
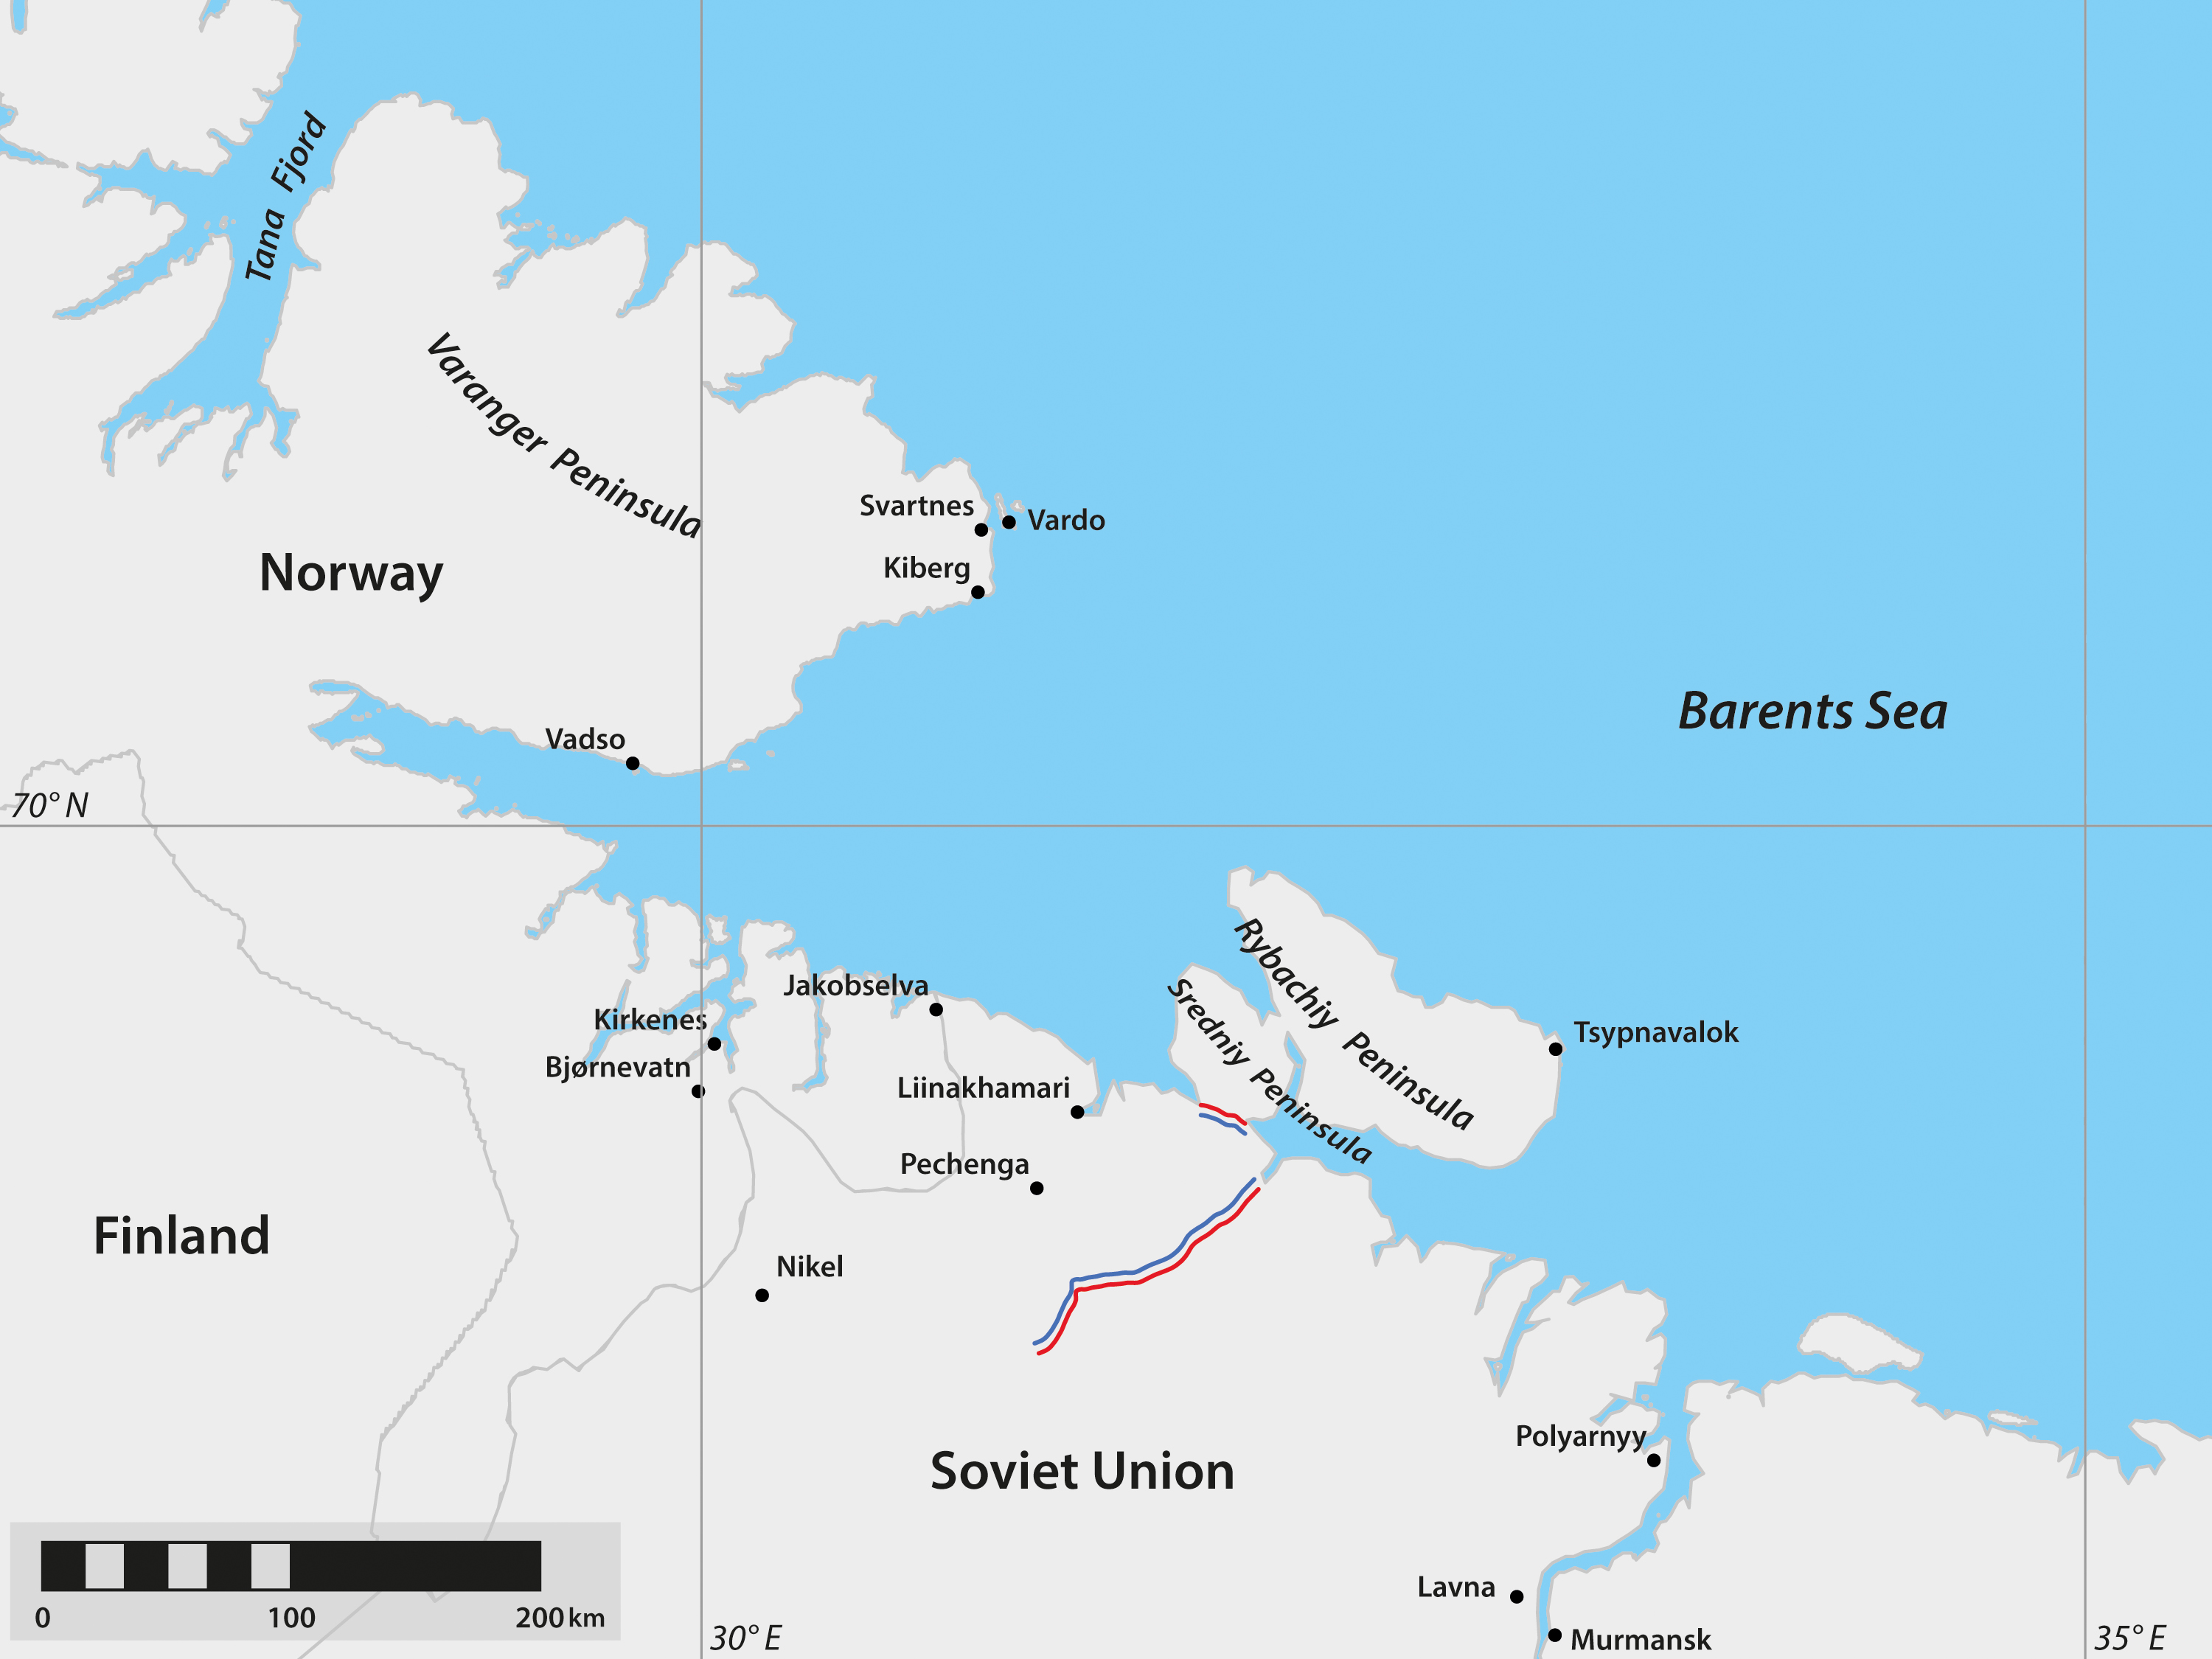
Figure 0.1. Map showing areas of conflict described in this book
...
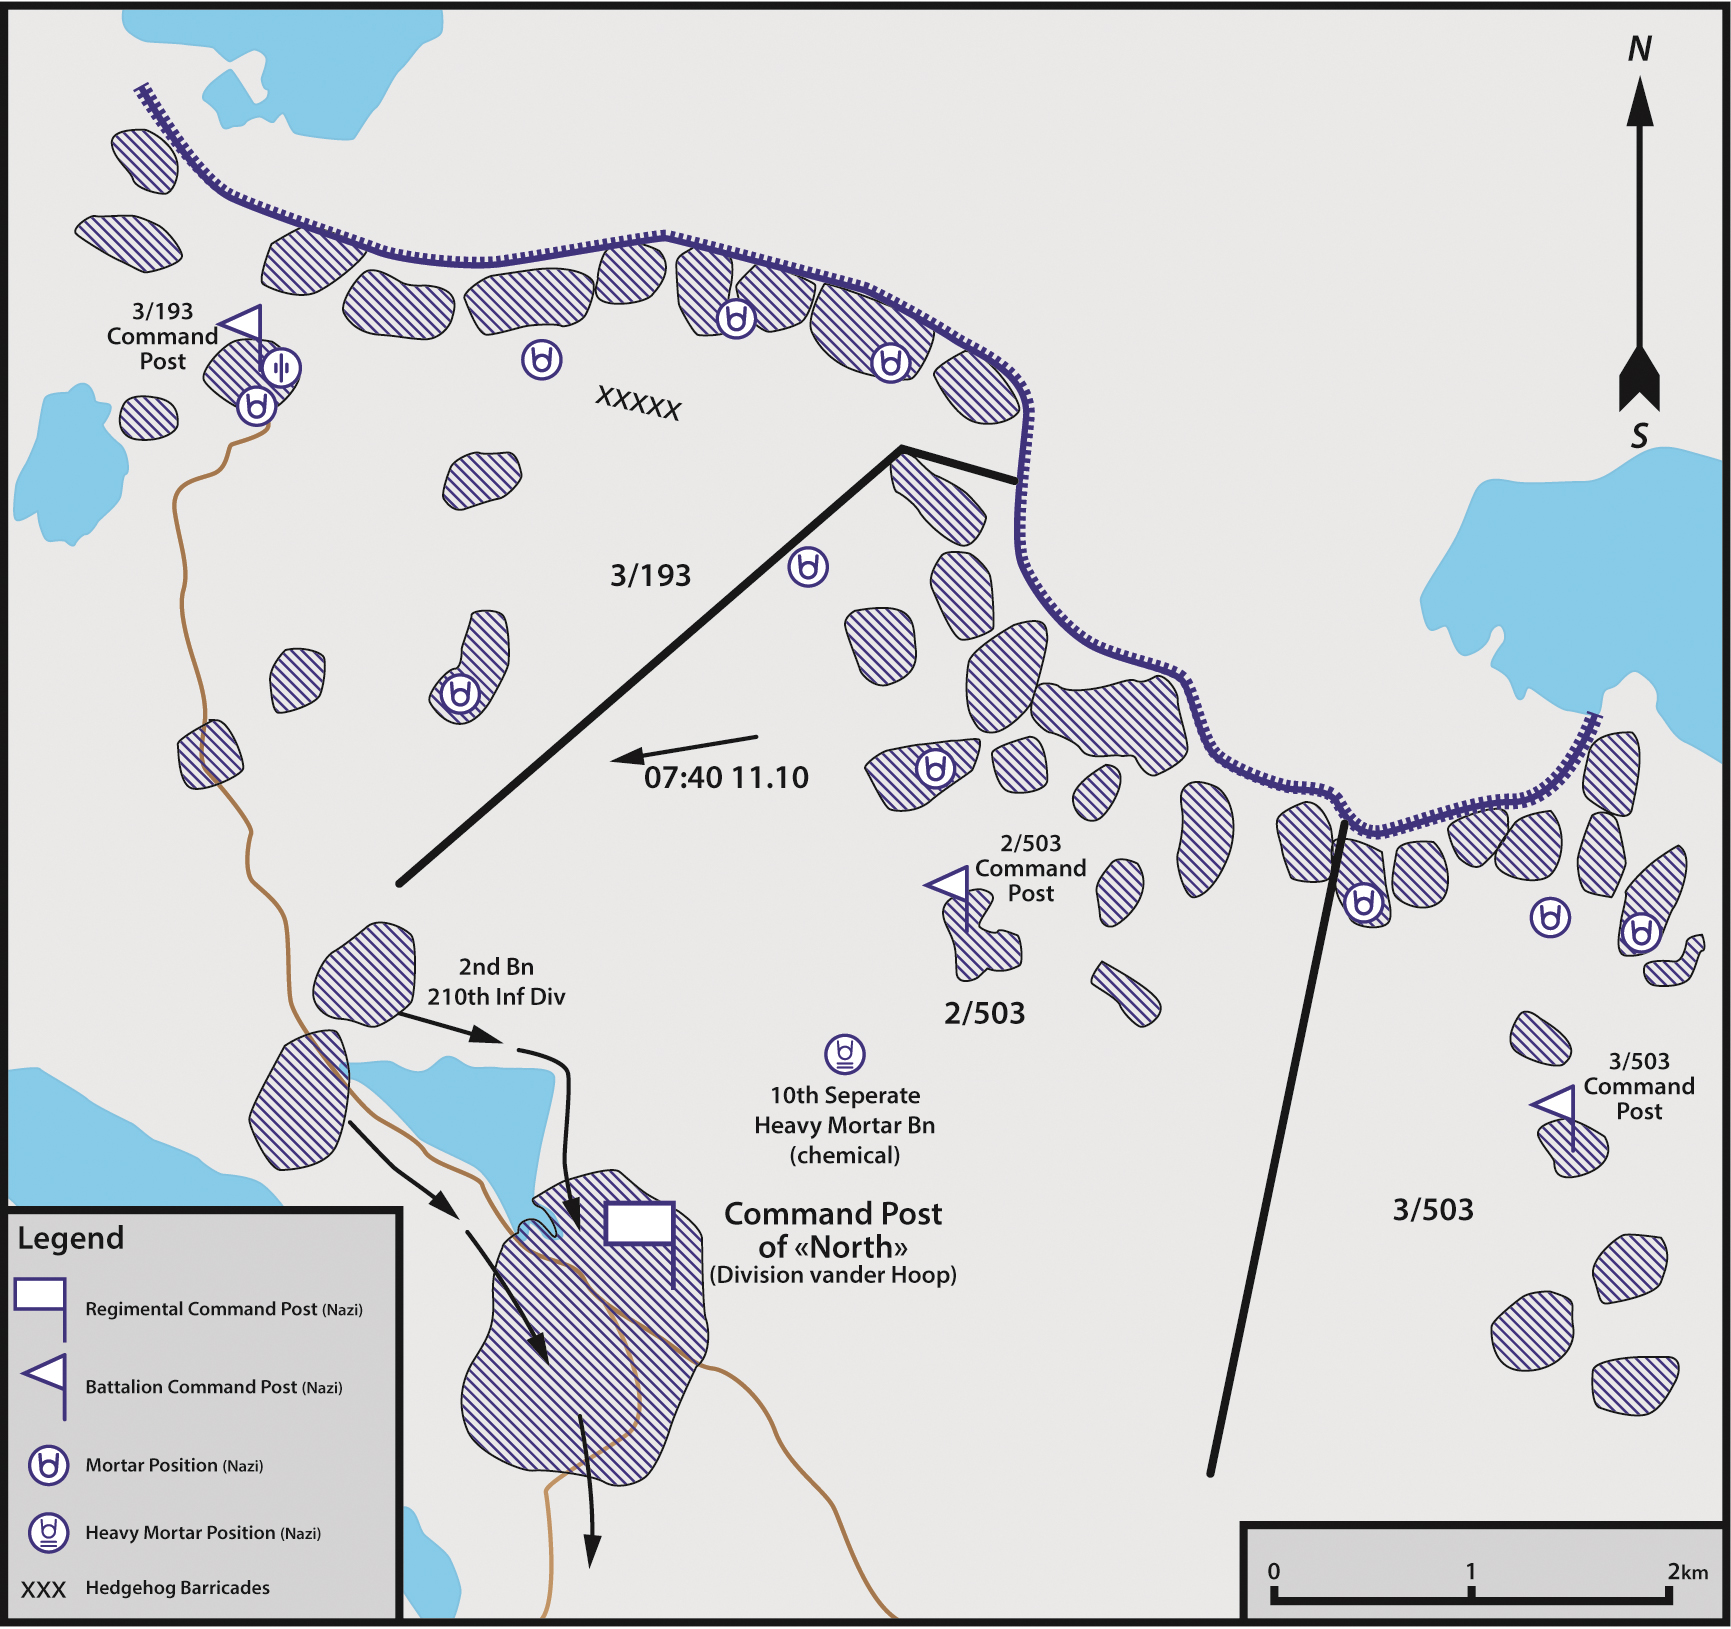
Figure 1.1. Disposition of Enemy Defenses on the isthmus of the peninsula
 ...
...
Figure 1.2. Disposition of force and scheme of maneuver decided by the Northern Fleet commander
 ...
...
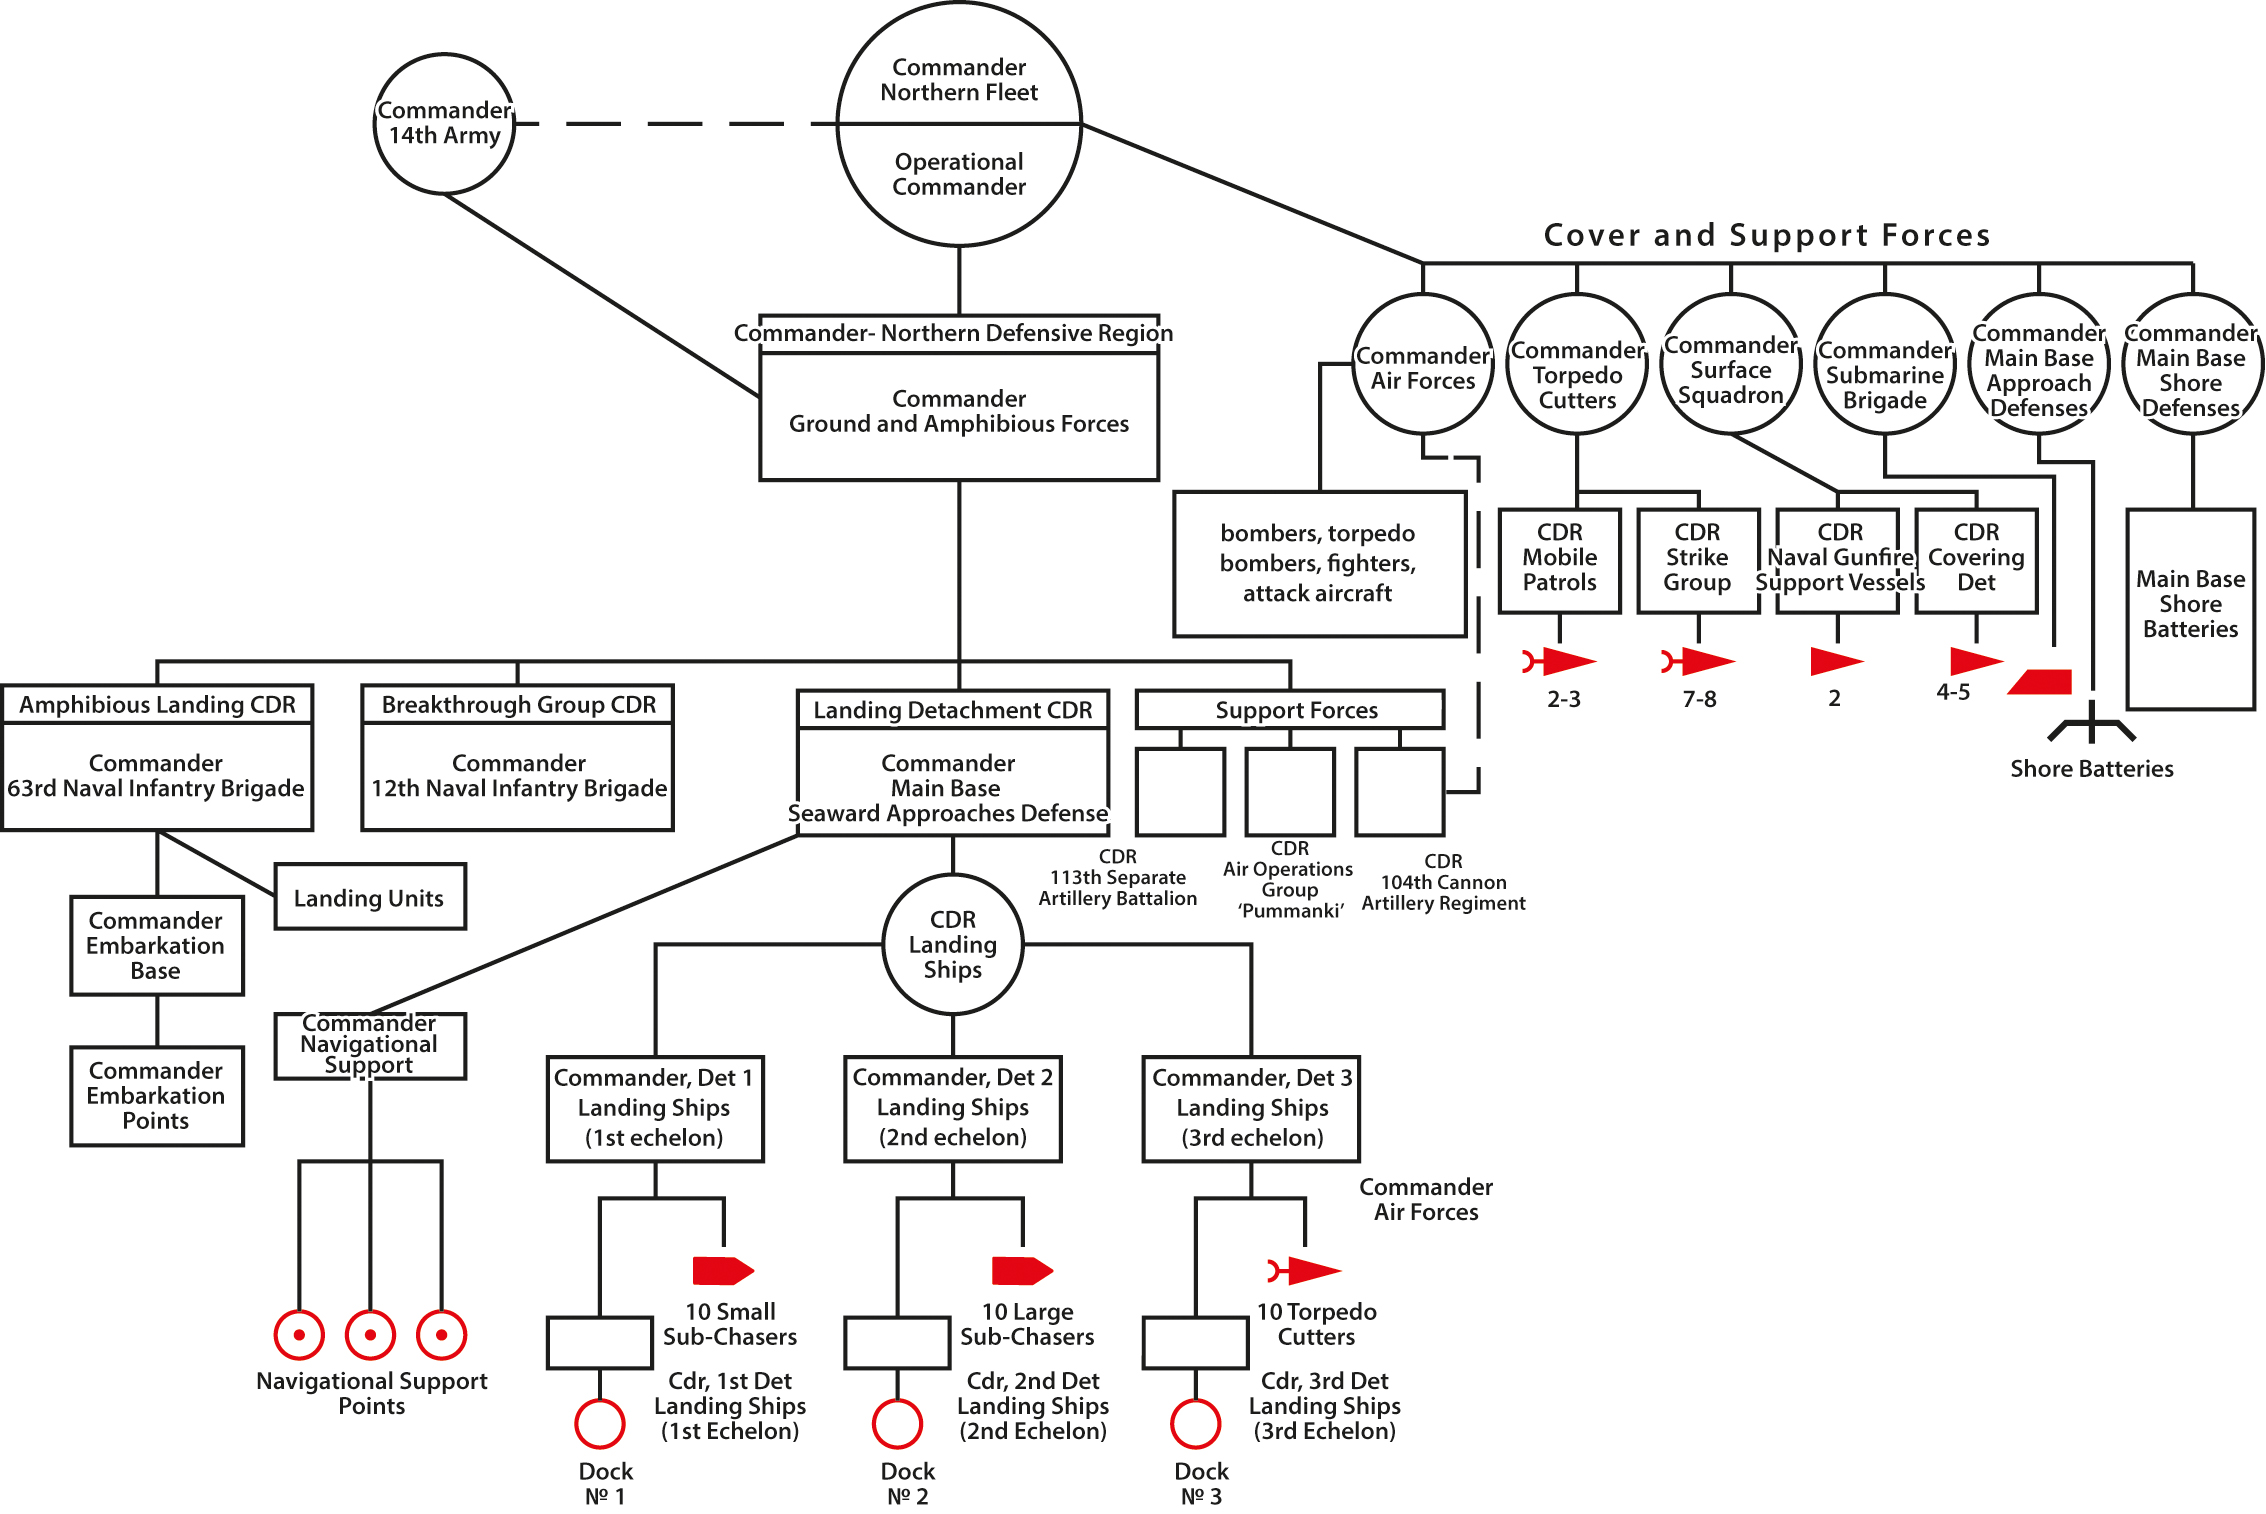
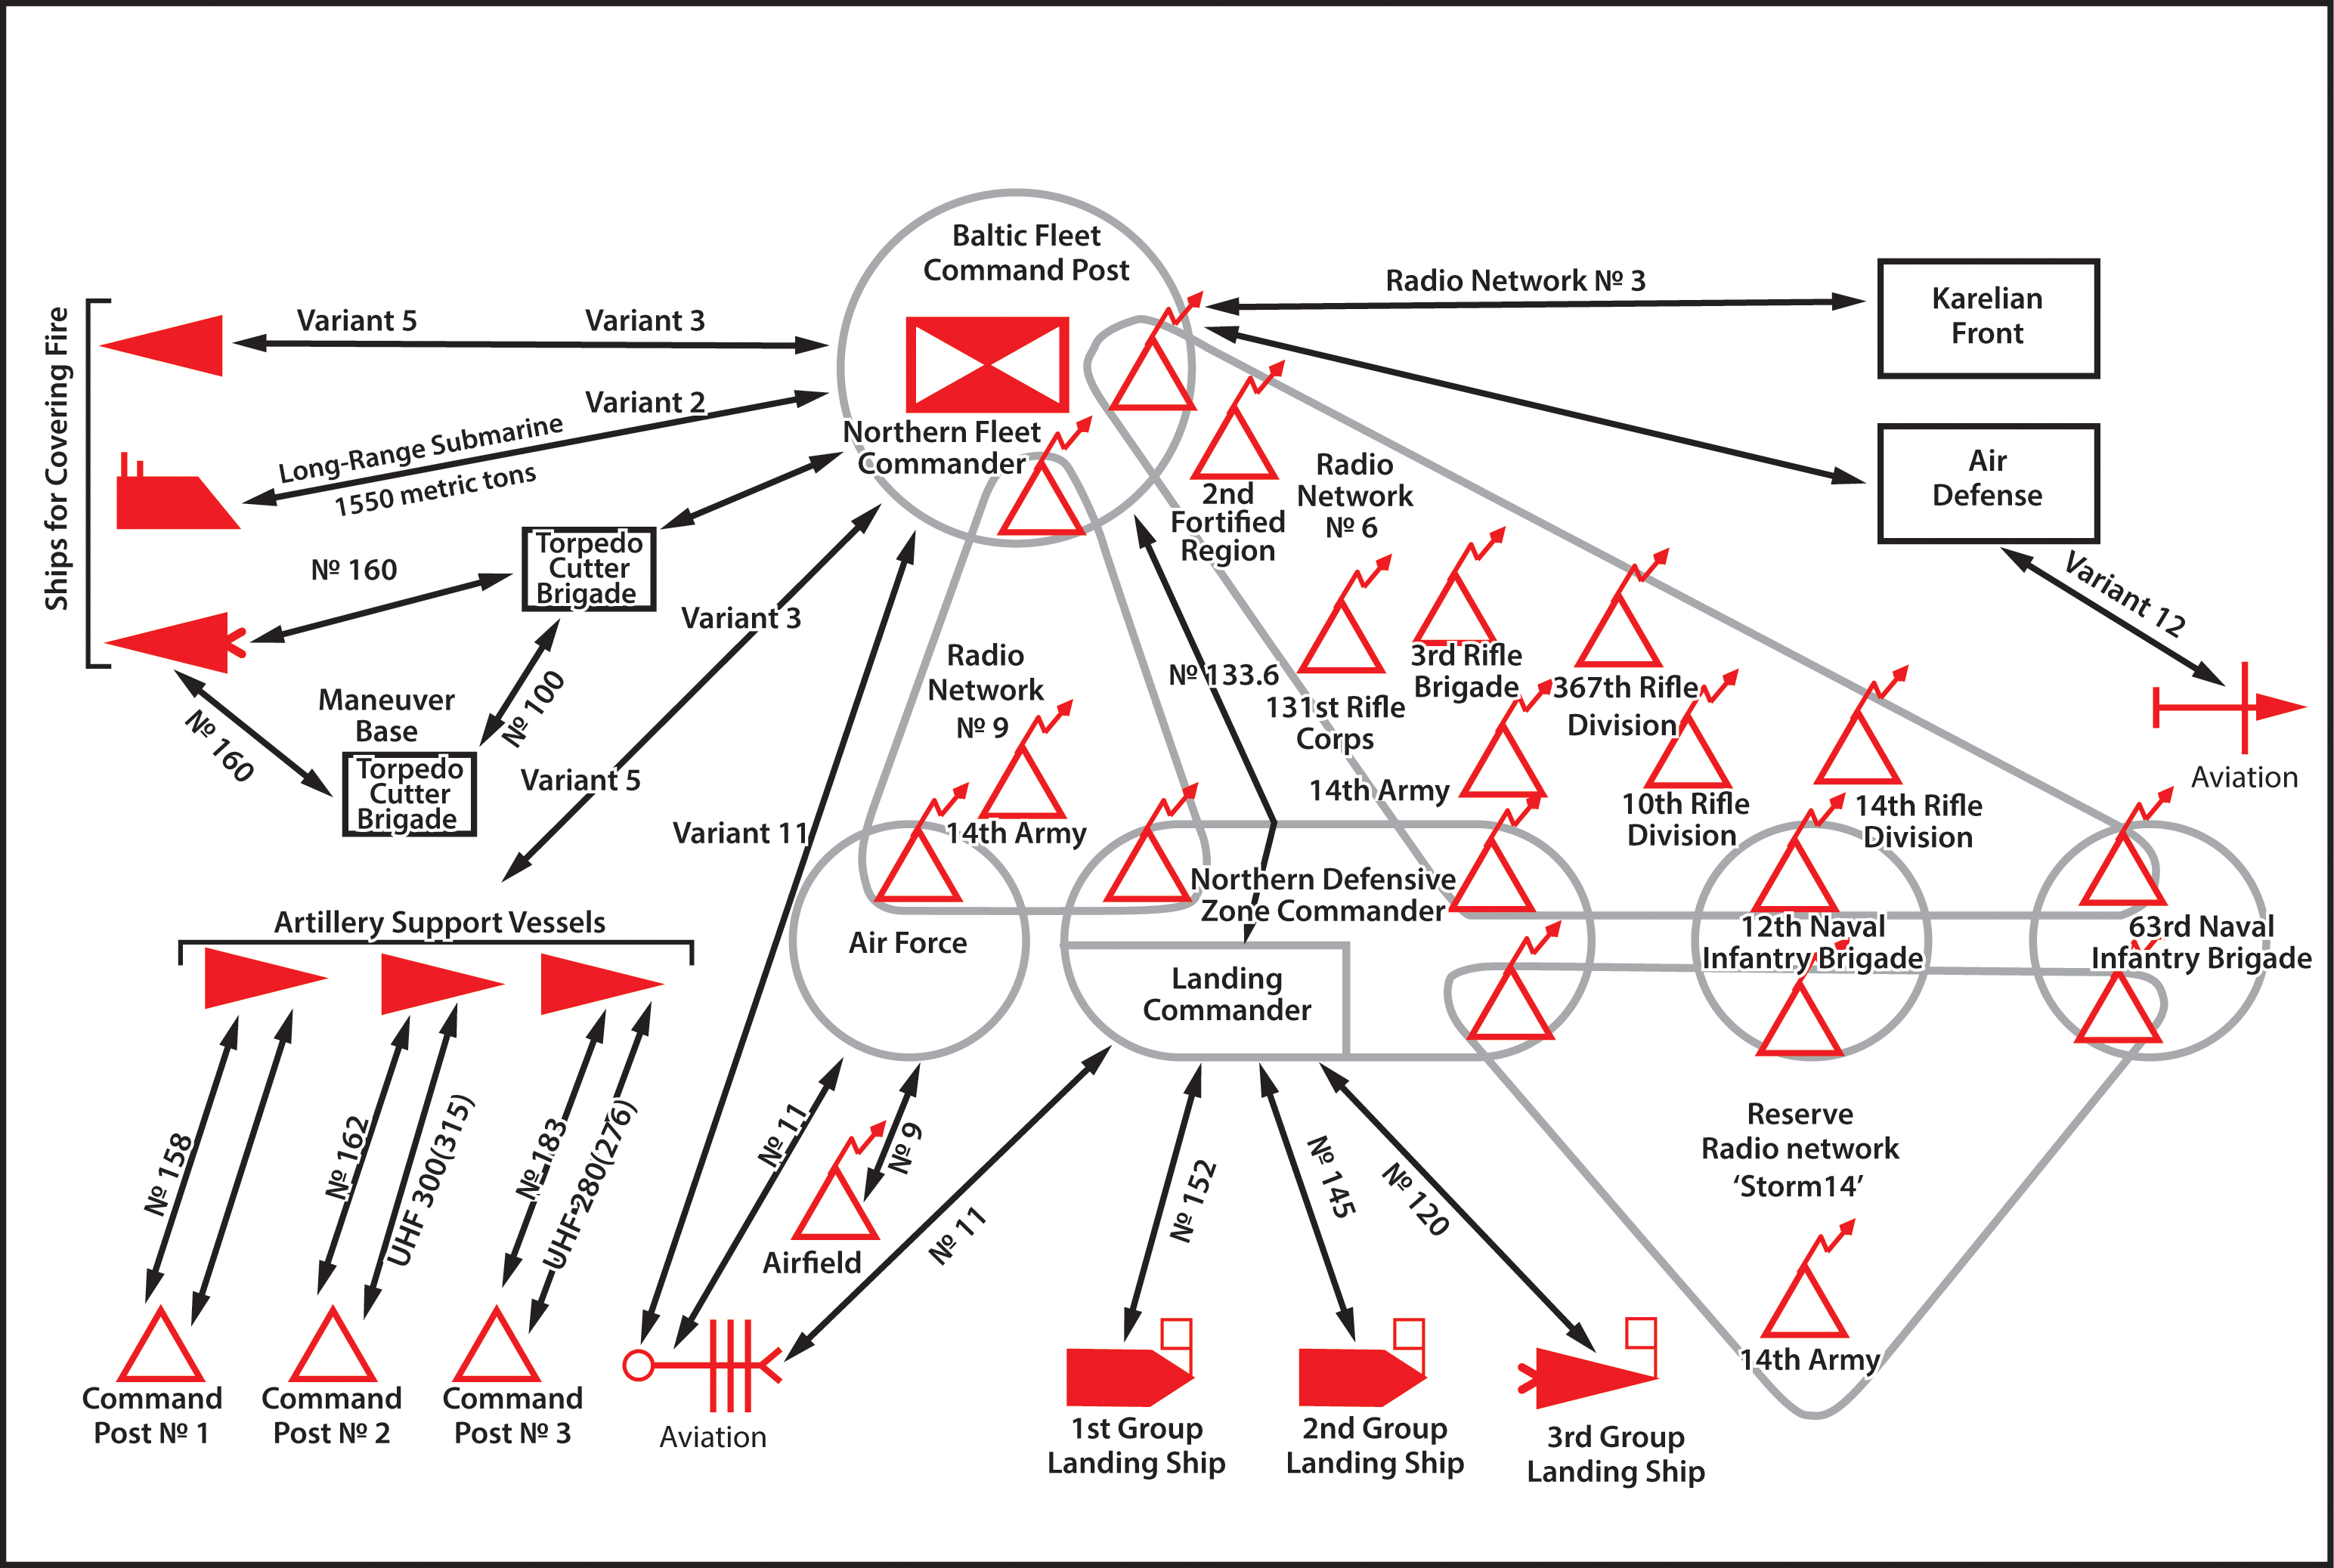
Figure 3.1. Organization of command and composition of forces
 ...
...
 ...
...
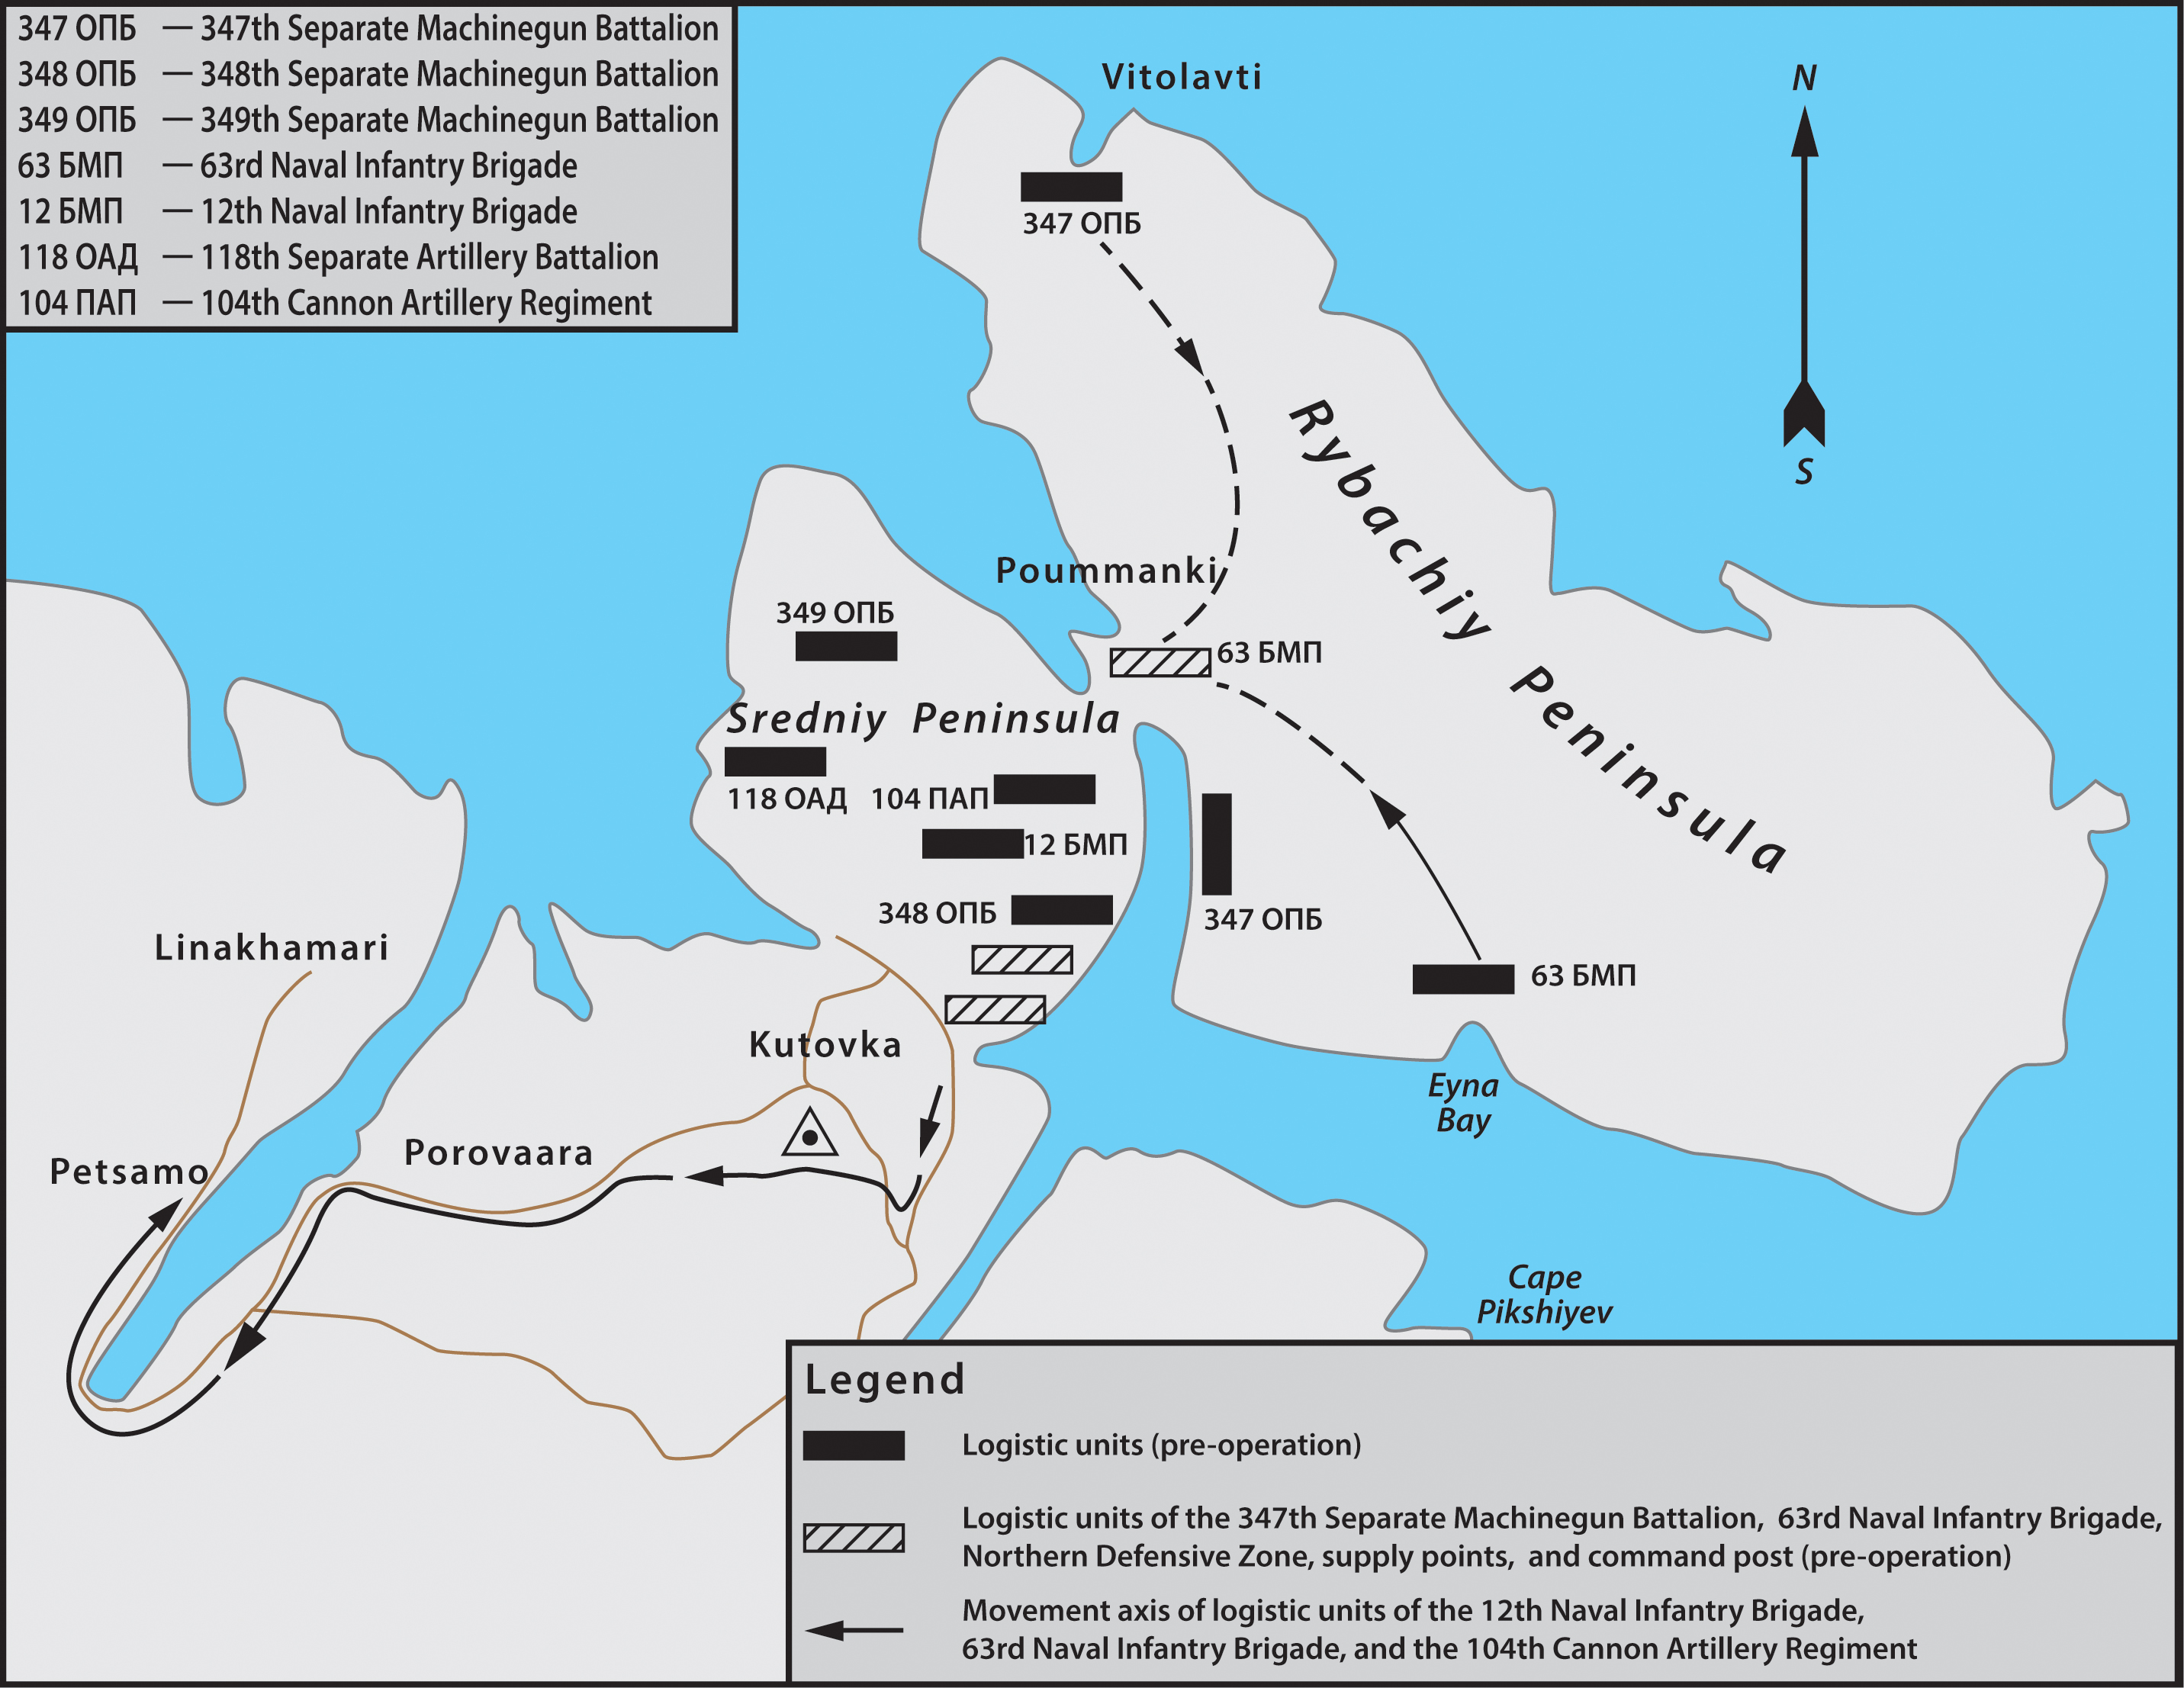
Figure 4.2. Location and movement of Northern Defensive Region logistic facilities
 ...
...
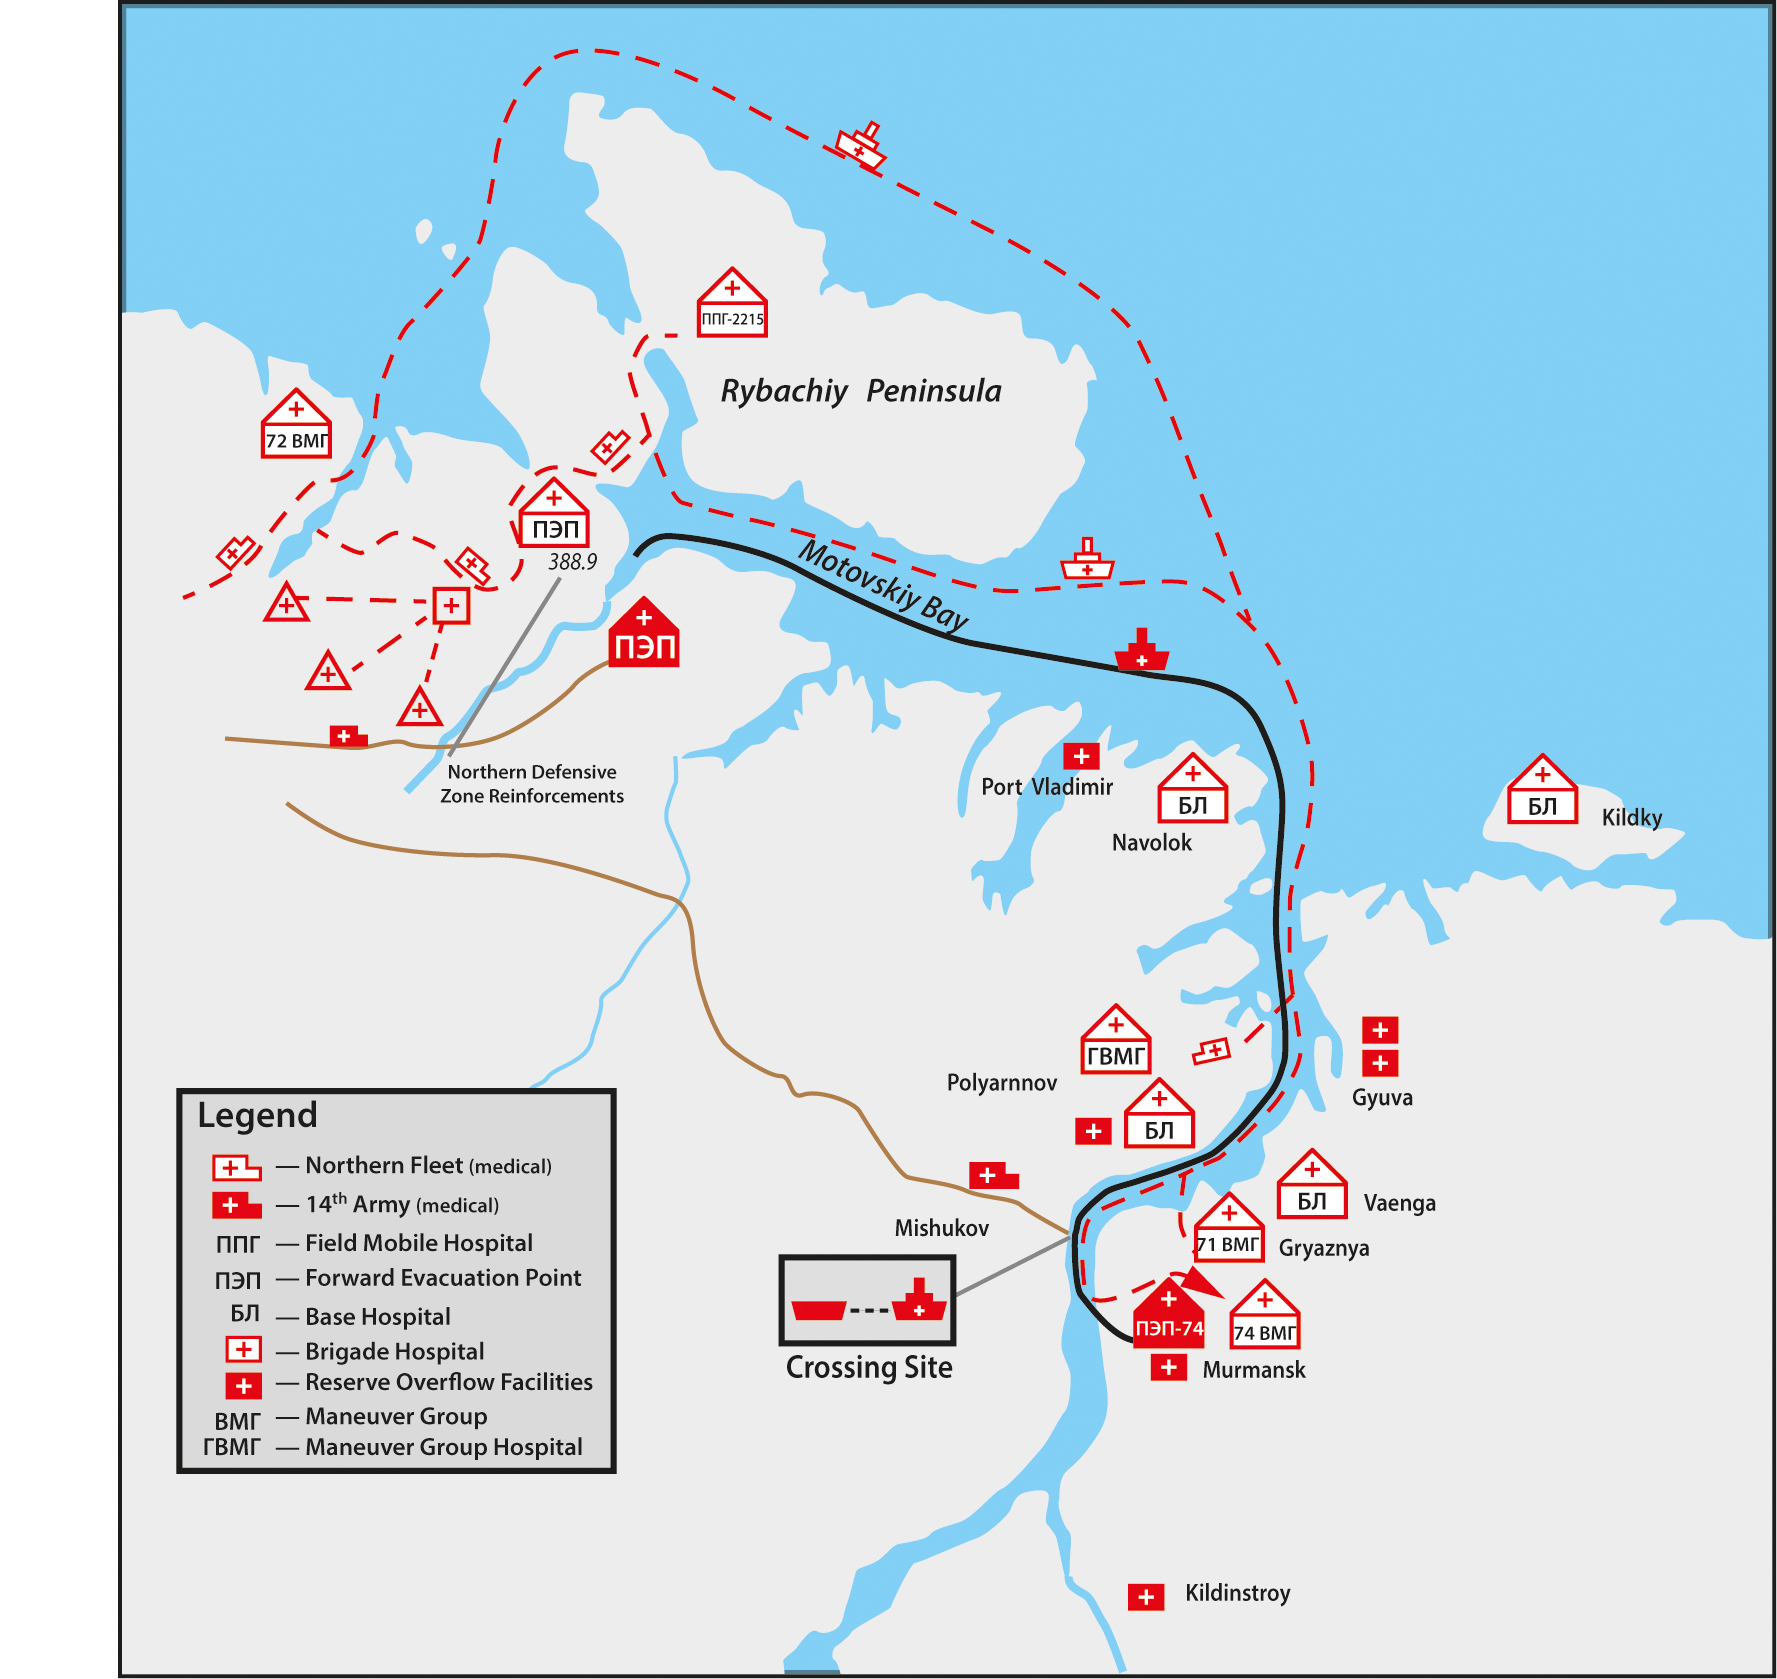
Figure 4.3. Location of medical treatment facilities
 ...
...
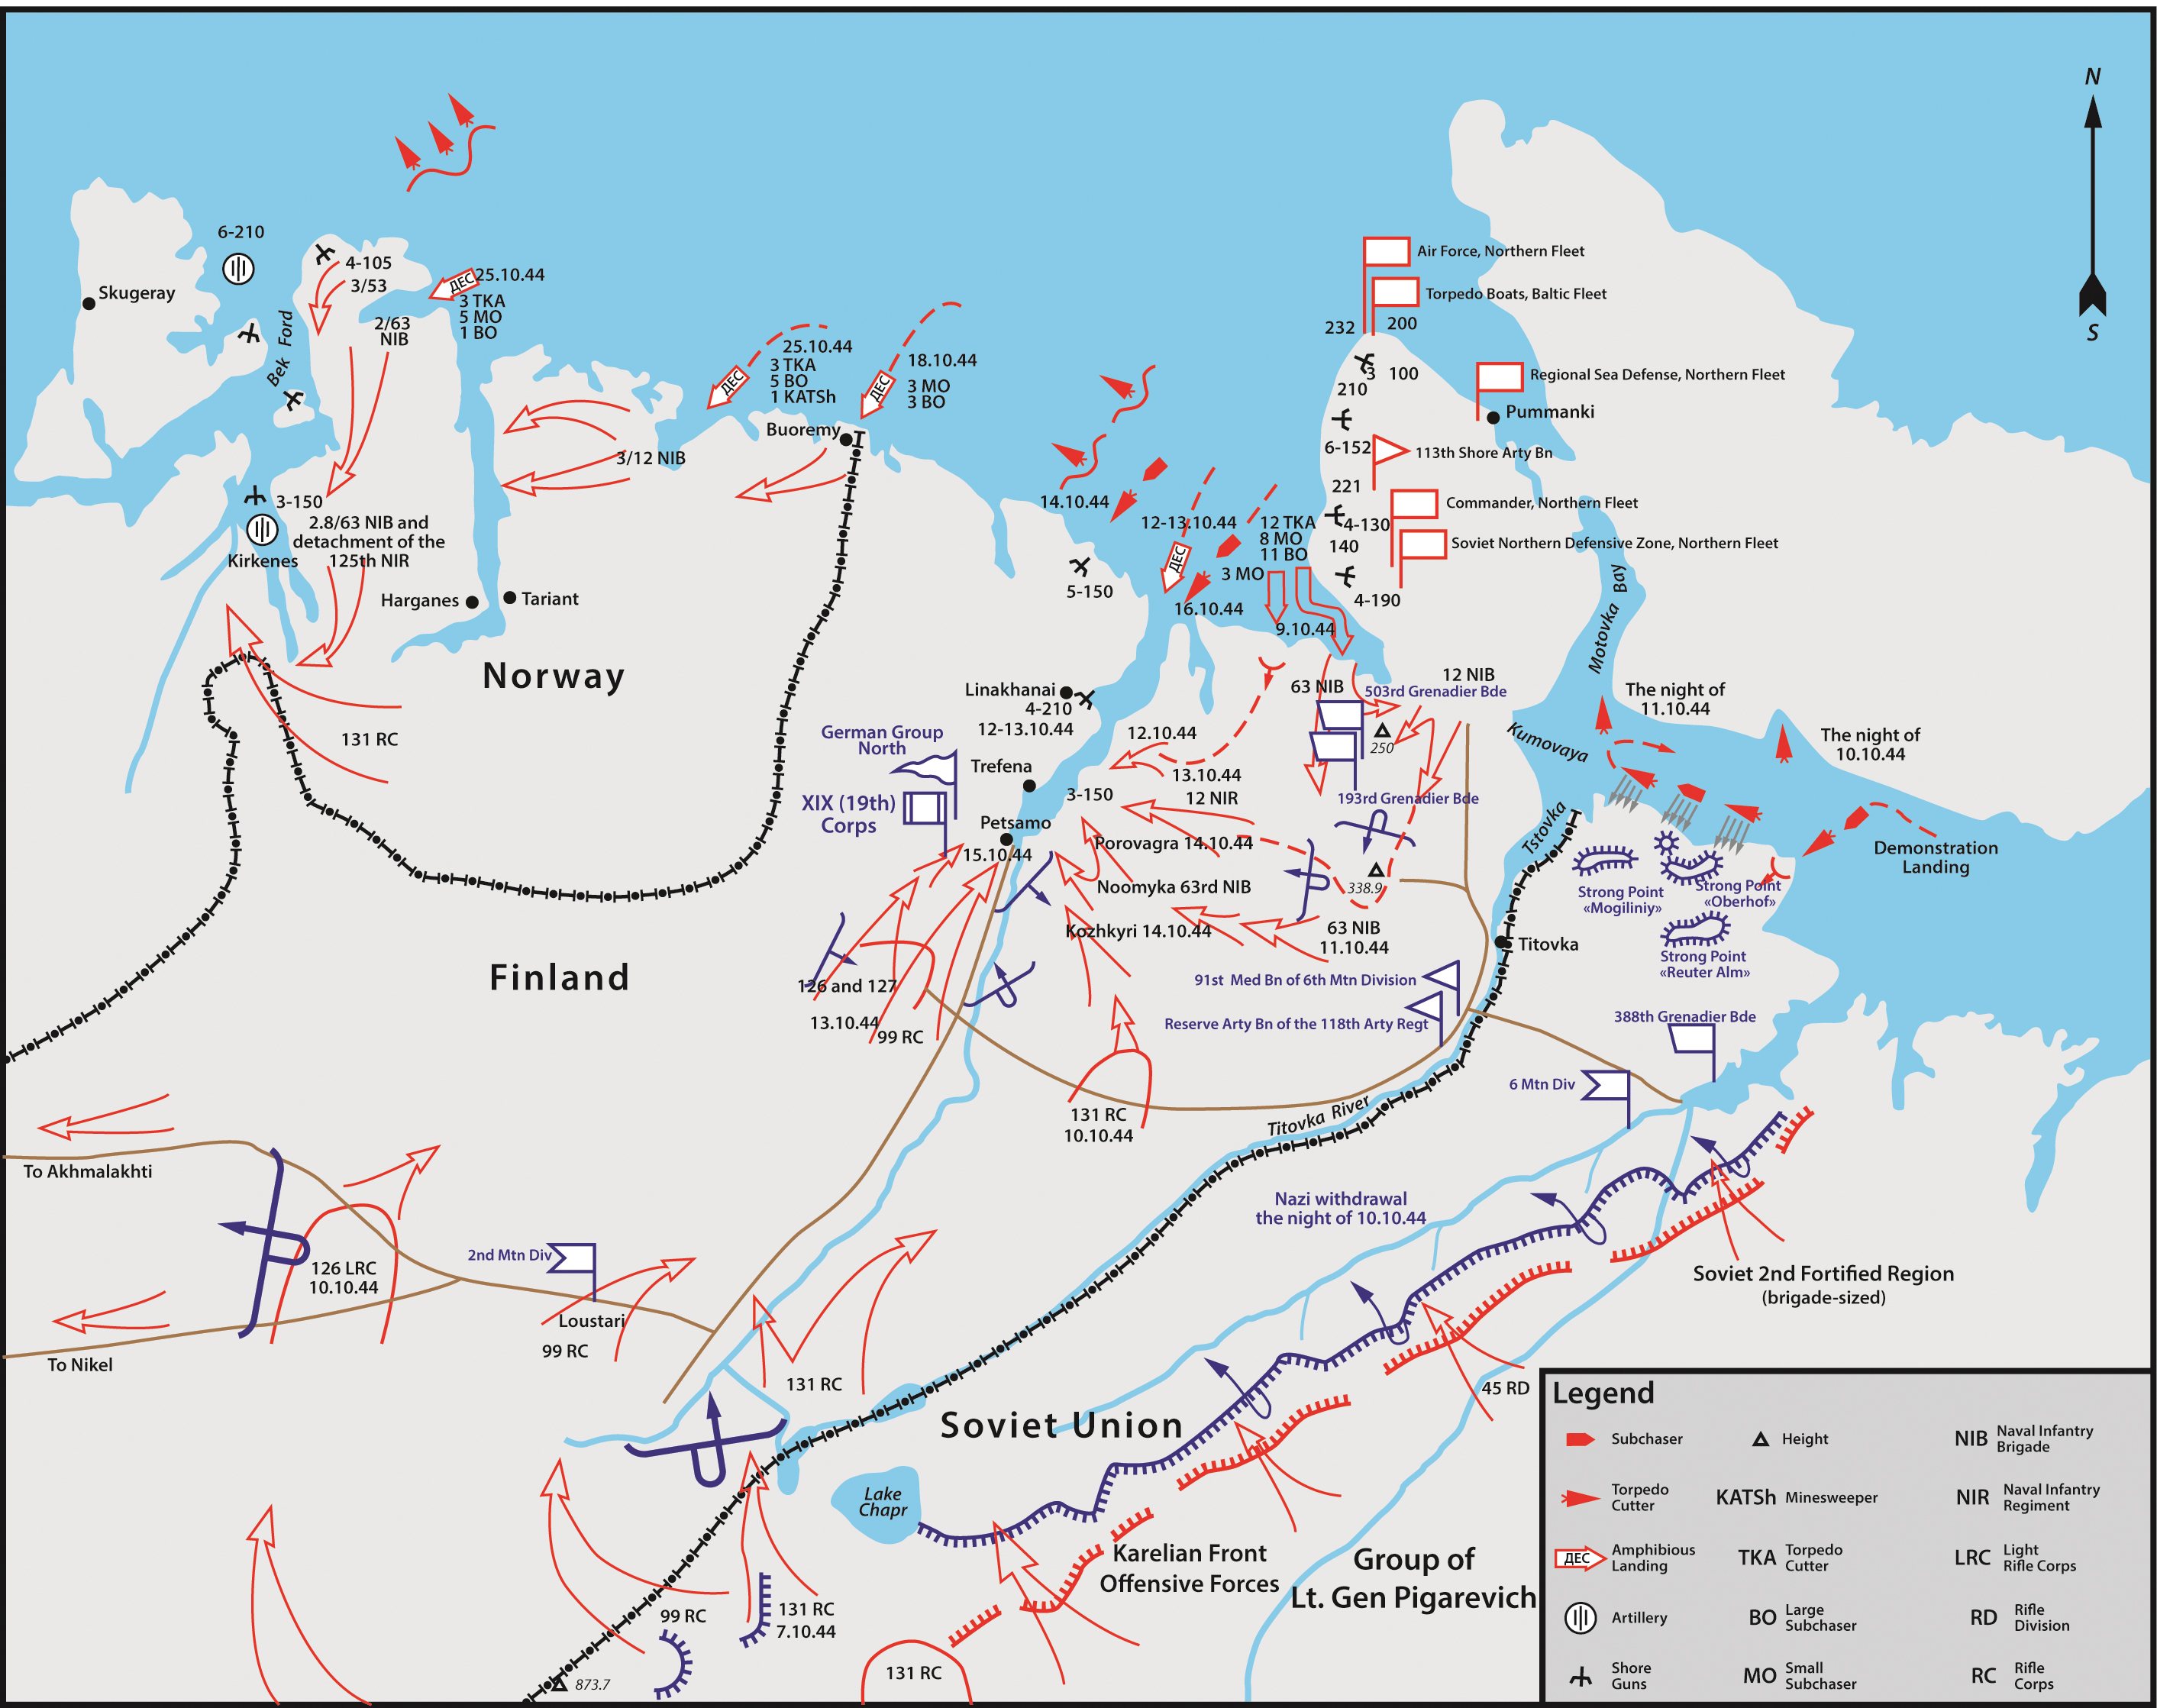
Figure 4.4. Plan of advance of the Forces of the Karelian Front
 ...
...
 ...
...
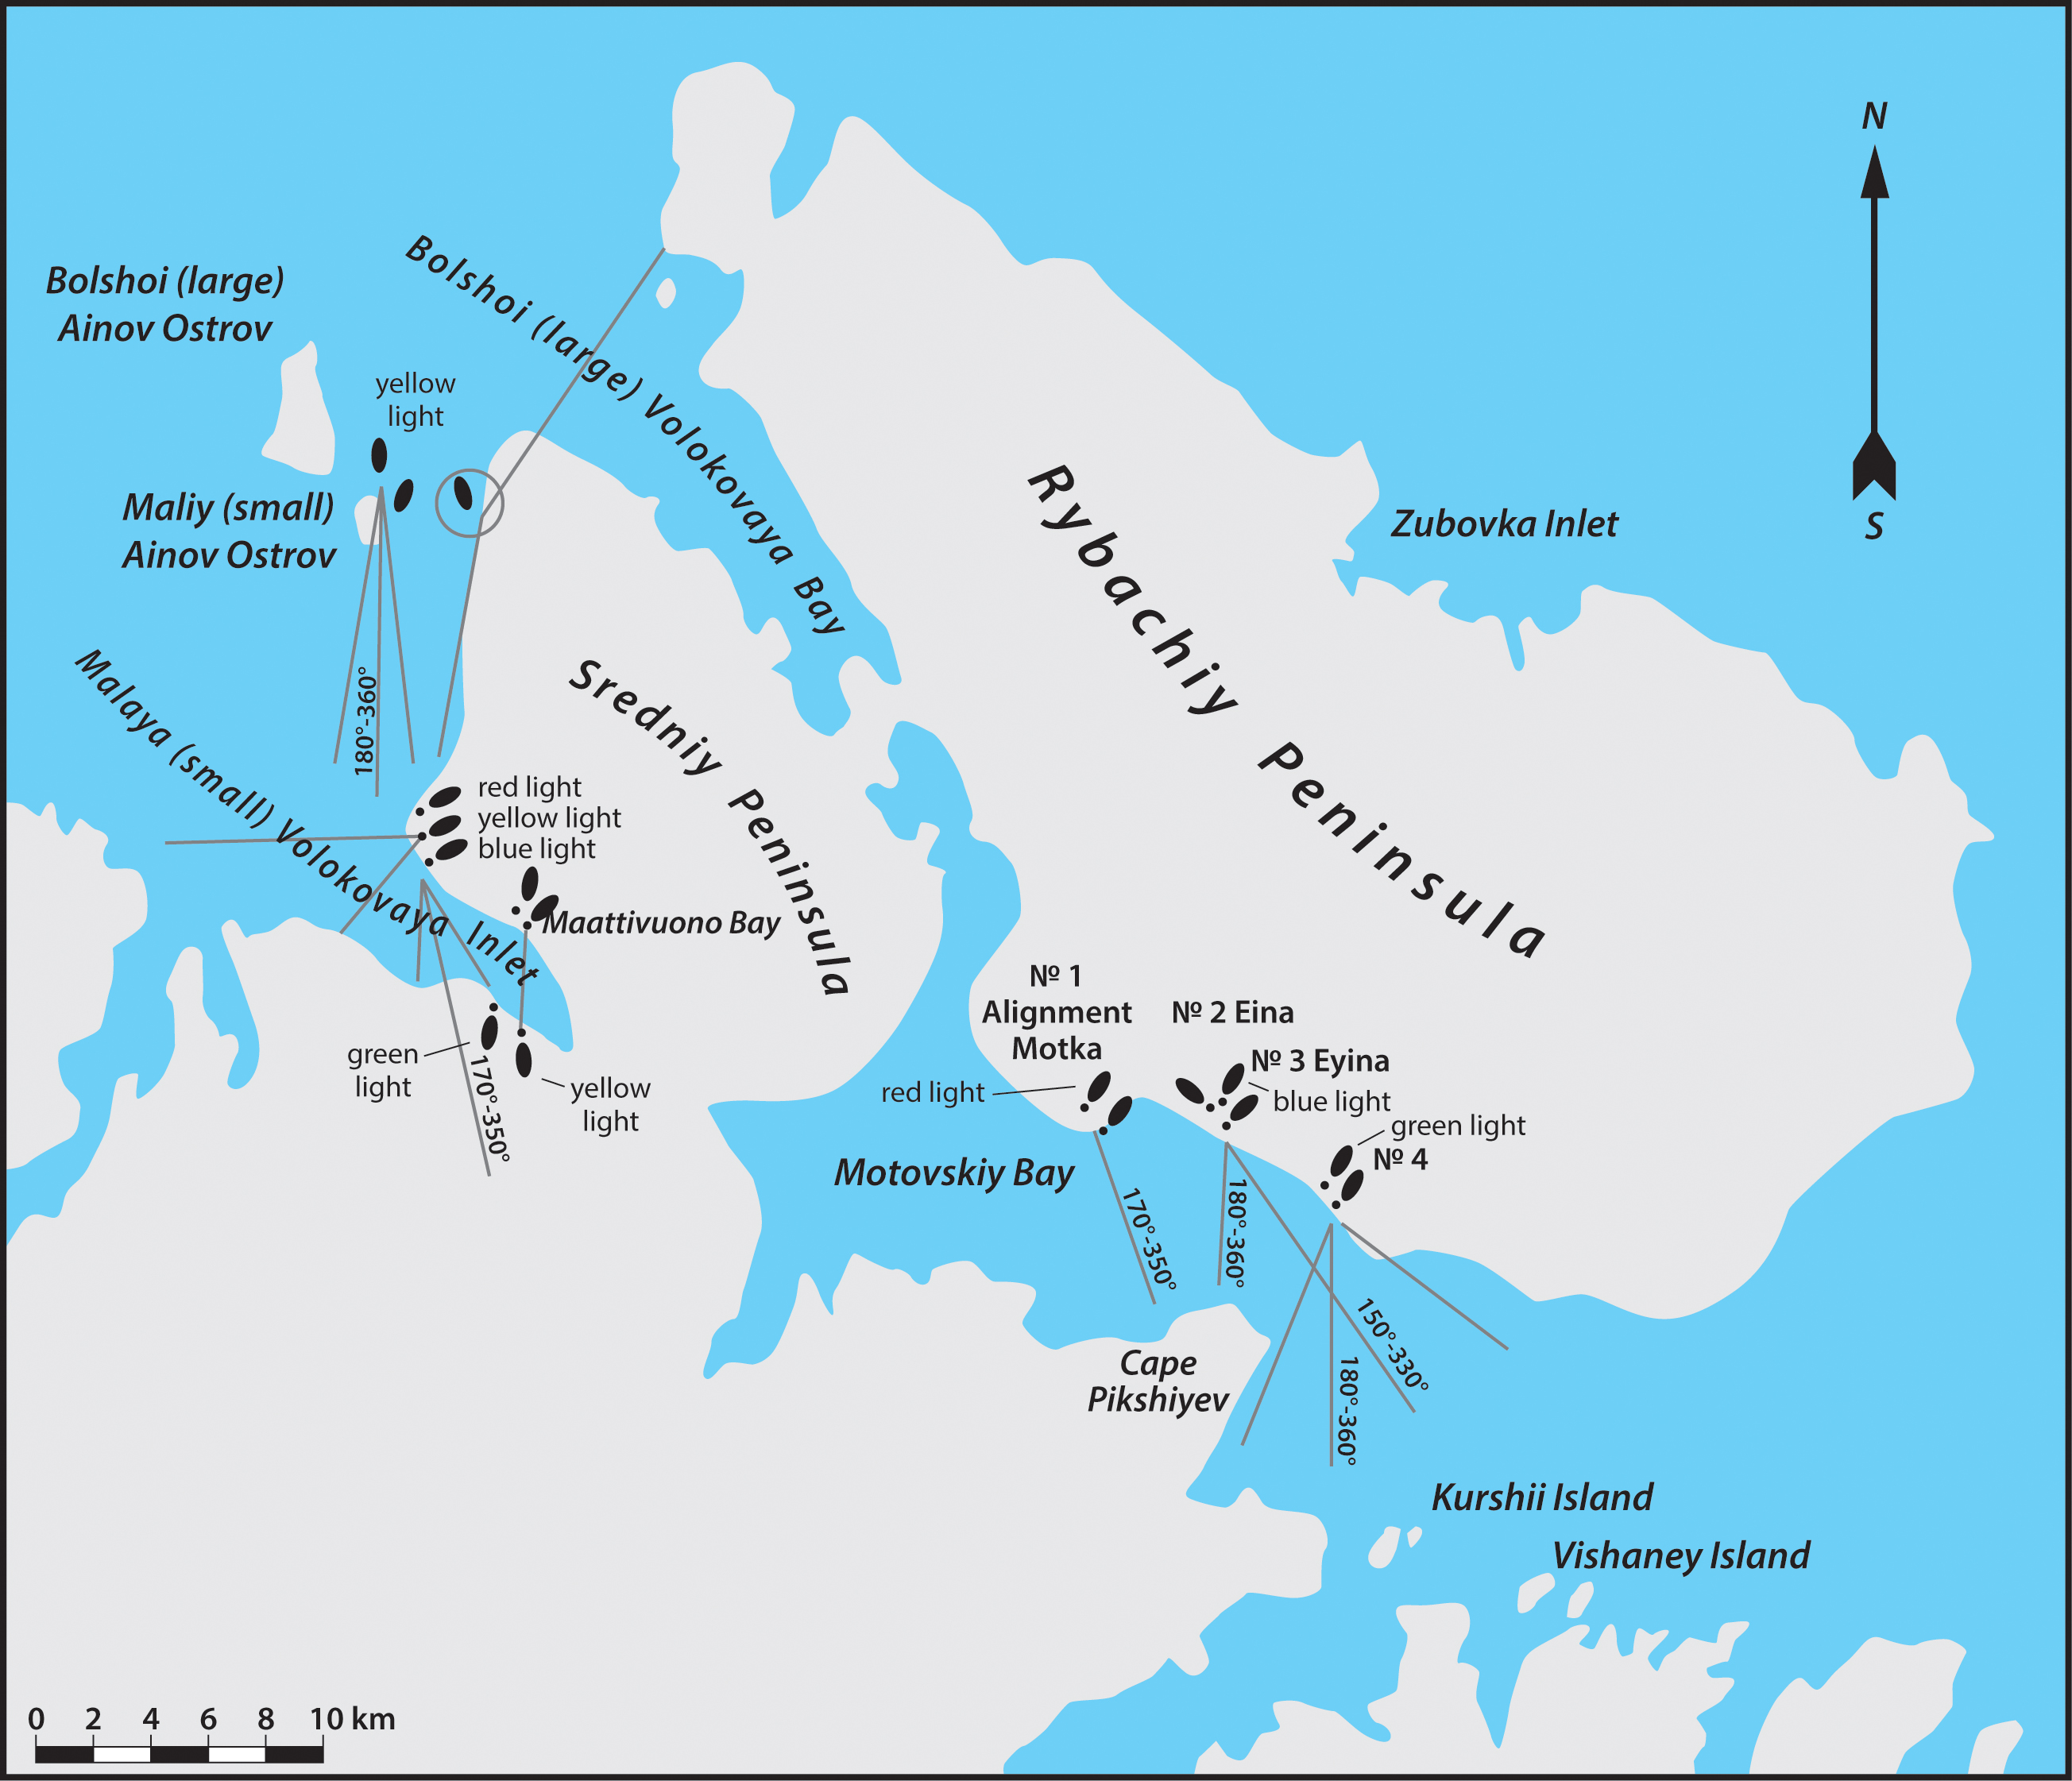
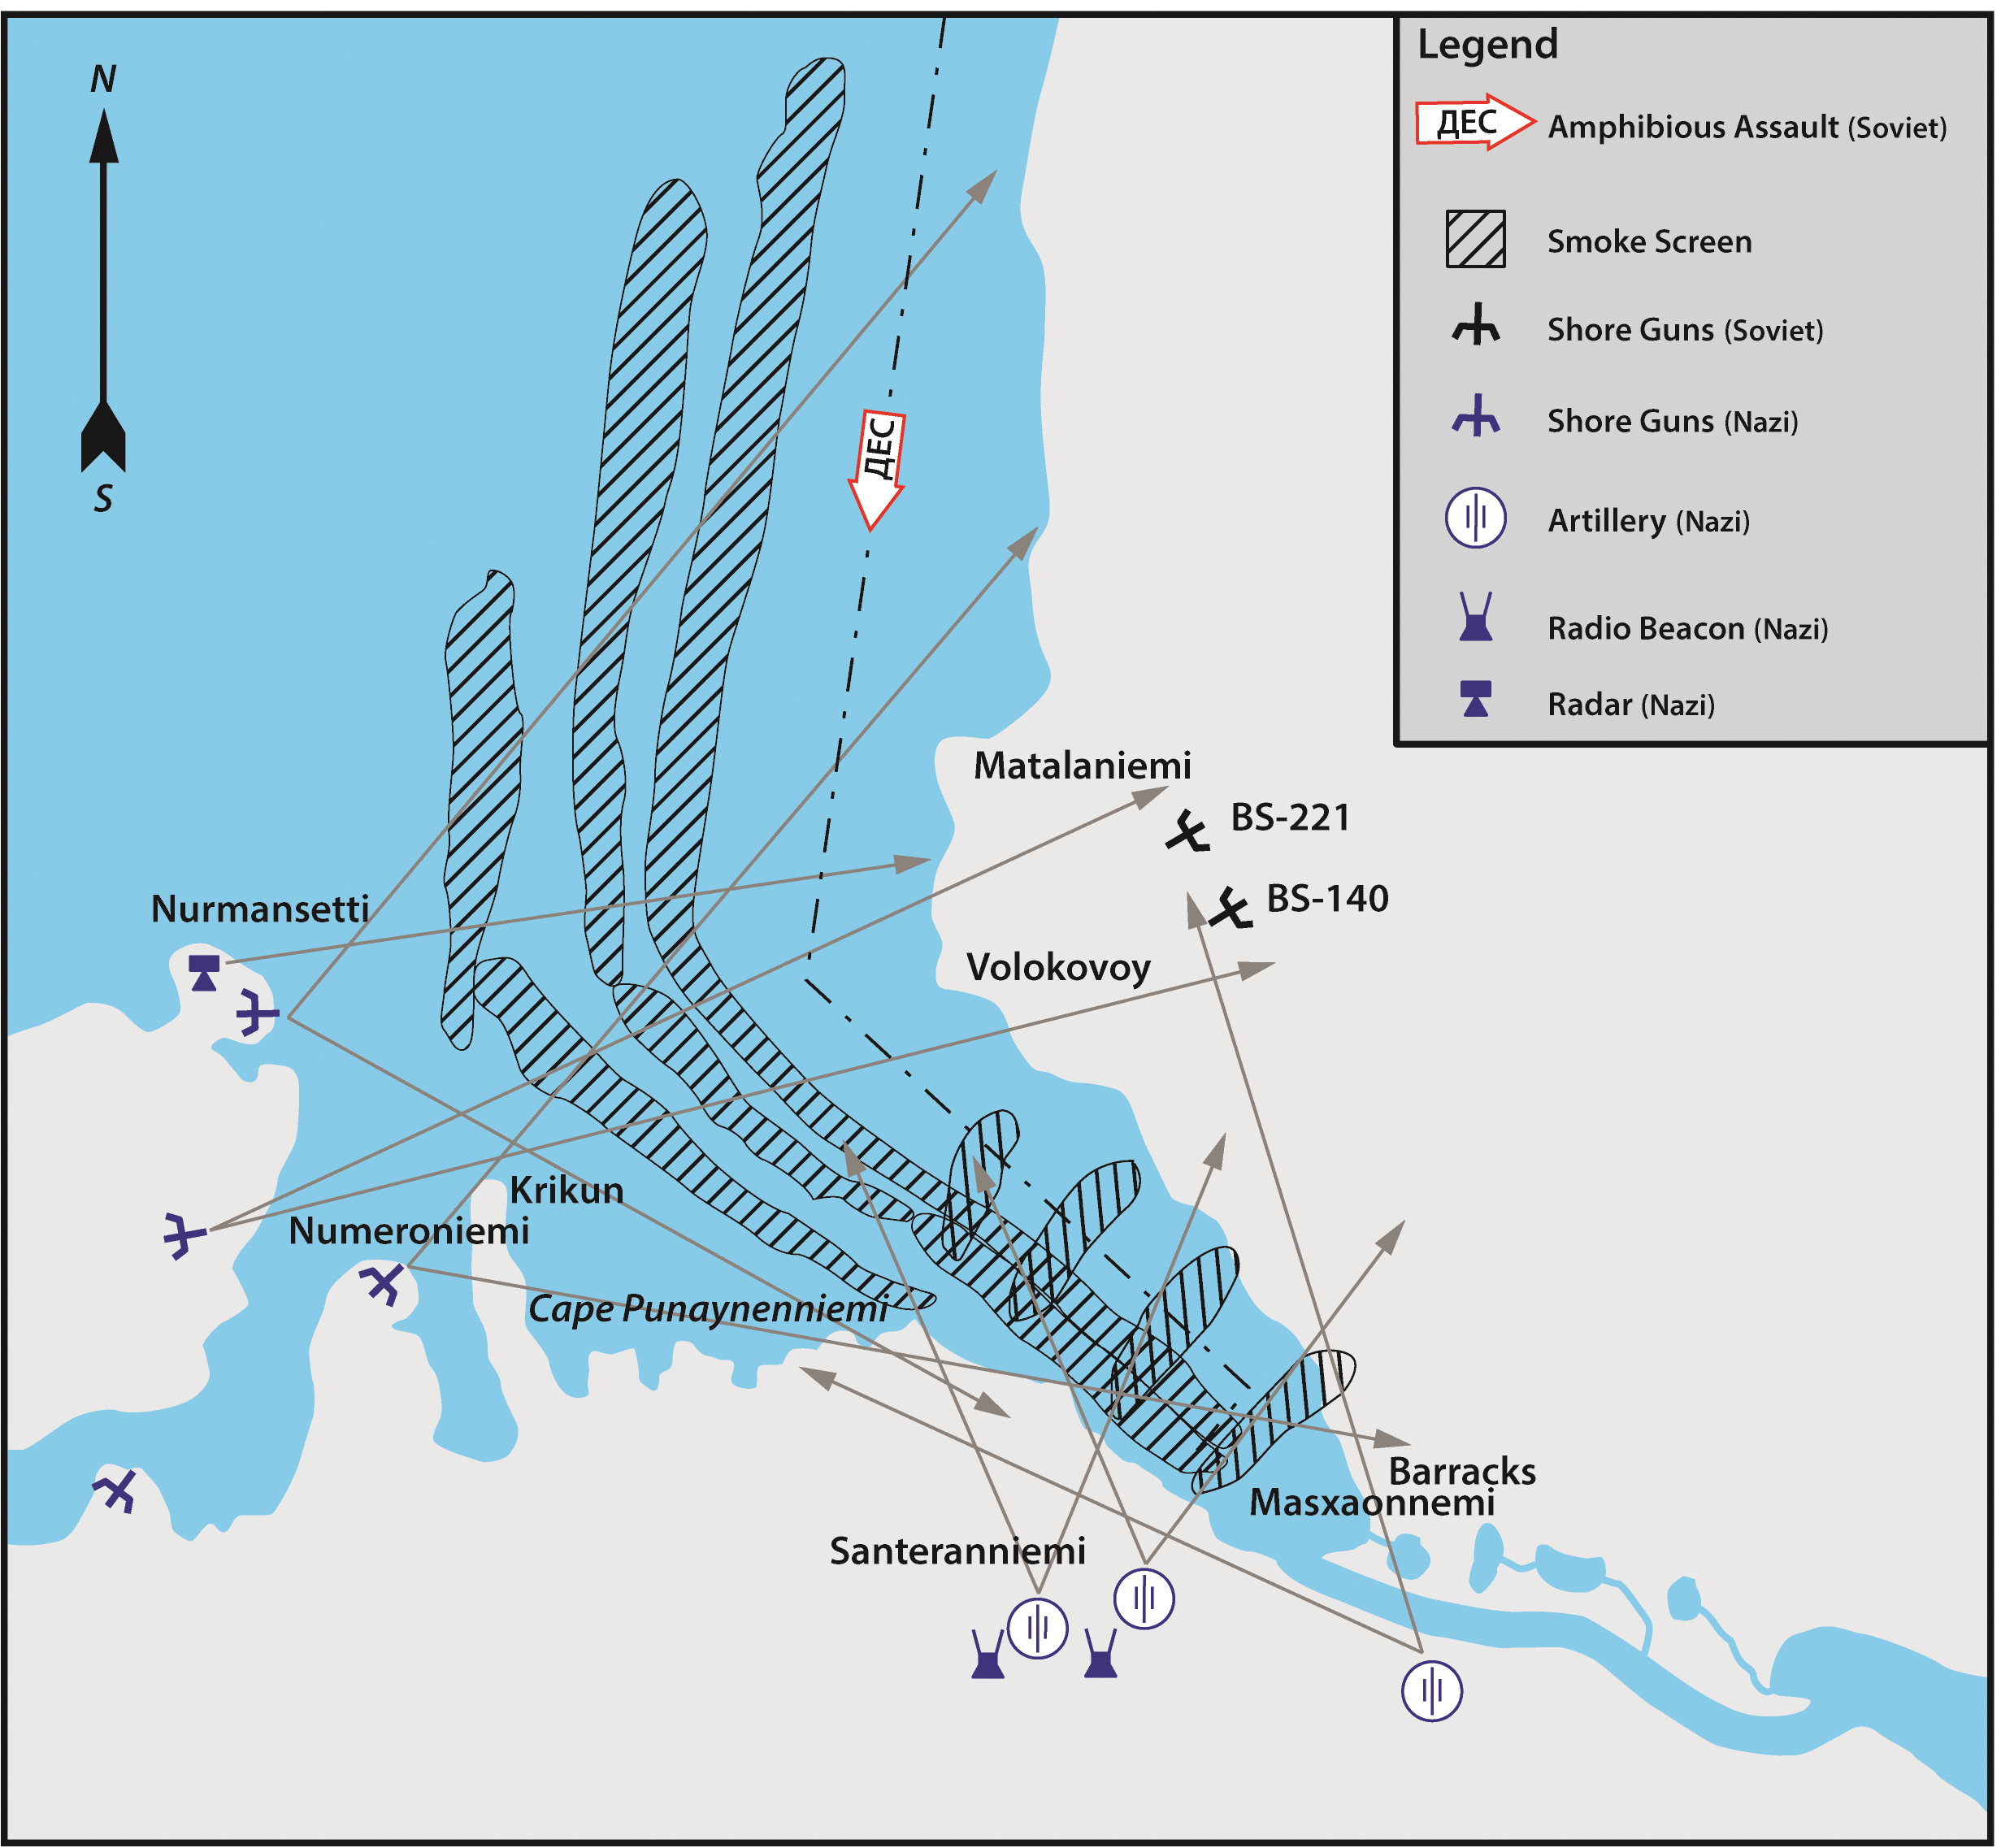
Figure 5.2. Smoke screens laid down by cutters during the amphibious landing on Maattivuono coastline
 ...
...
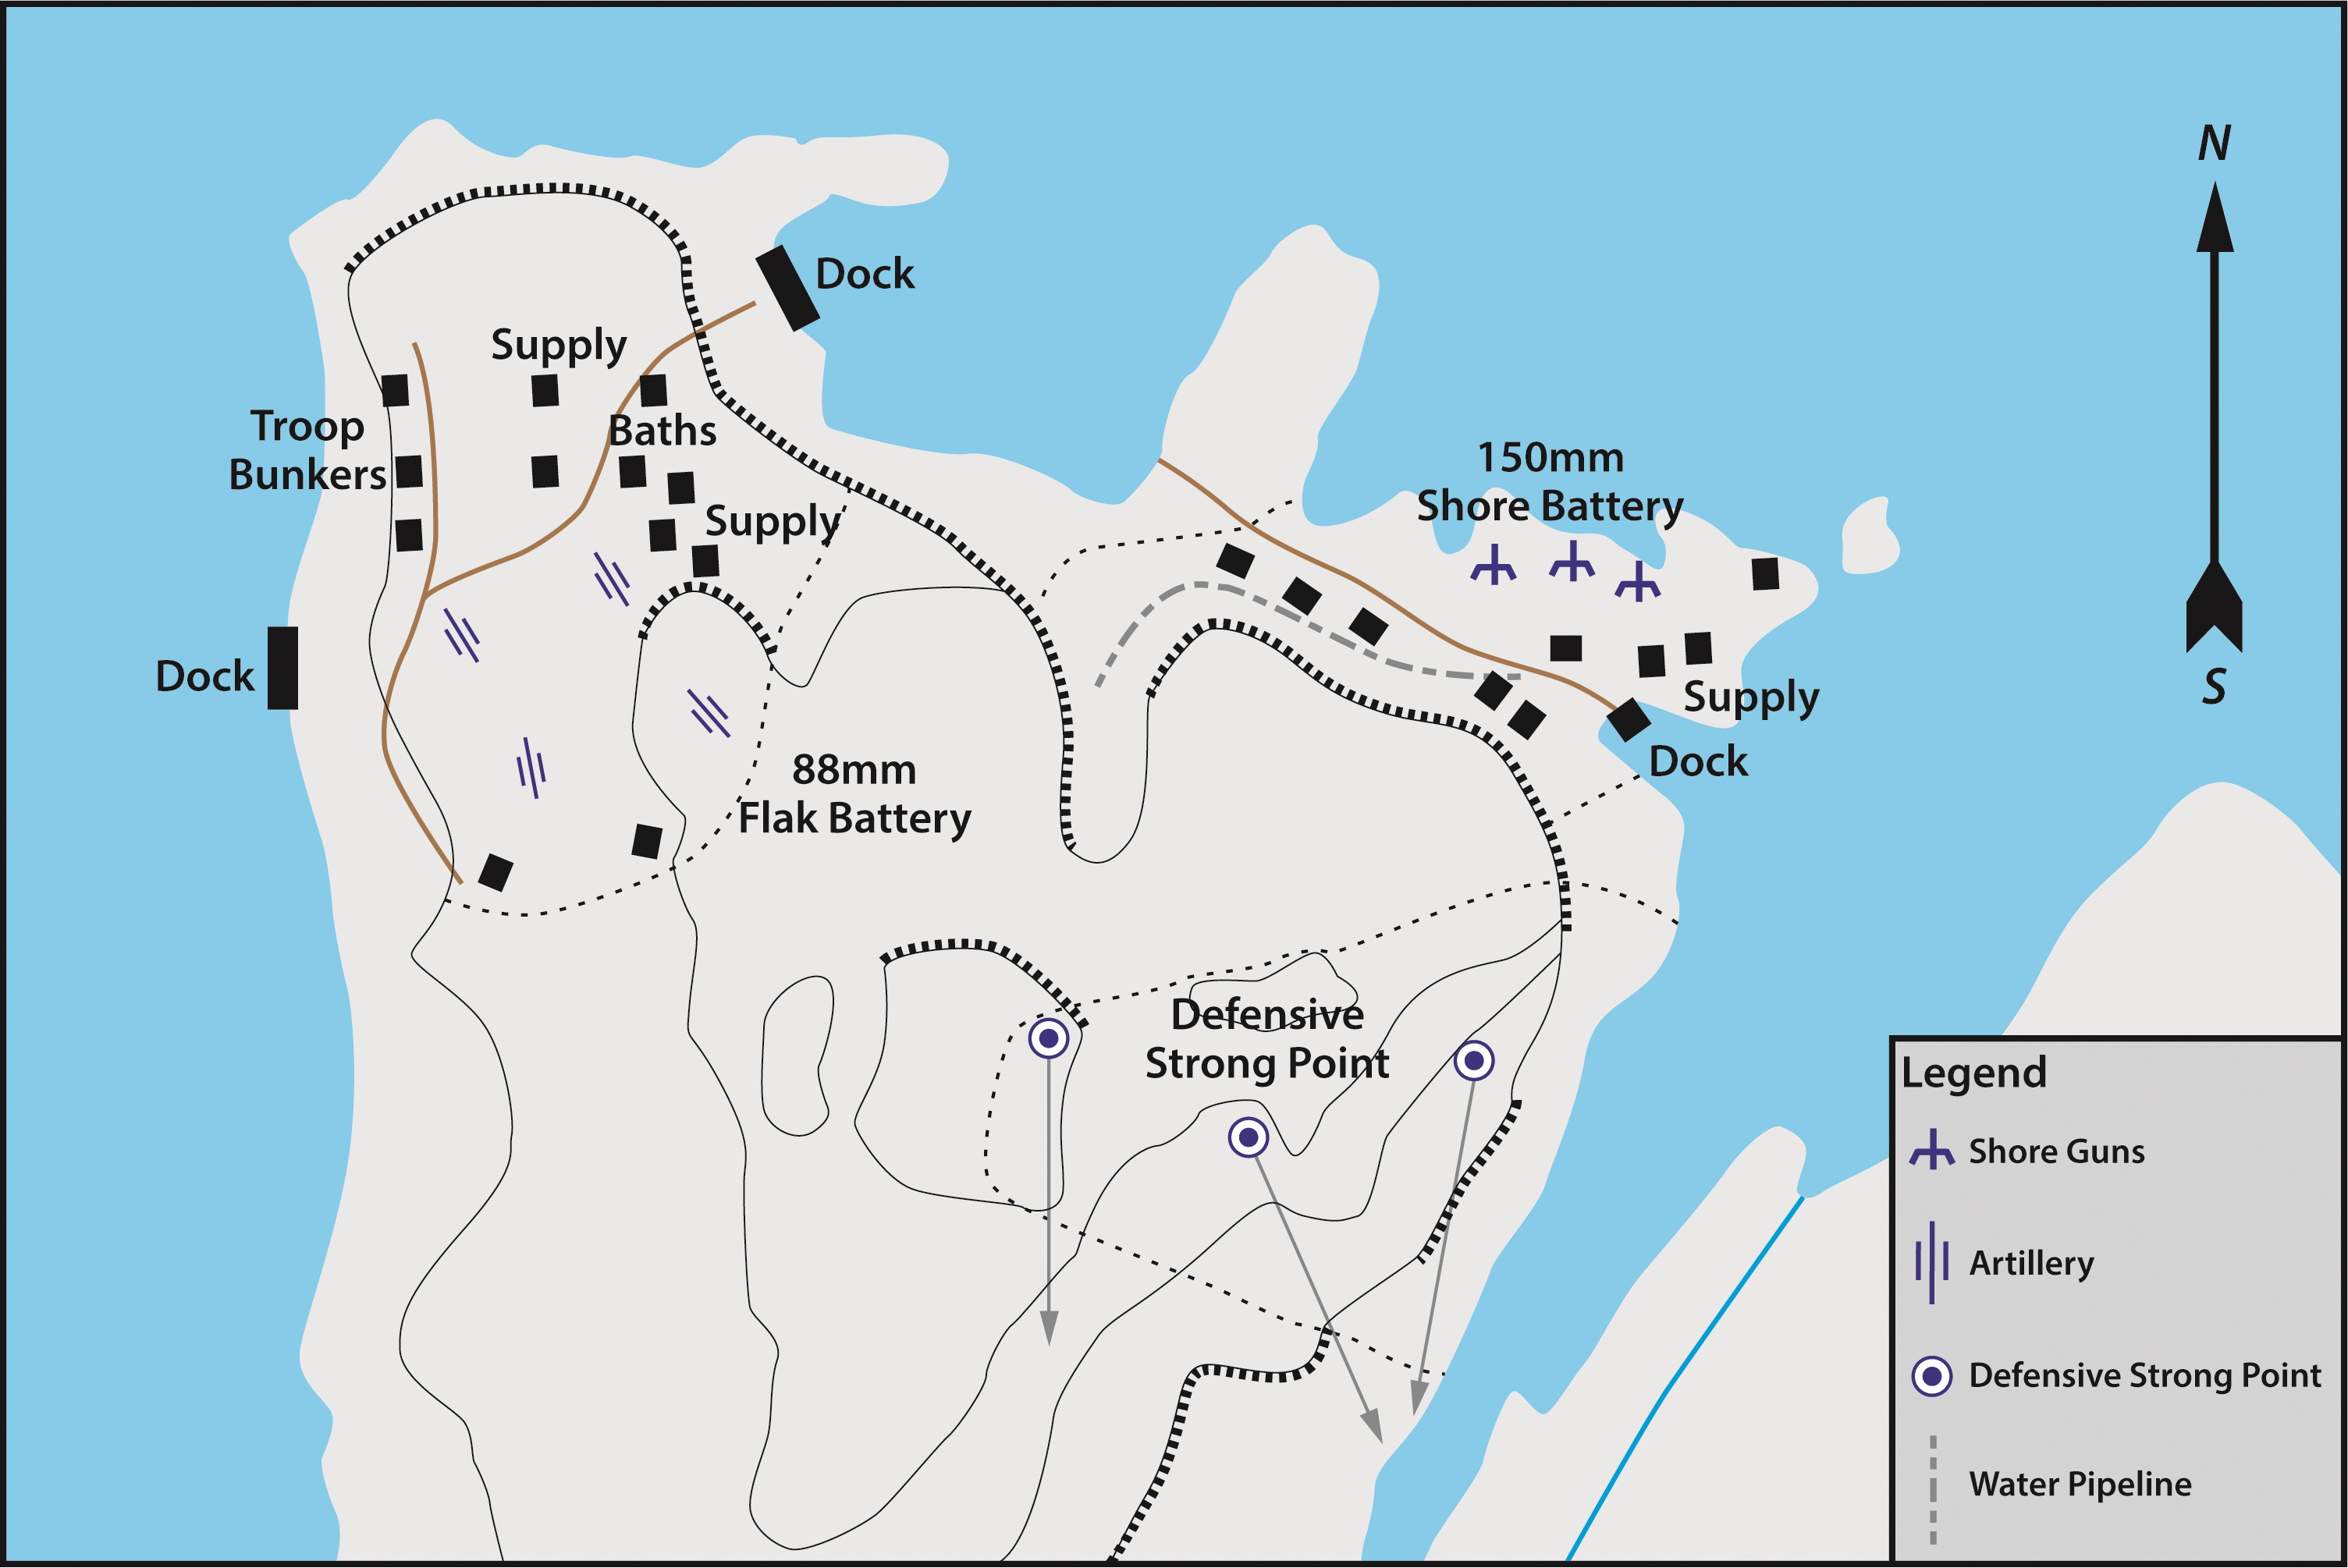
Figure 5.3. Disposition of the batteries on Cape Krestovyy
 ...
...
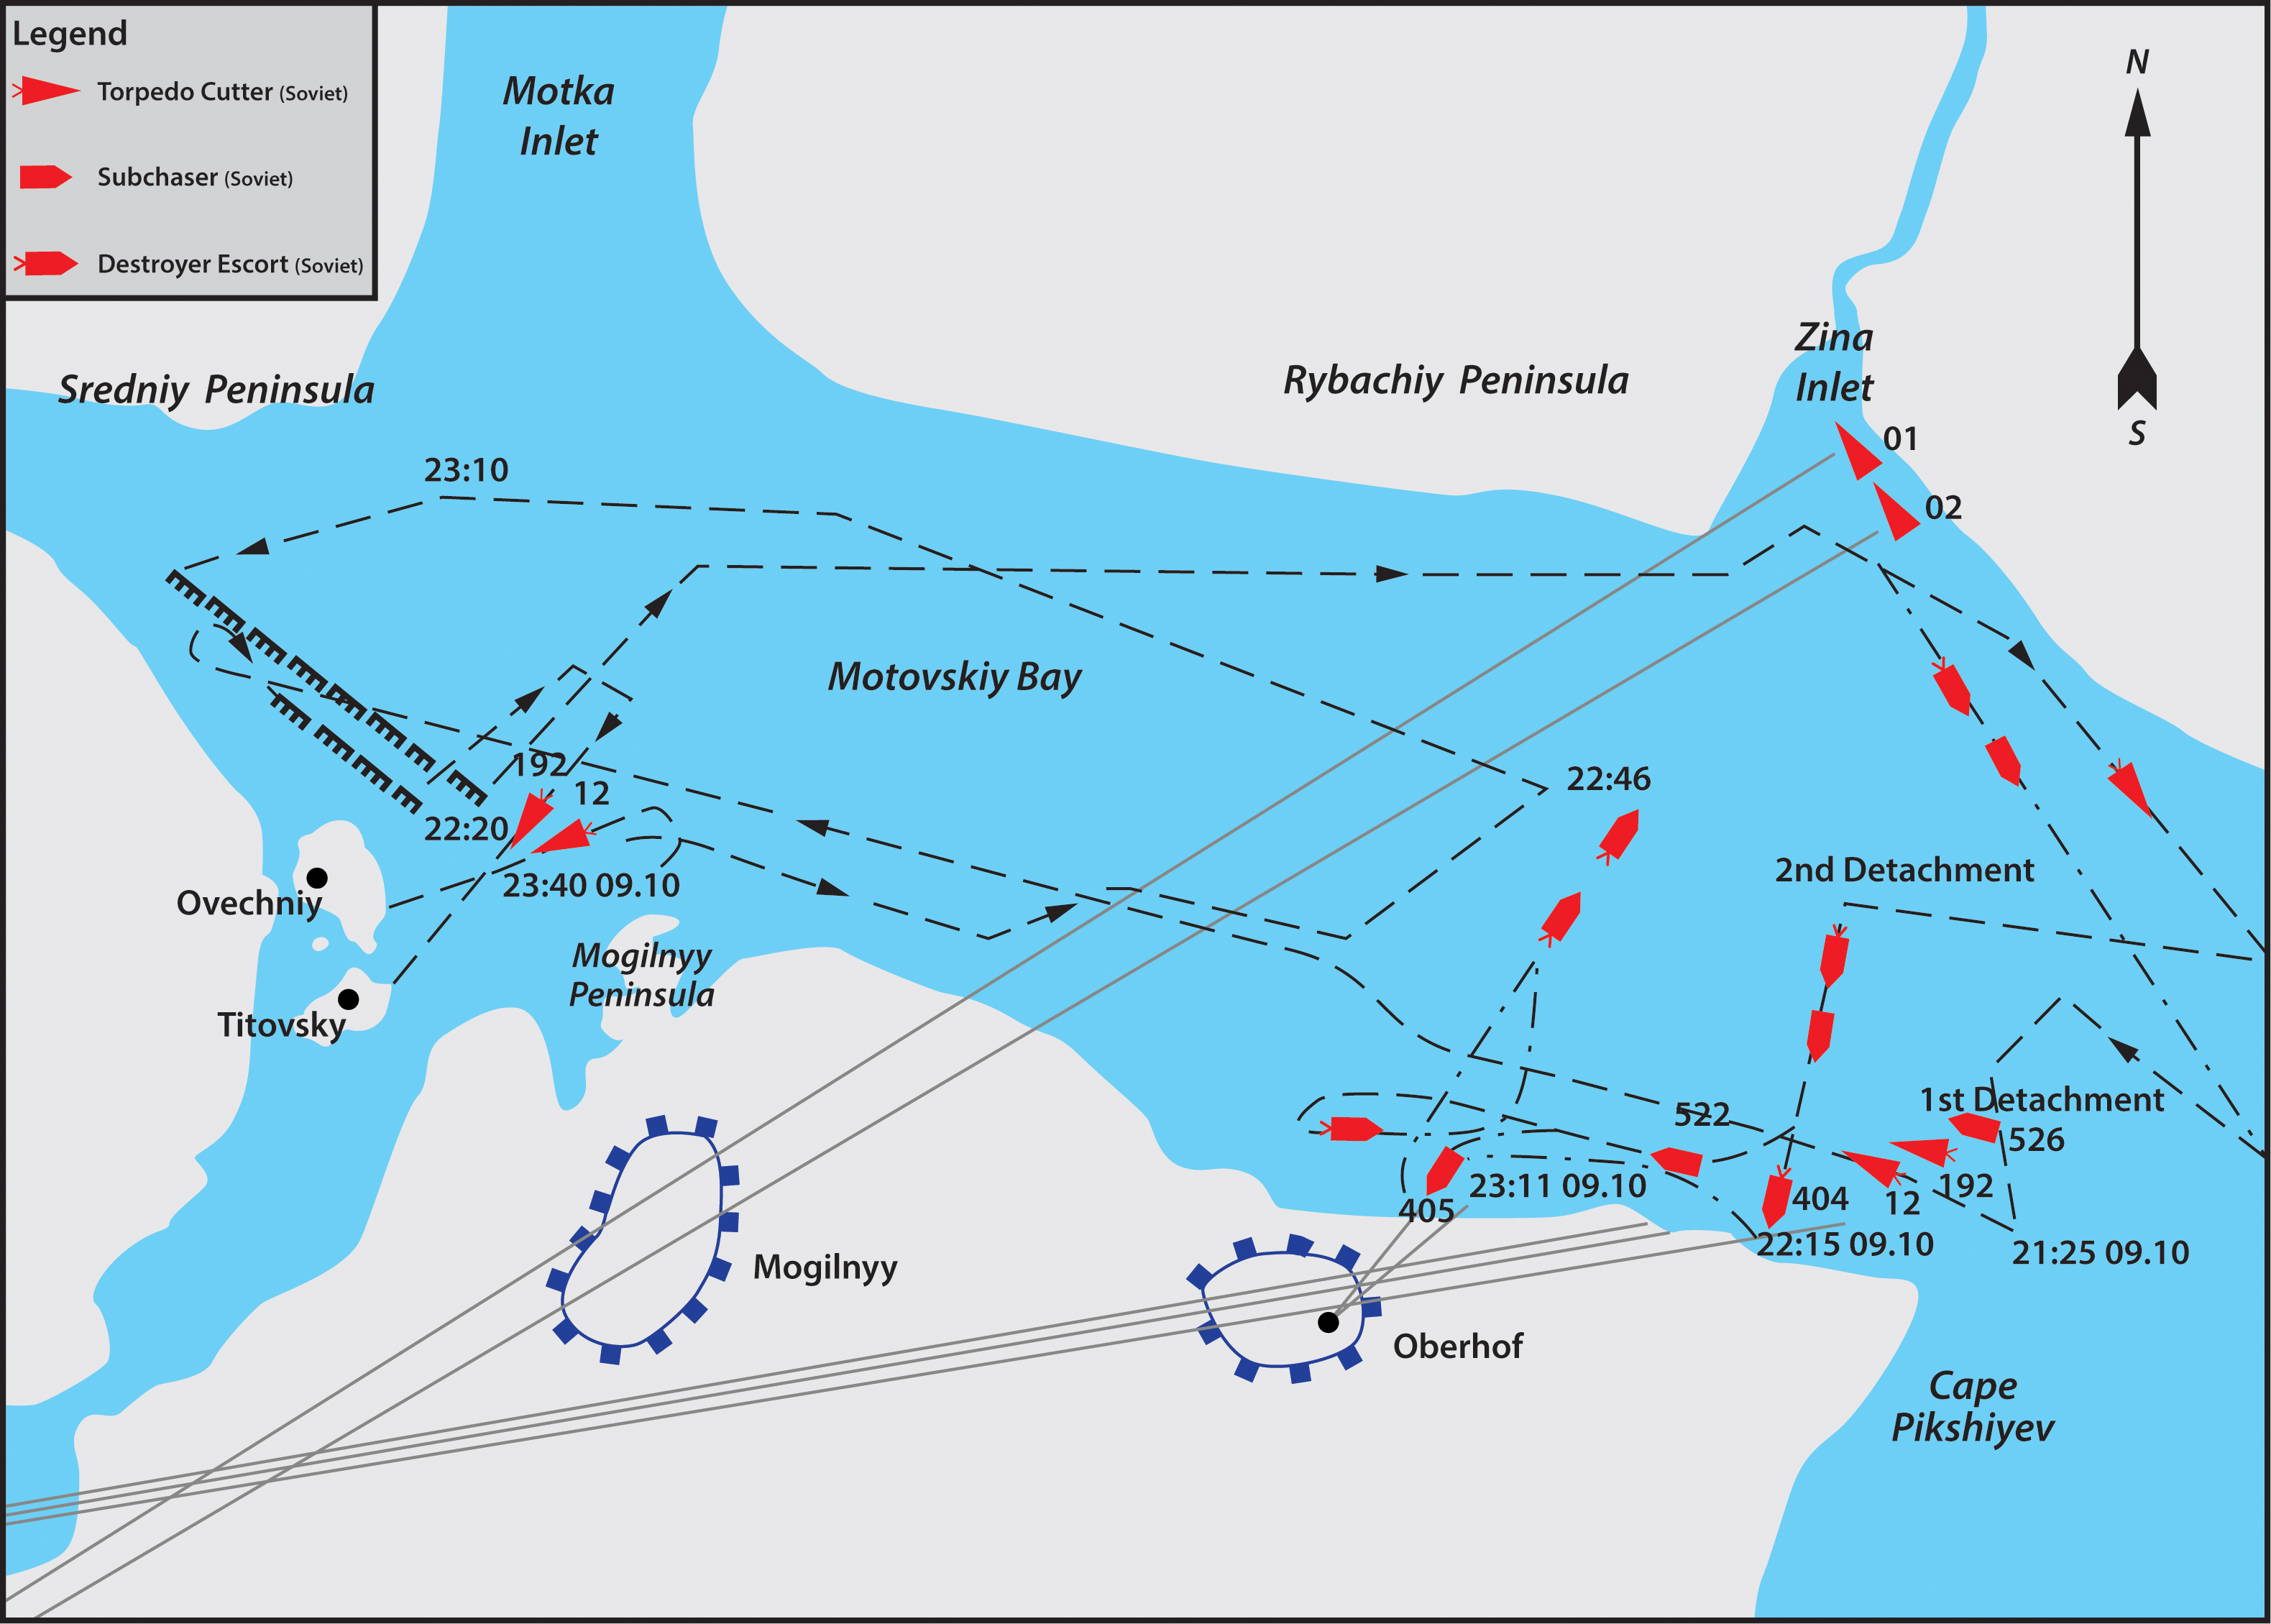
Figure 5.4. The demonstration amphibious landing in Motovskiy Bay
 ...
...
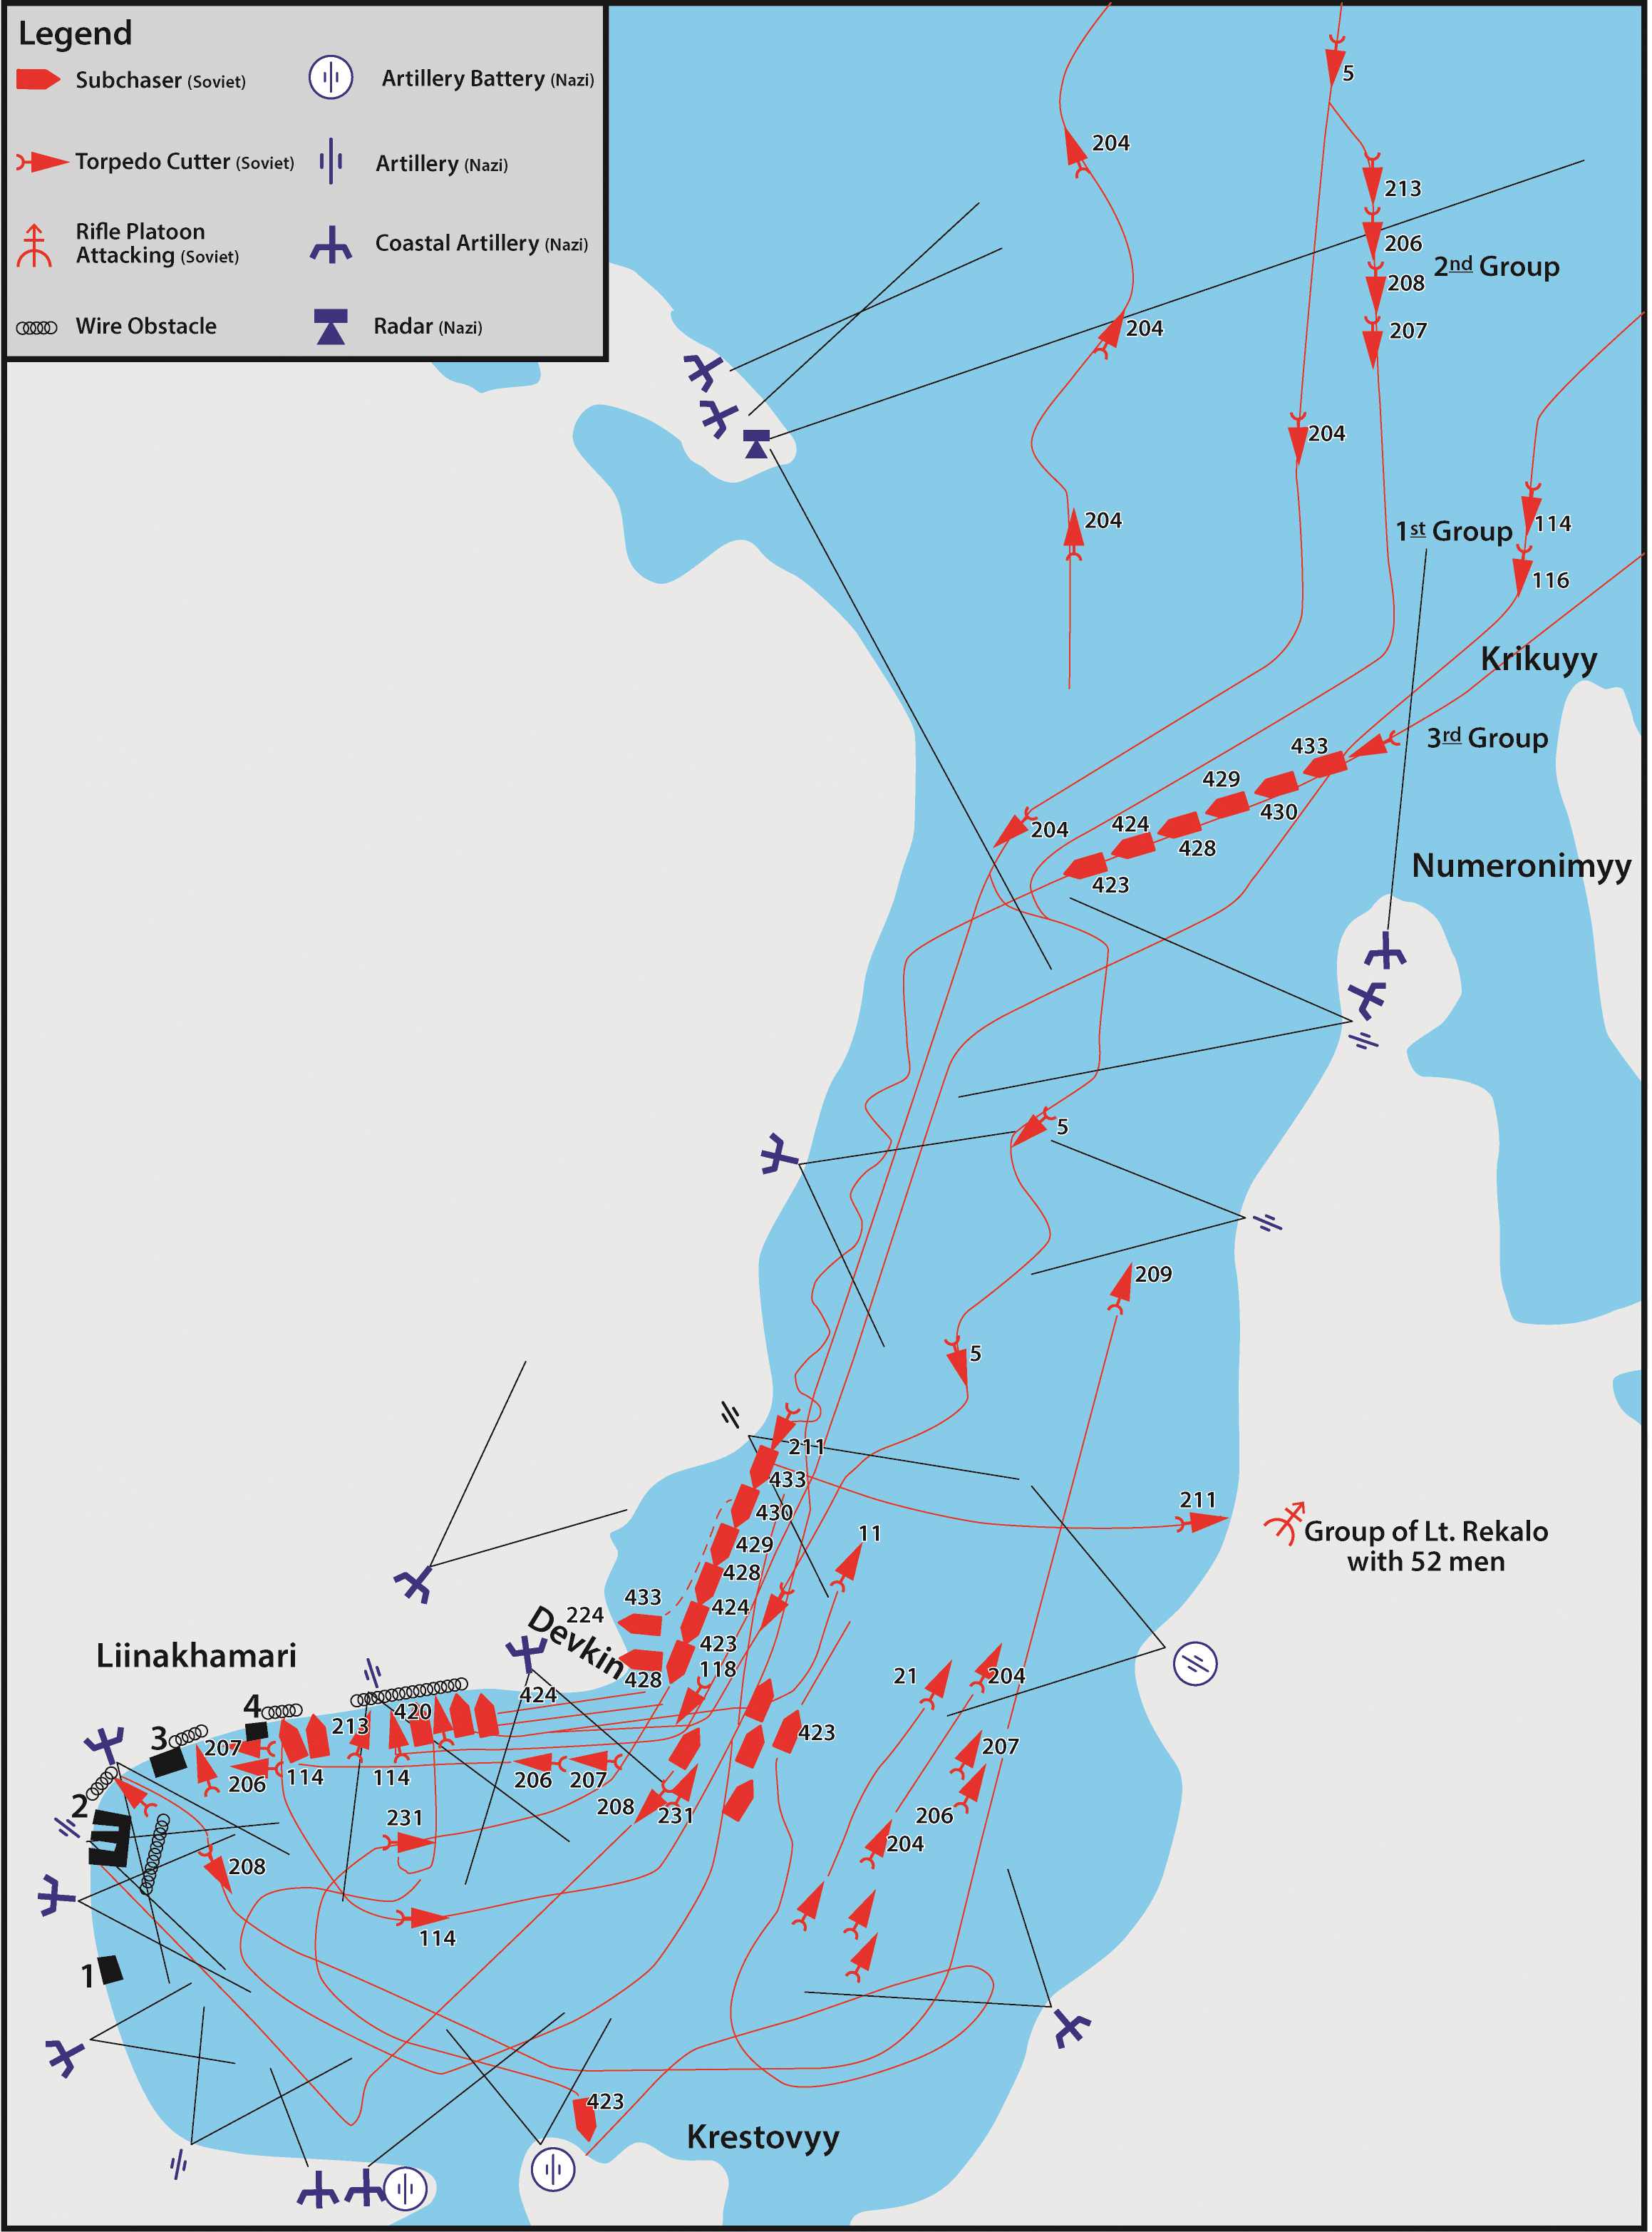
Figure 5.5. Breakthrough of cutters with amphibious assault force into Petsamovuono Inlet to capture Liinakhamari Harbor
 ...
...
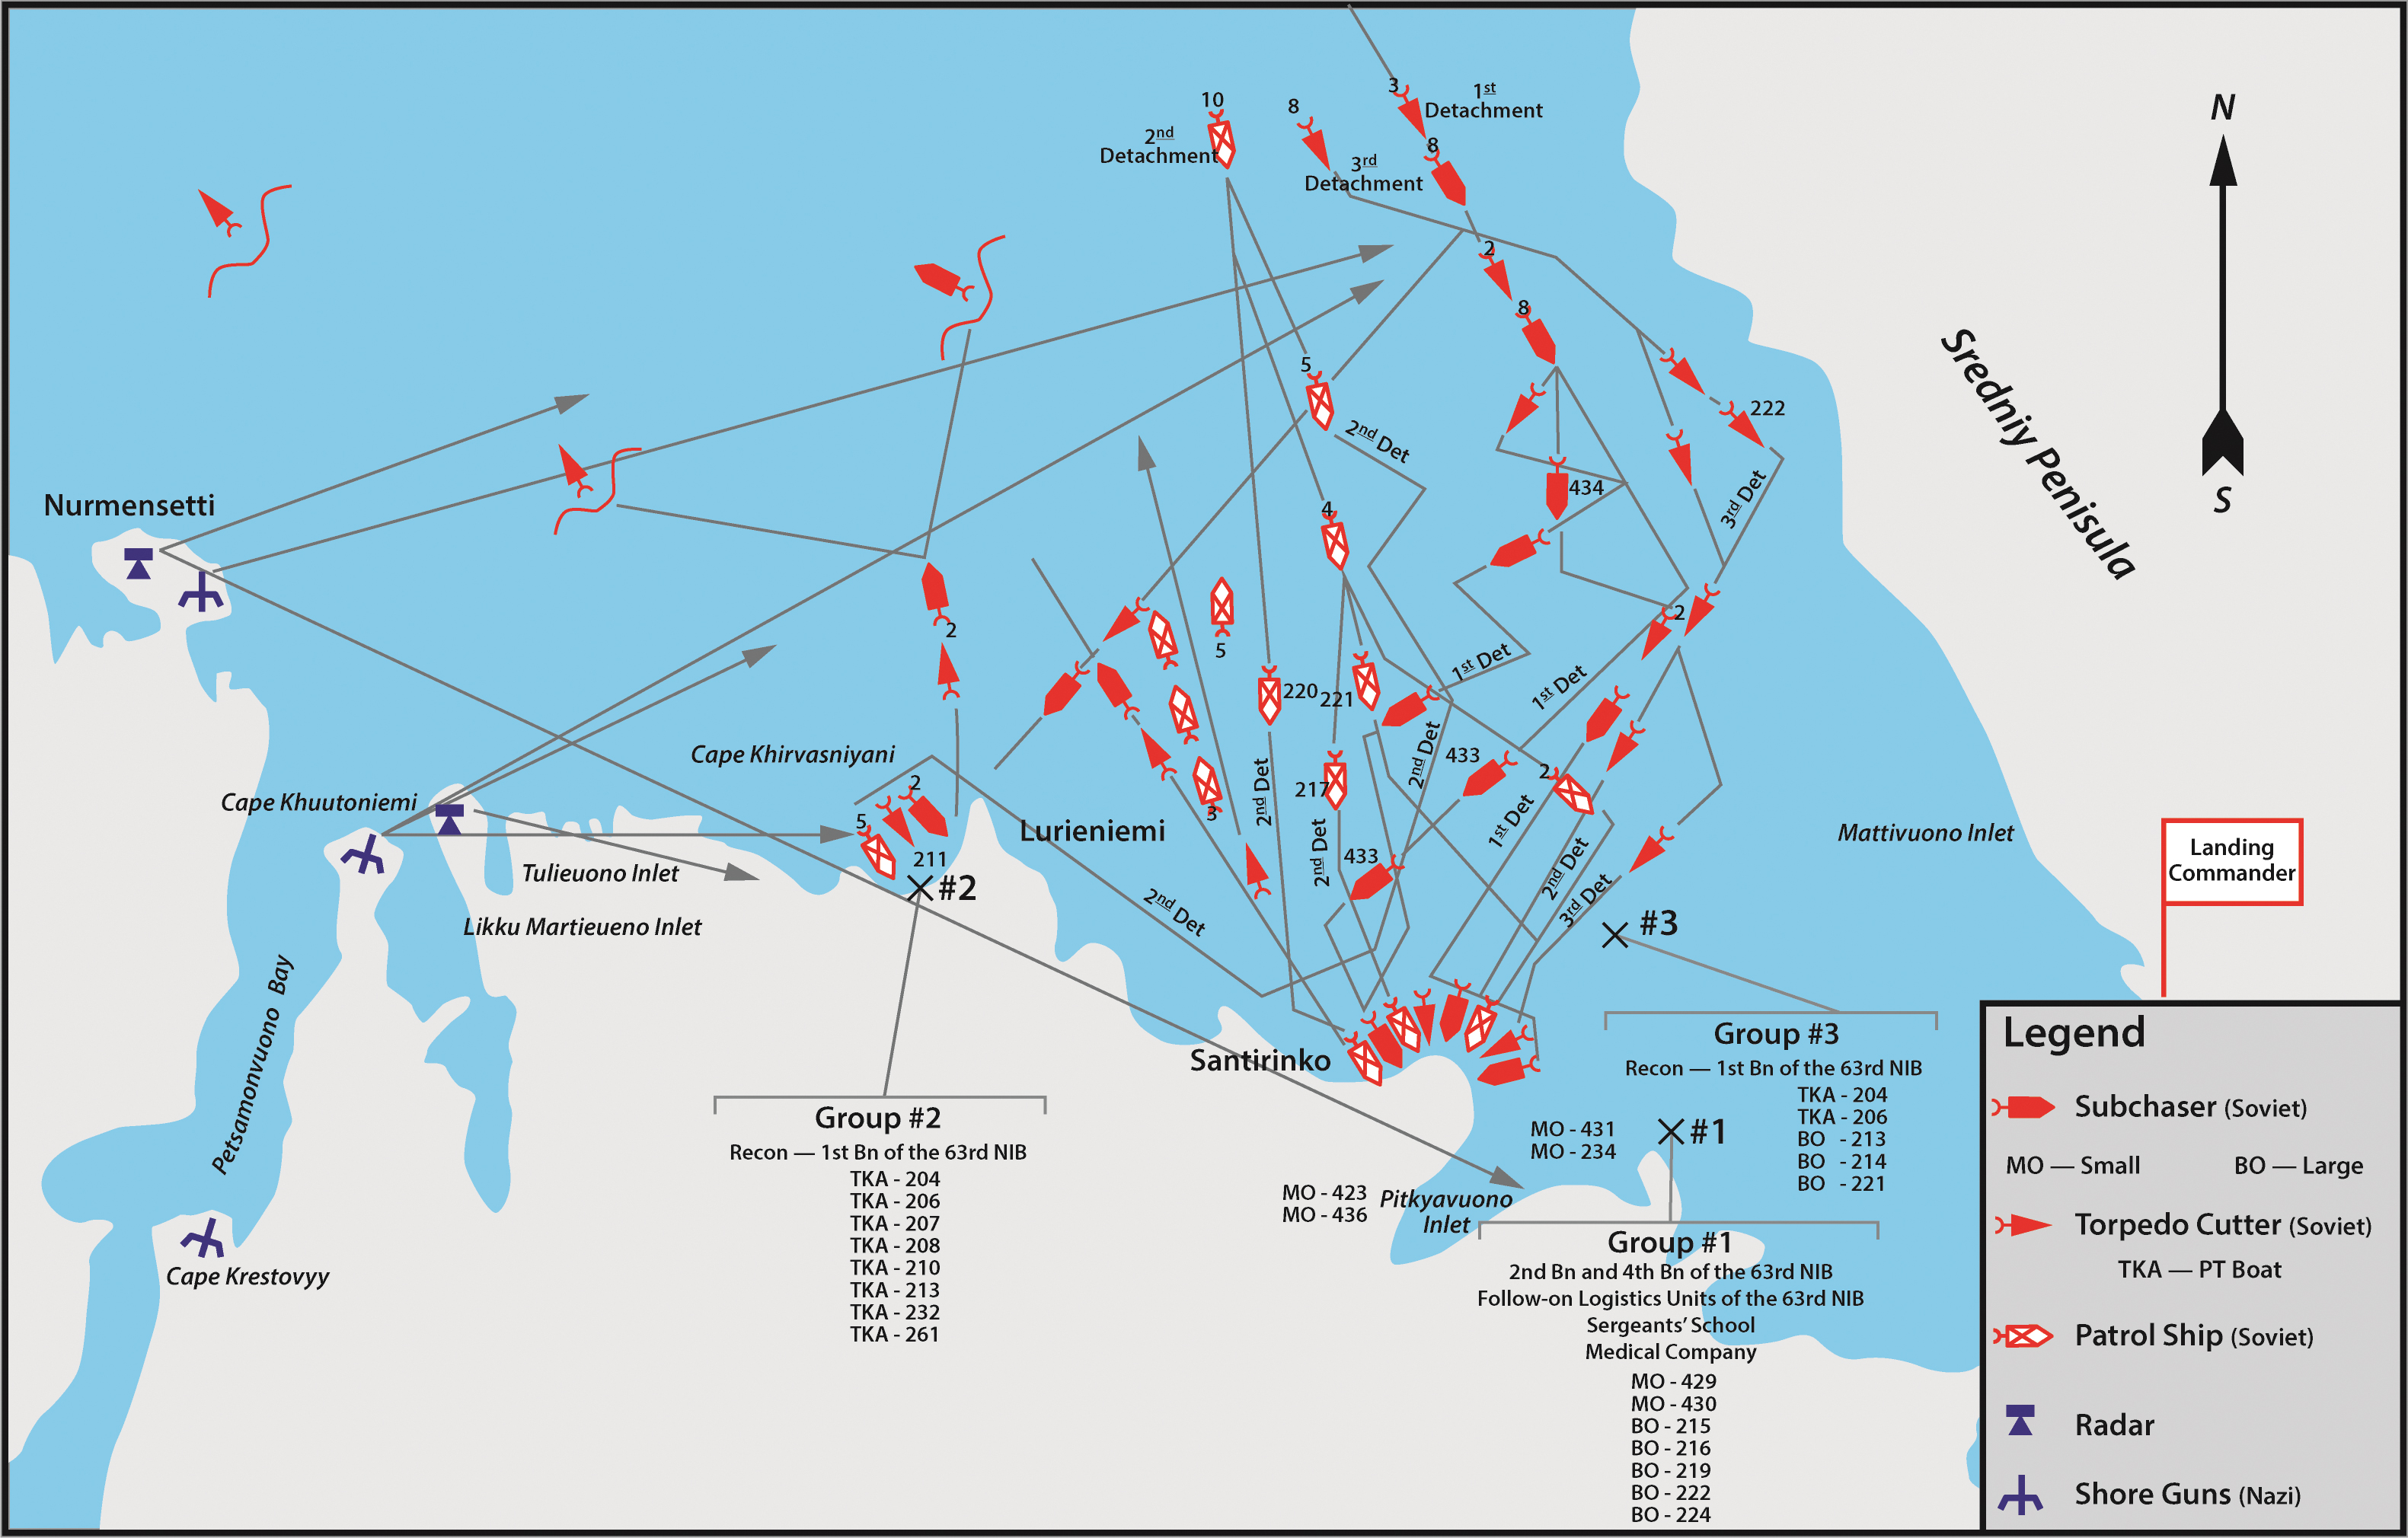
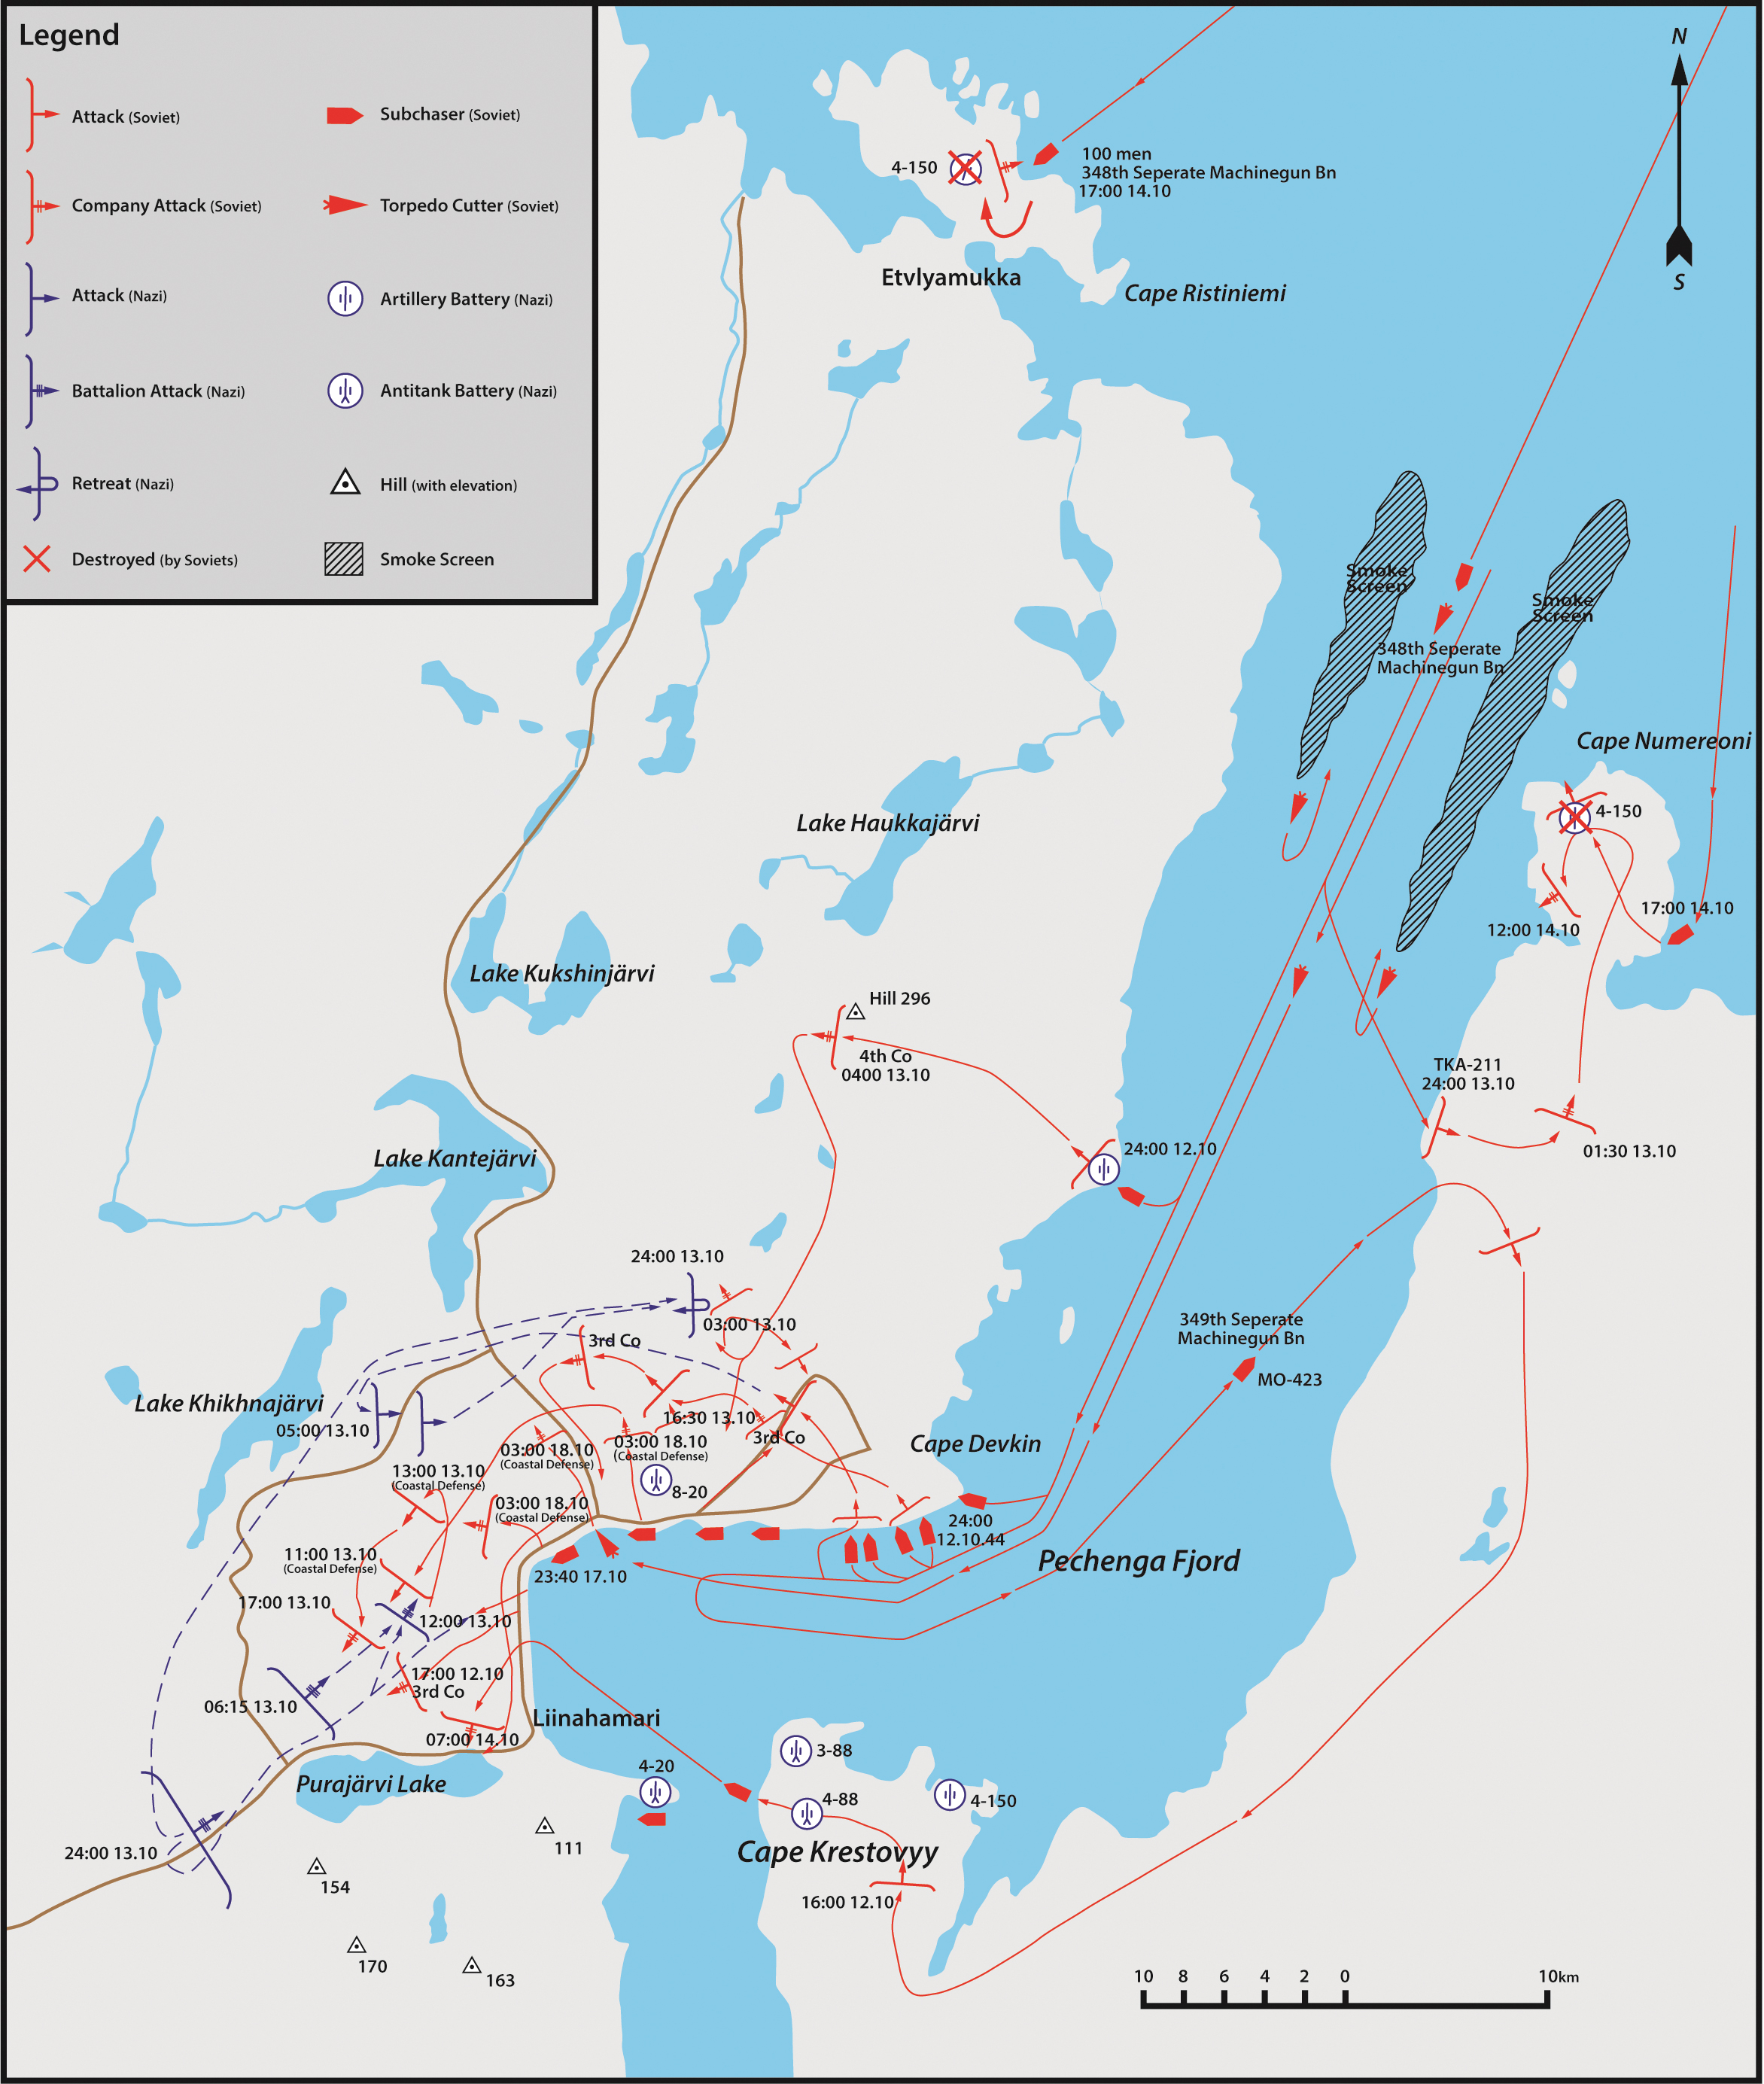
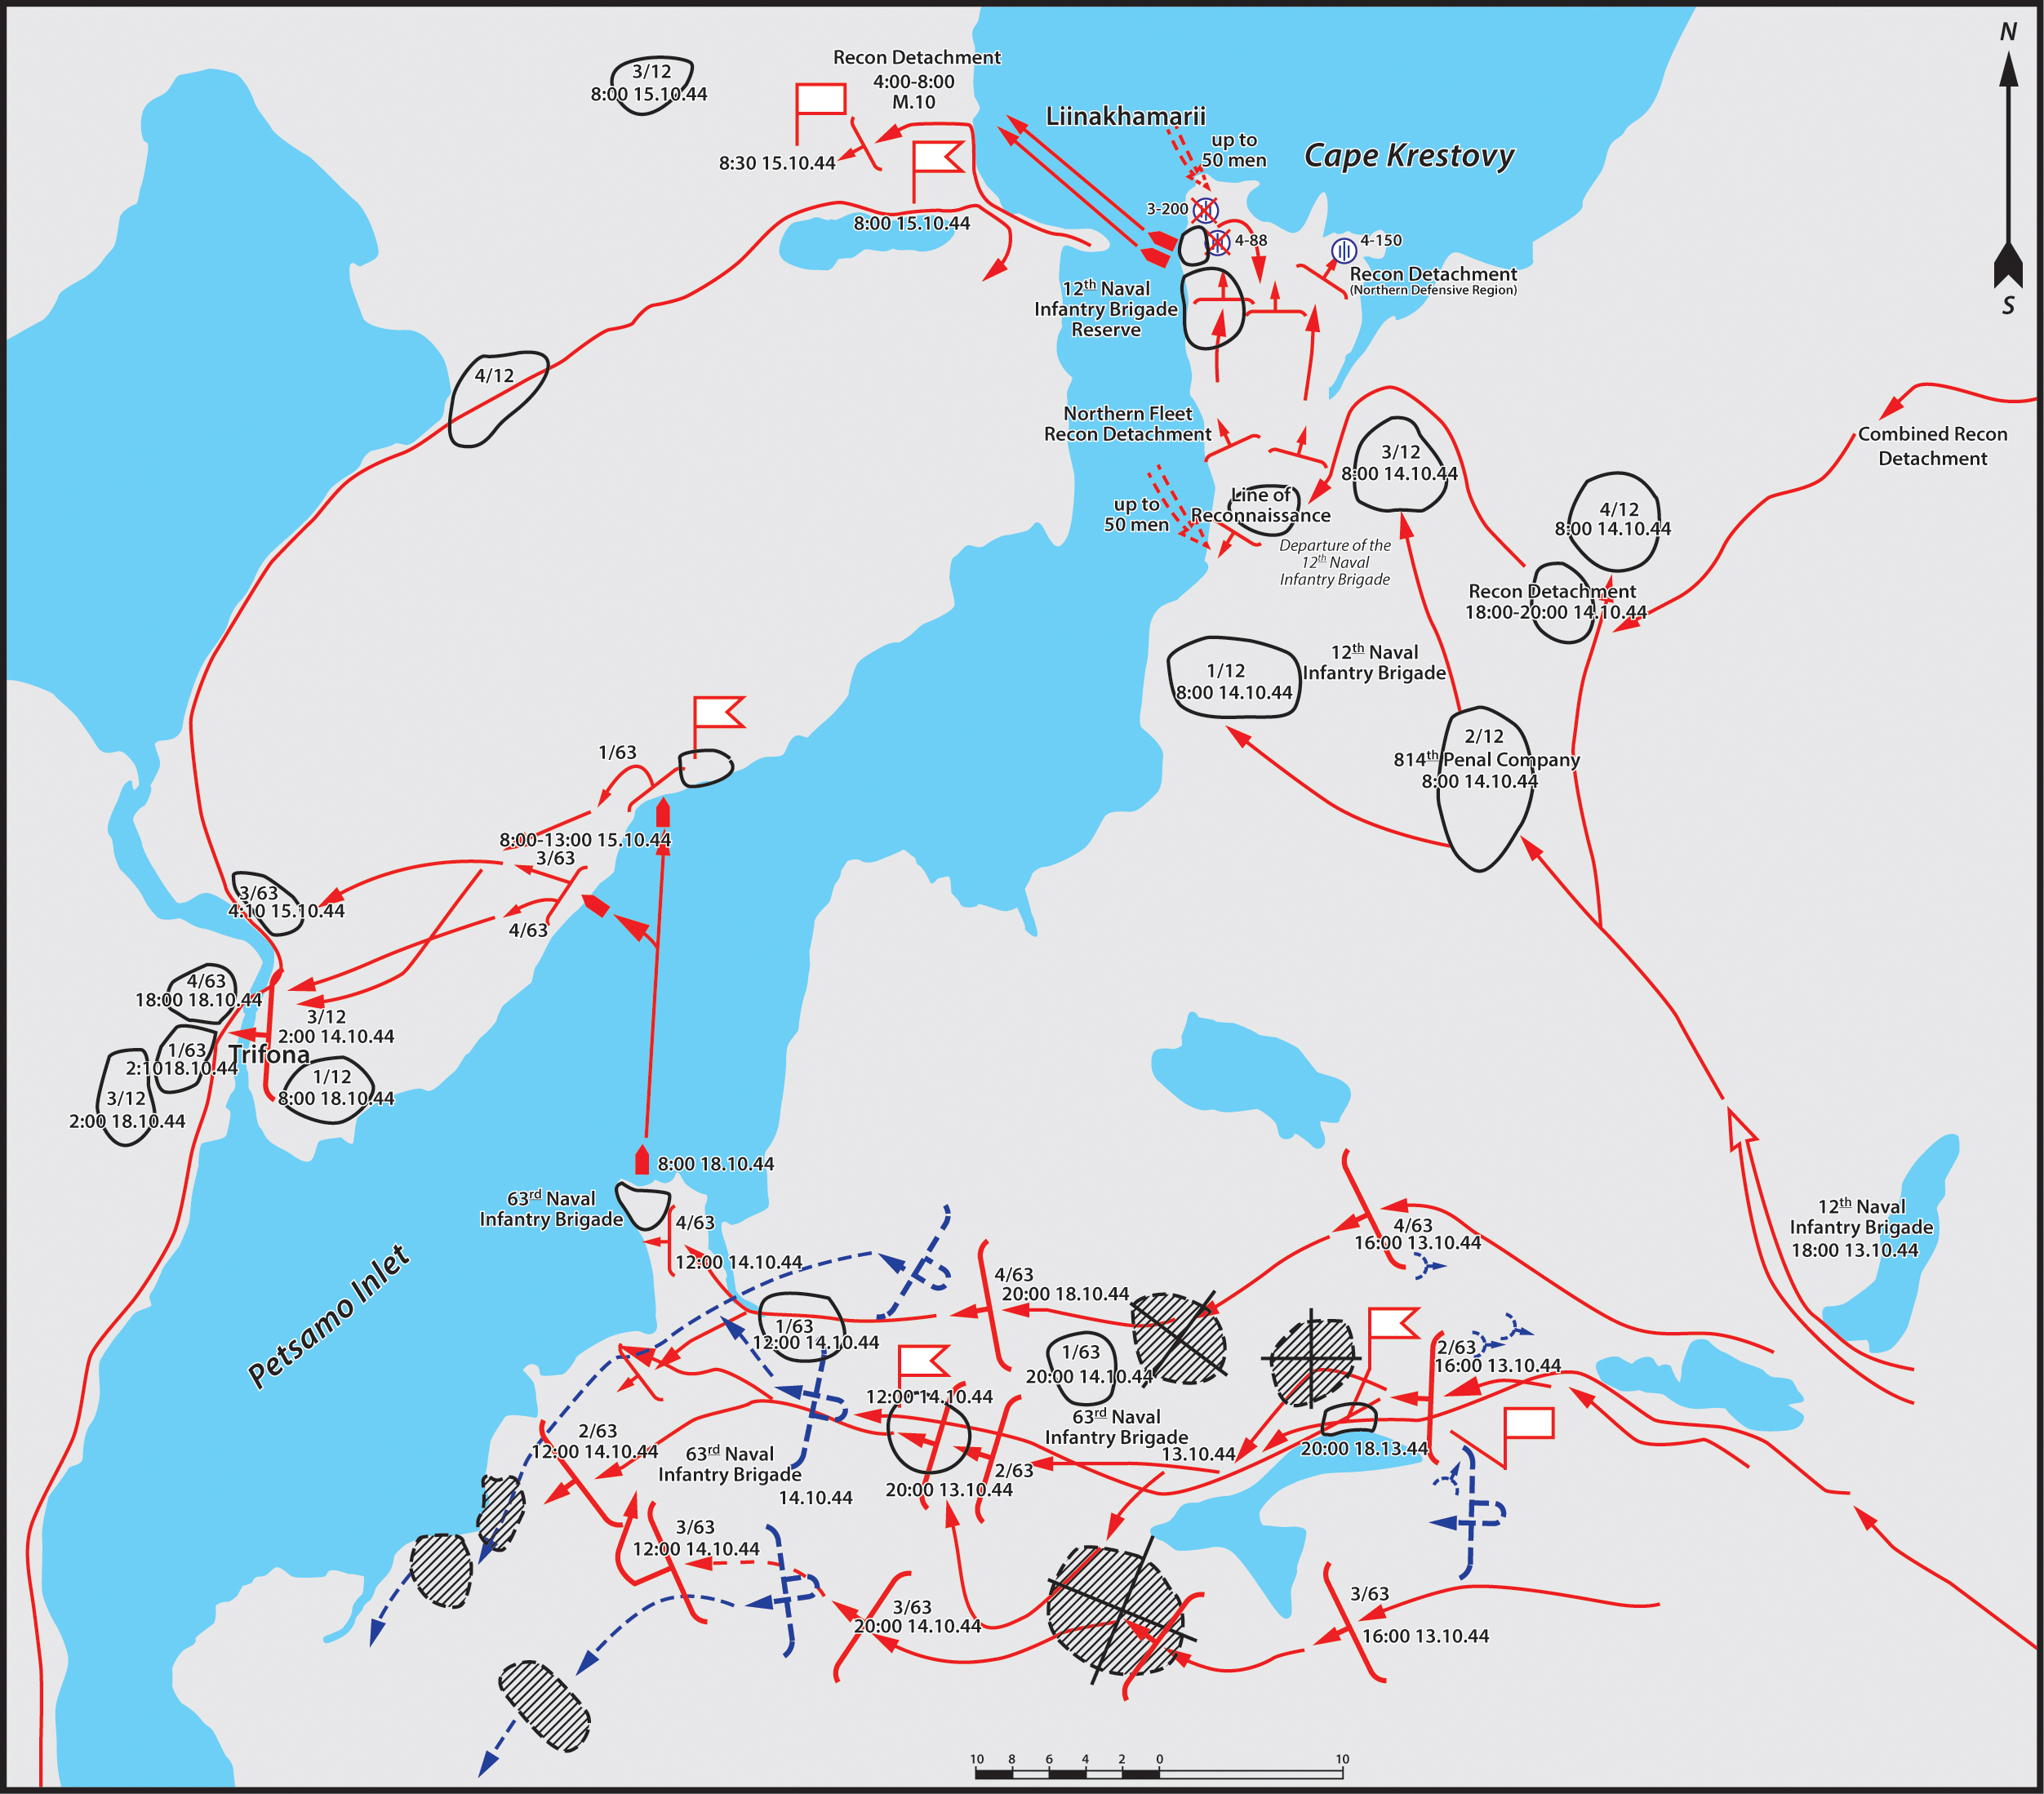
Figure 5.6. Actions of the amphibious assault detachment on shore during the capture of the Liinakhamari area
 ...
...
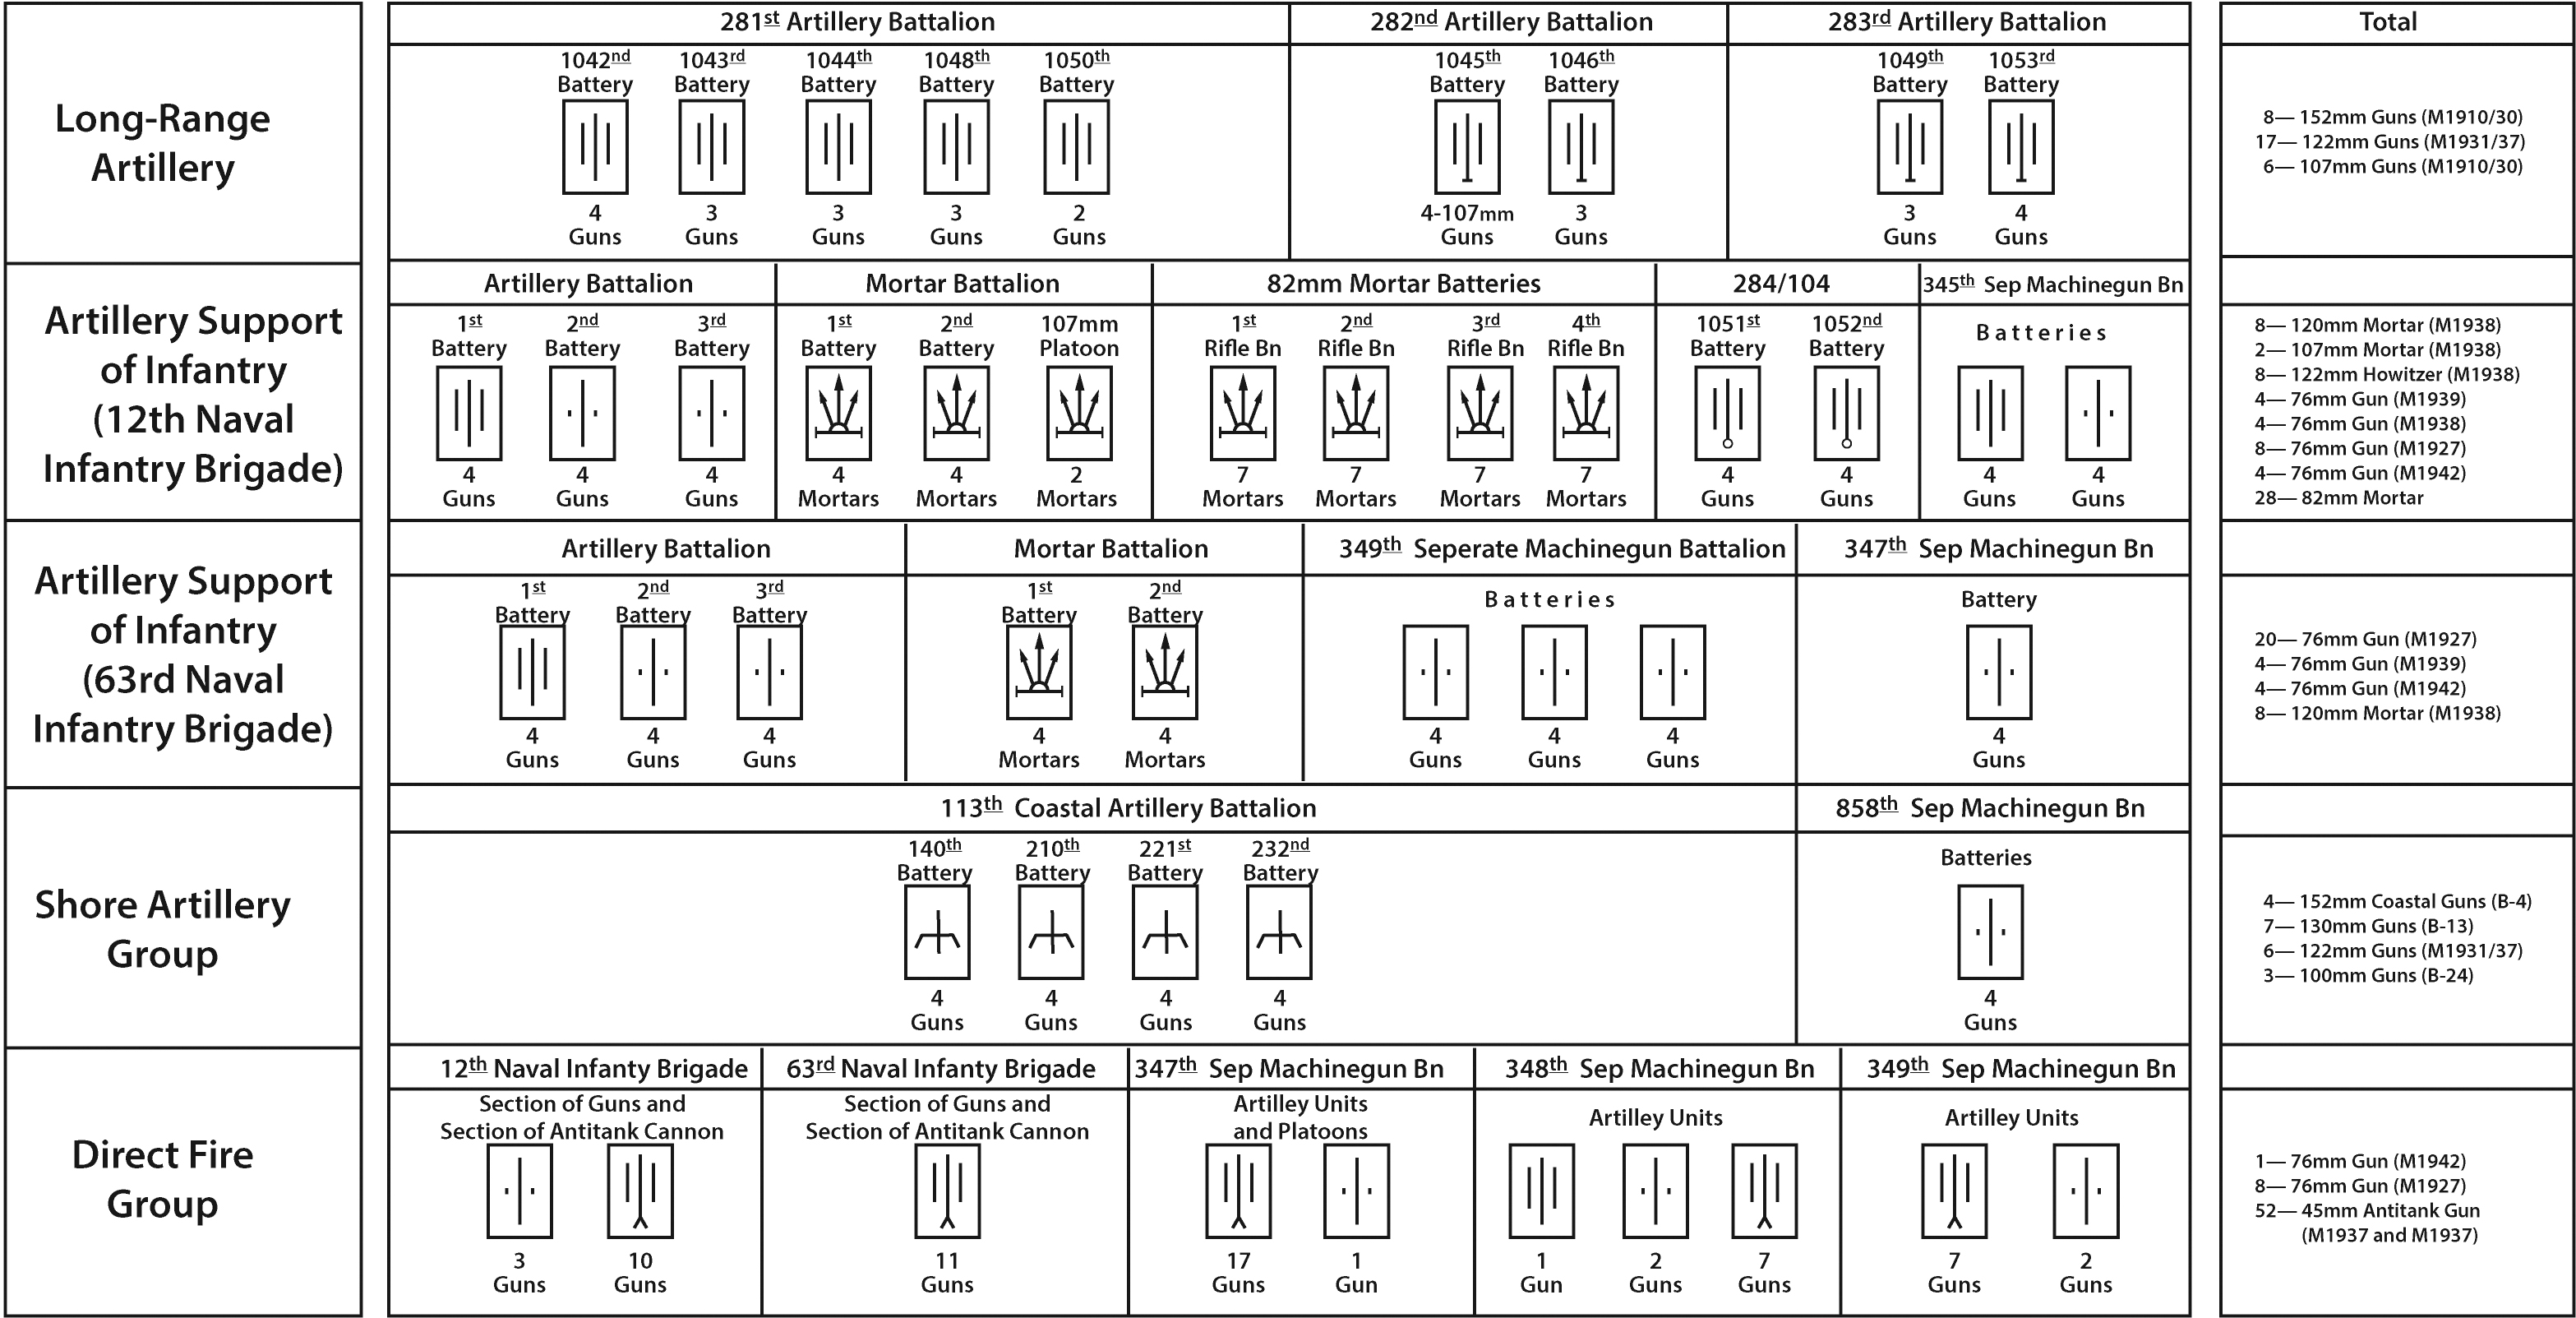
Figure 5.7. Artillery composition for breakthrough
 ...
...
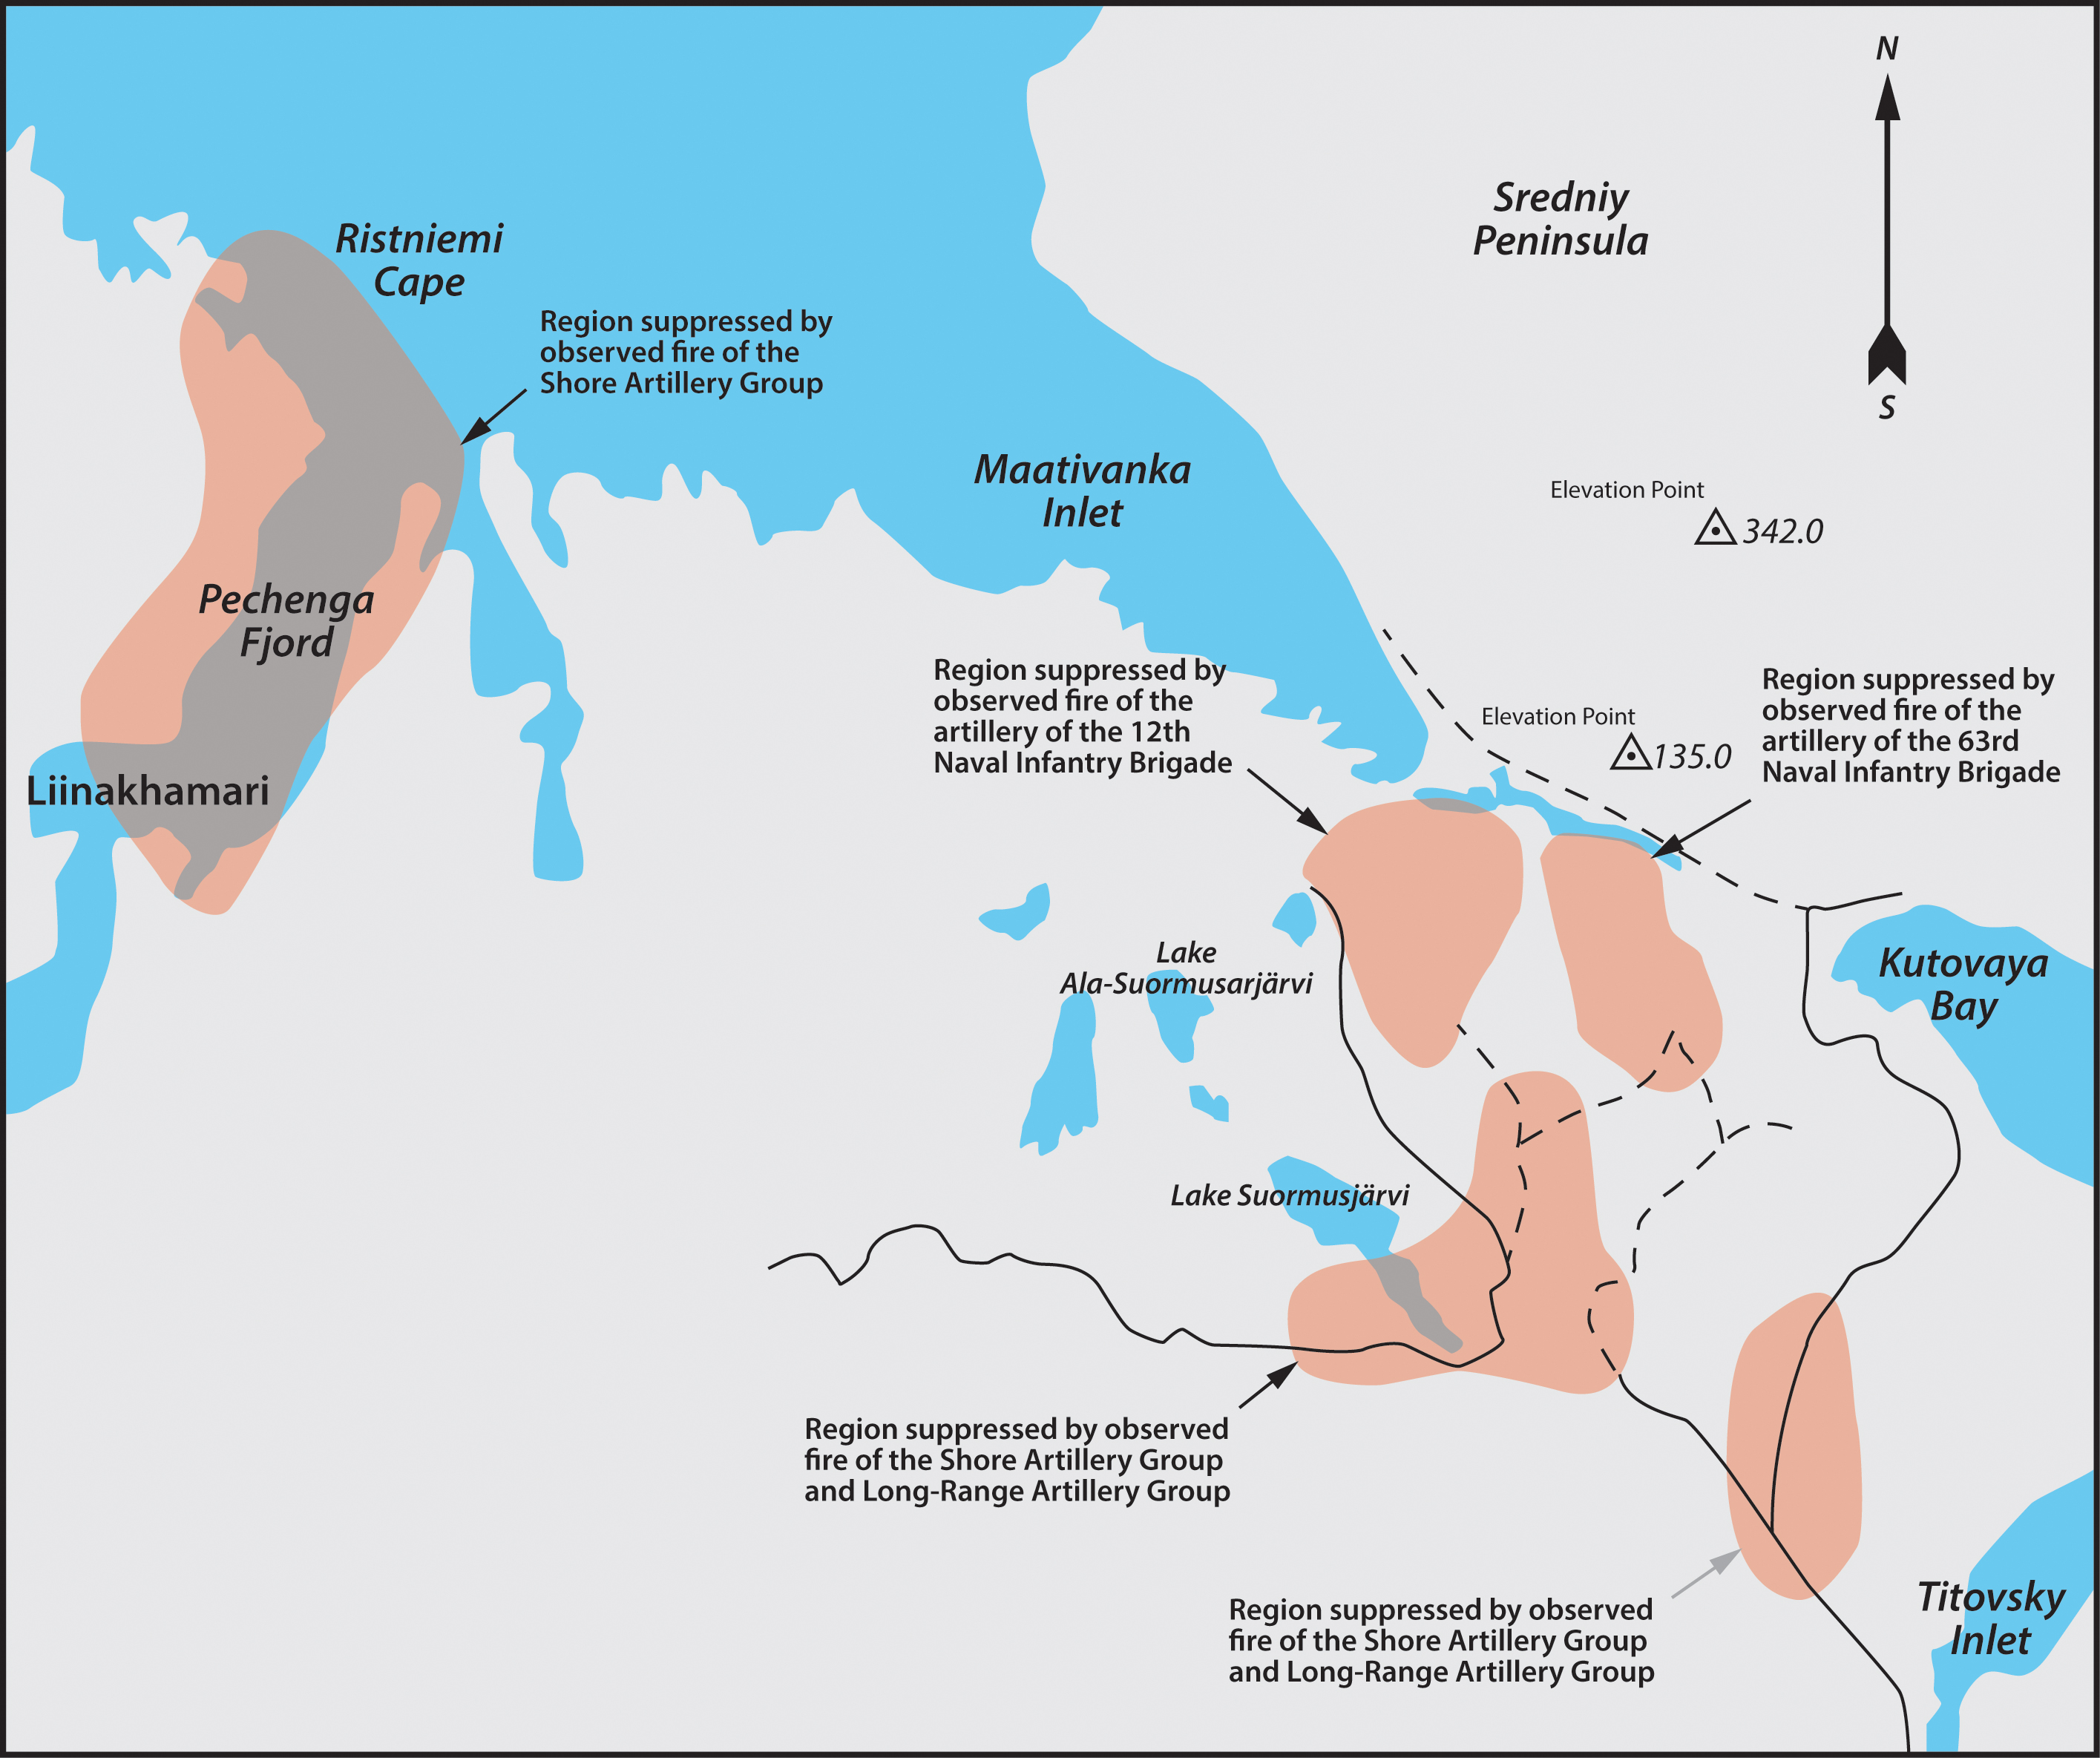
Figure 5.8. Distribution of targets for suppression by Northern Defensive Region artillery
 ...
...
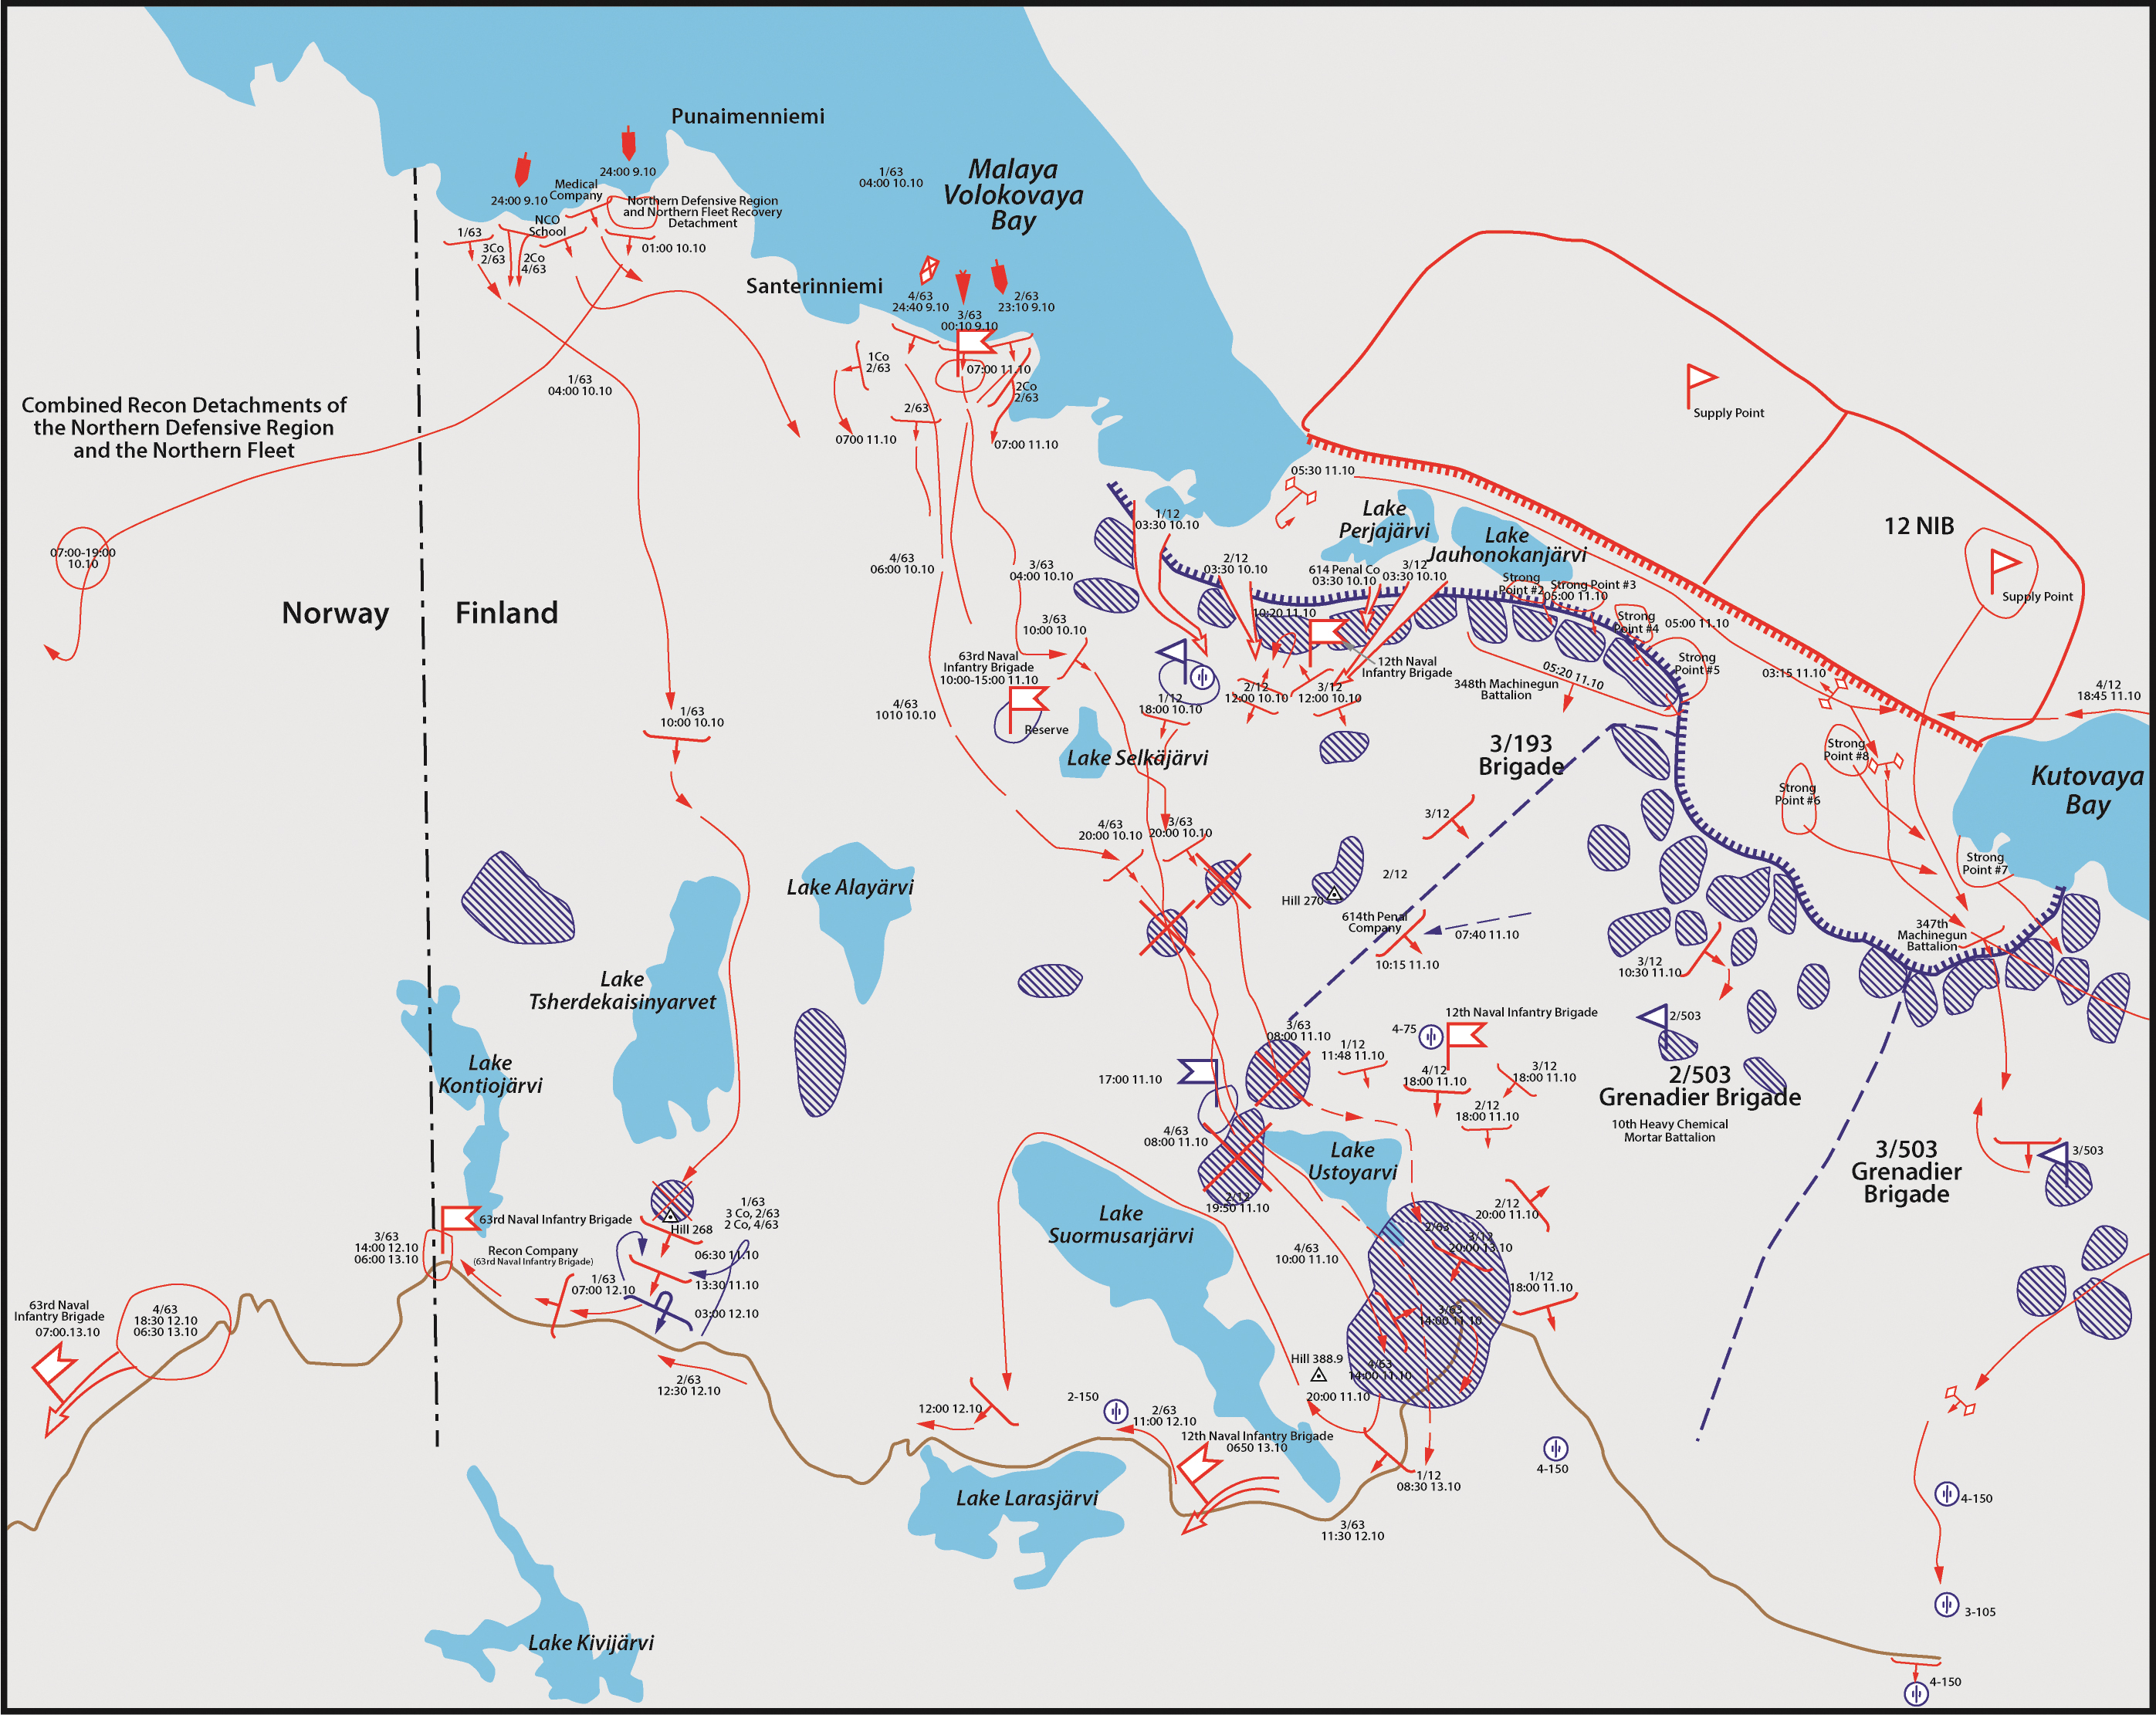
Figure 5.9. Start positions of the breakthrough forces at the line of attack and their offensive
 ...
...
Figure 5.10. Northern Fleet Air Forces strikes on ground targets during campaign
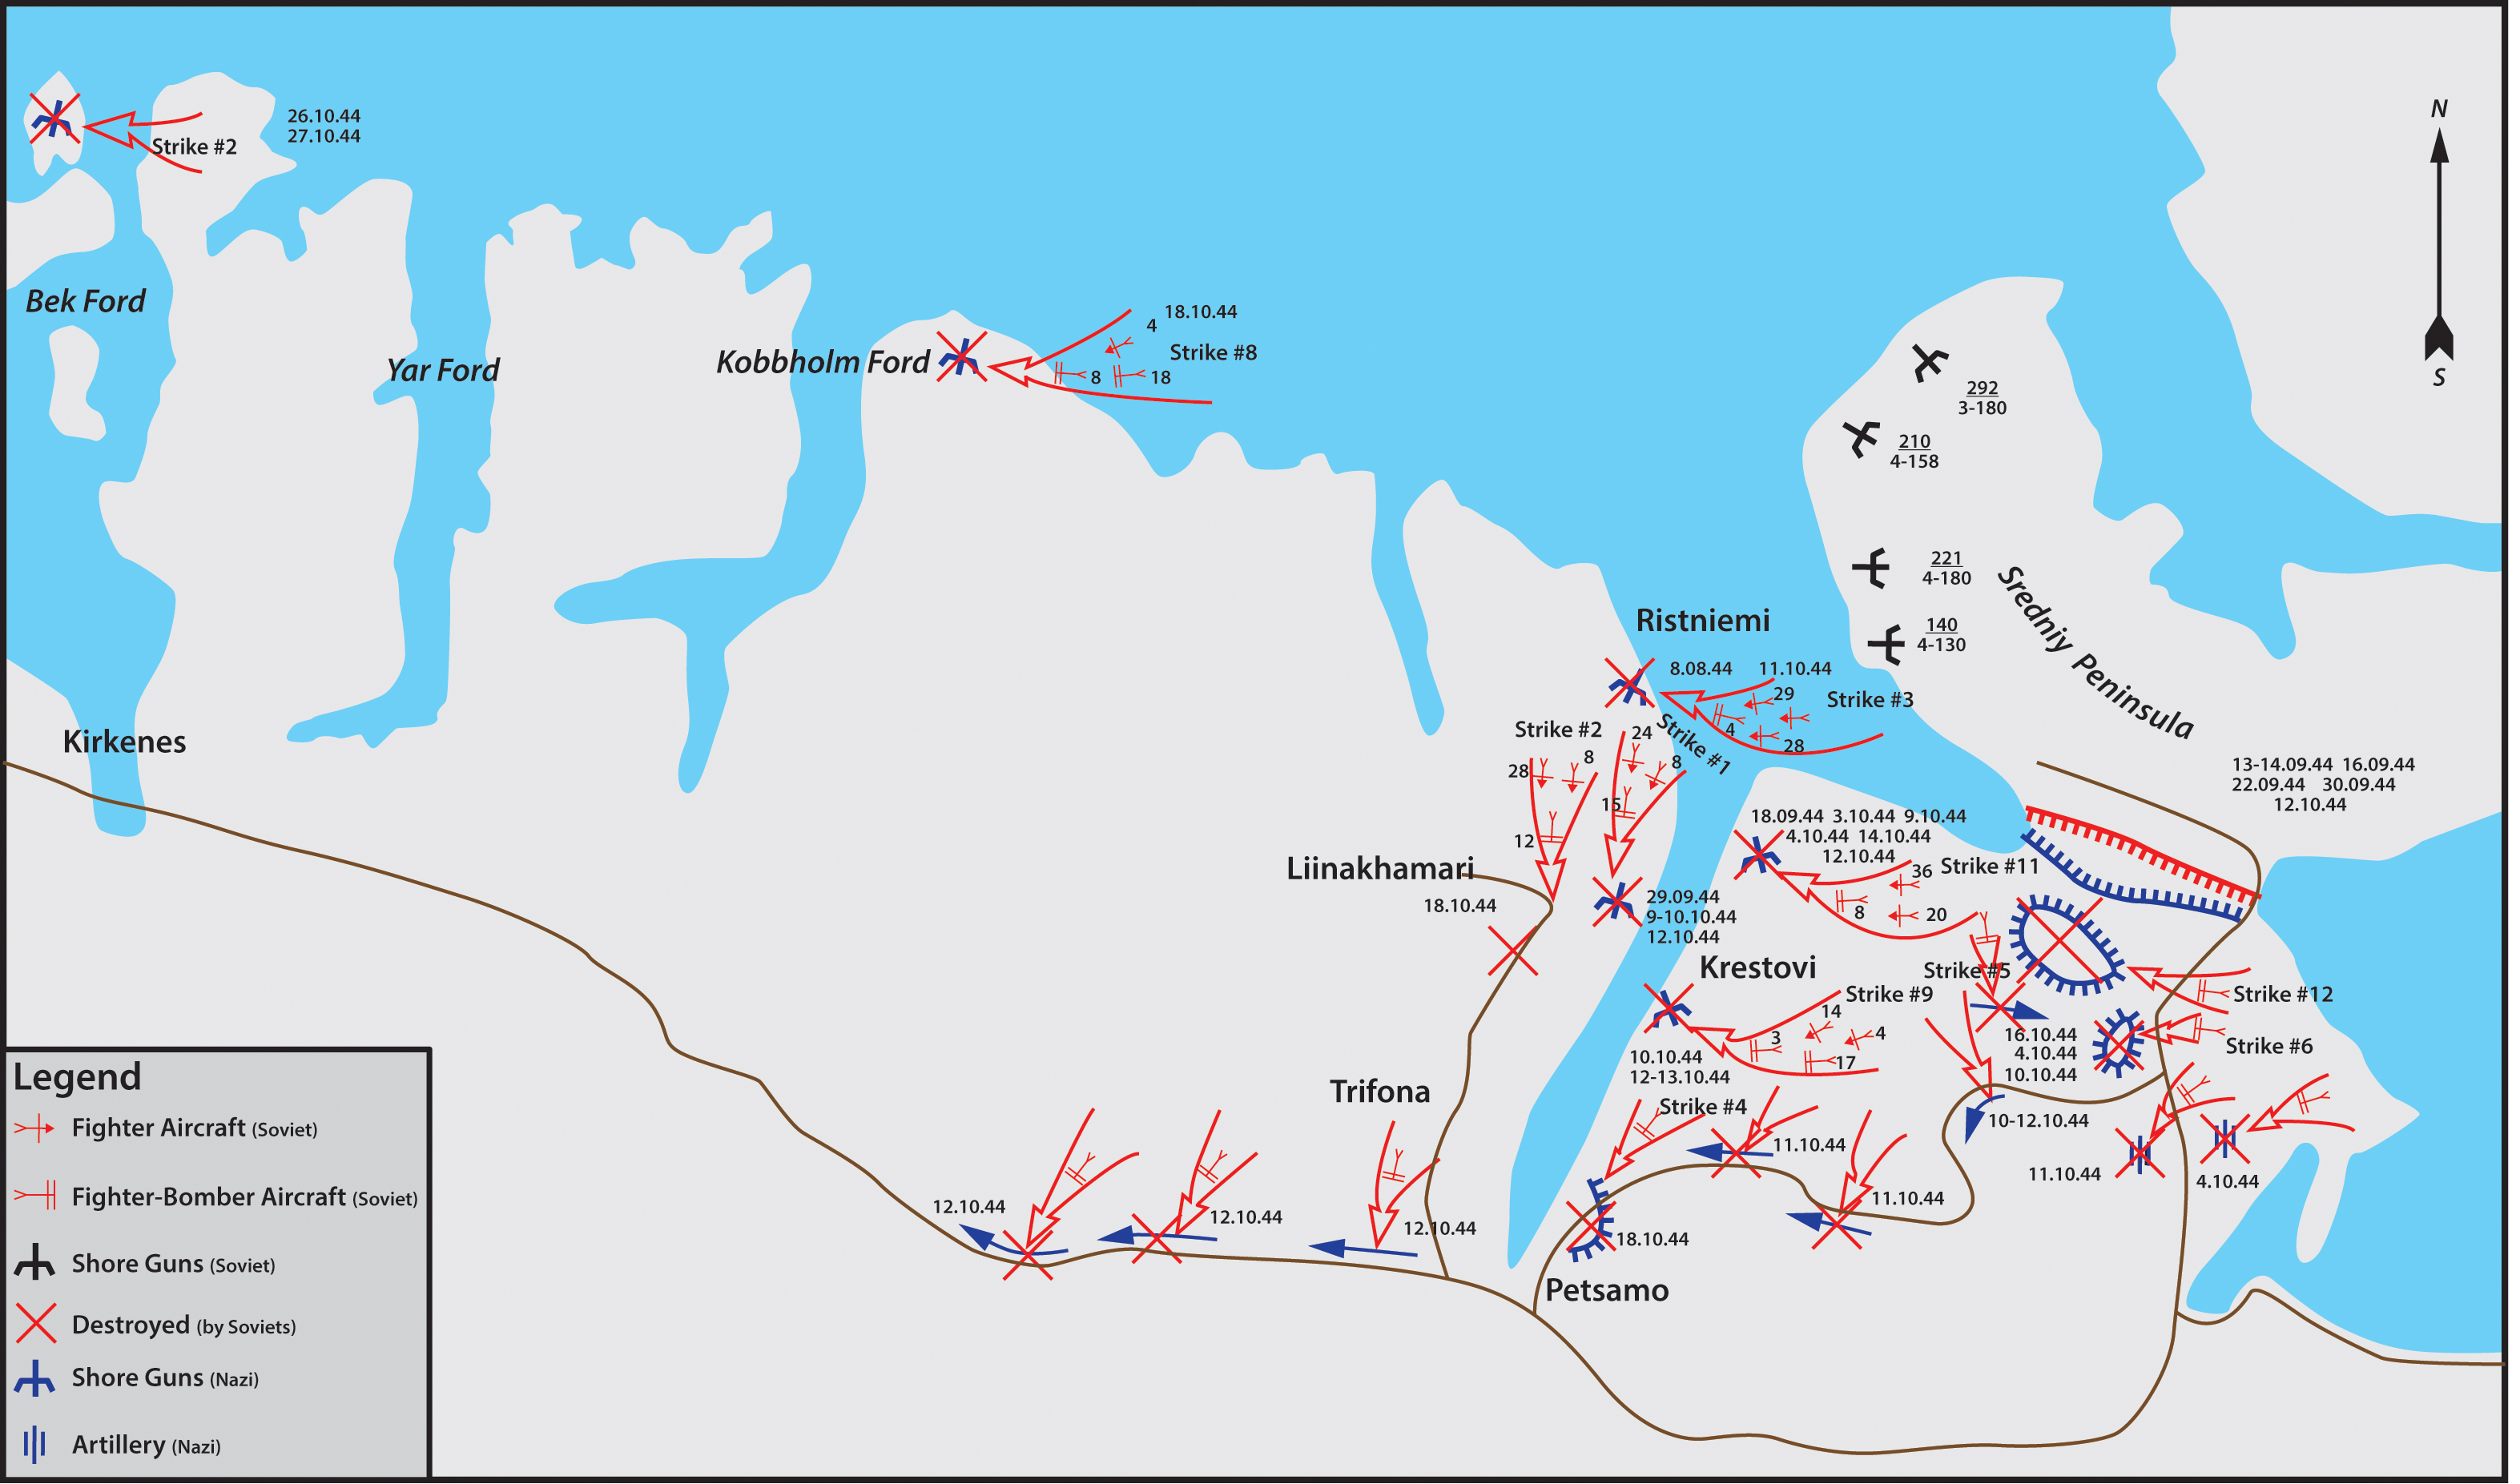 ...
...
Figure 5.11. Pursuit of the enemy by Northern Defensive Region units
 ...
...
Figure 5.12. Submarine and torpedo cutter actions against enemy sea lines of communication
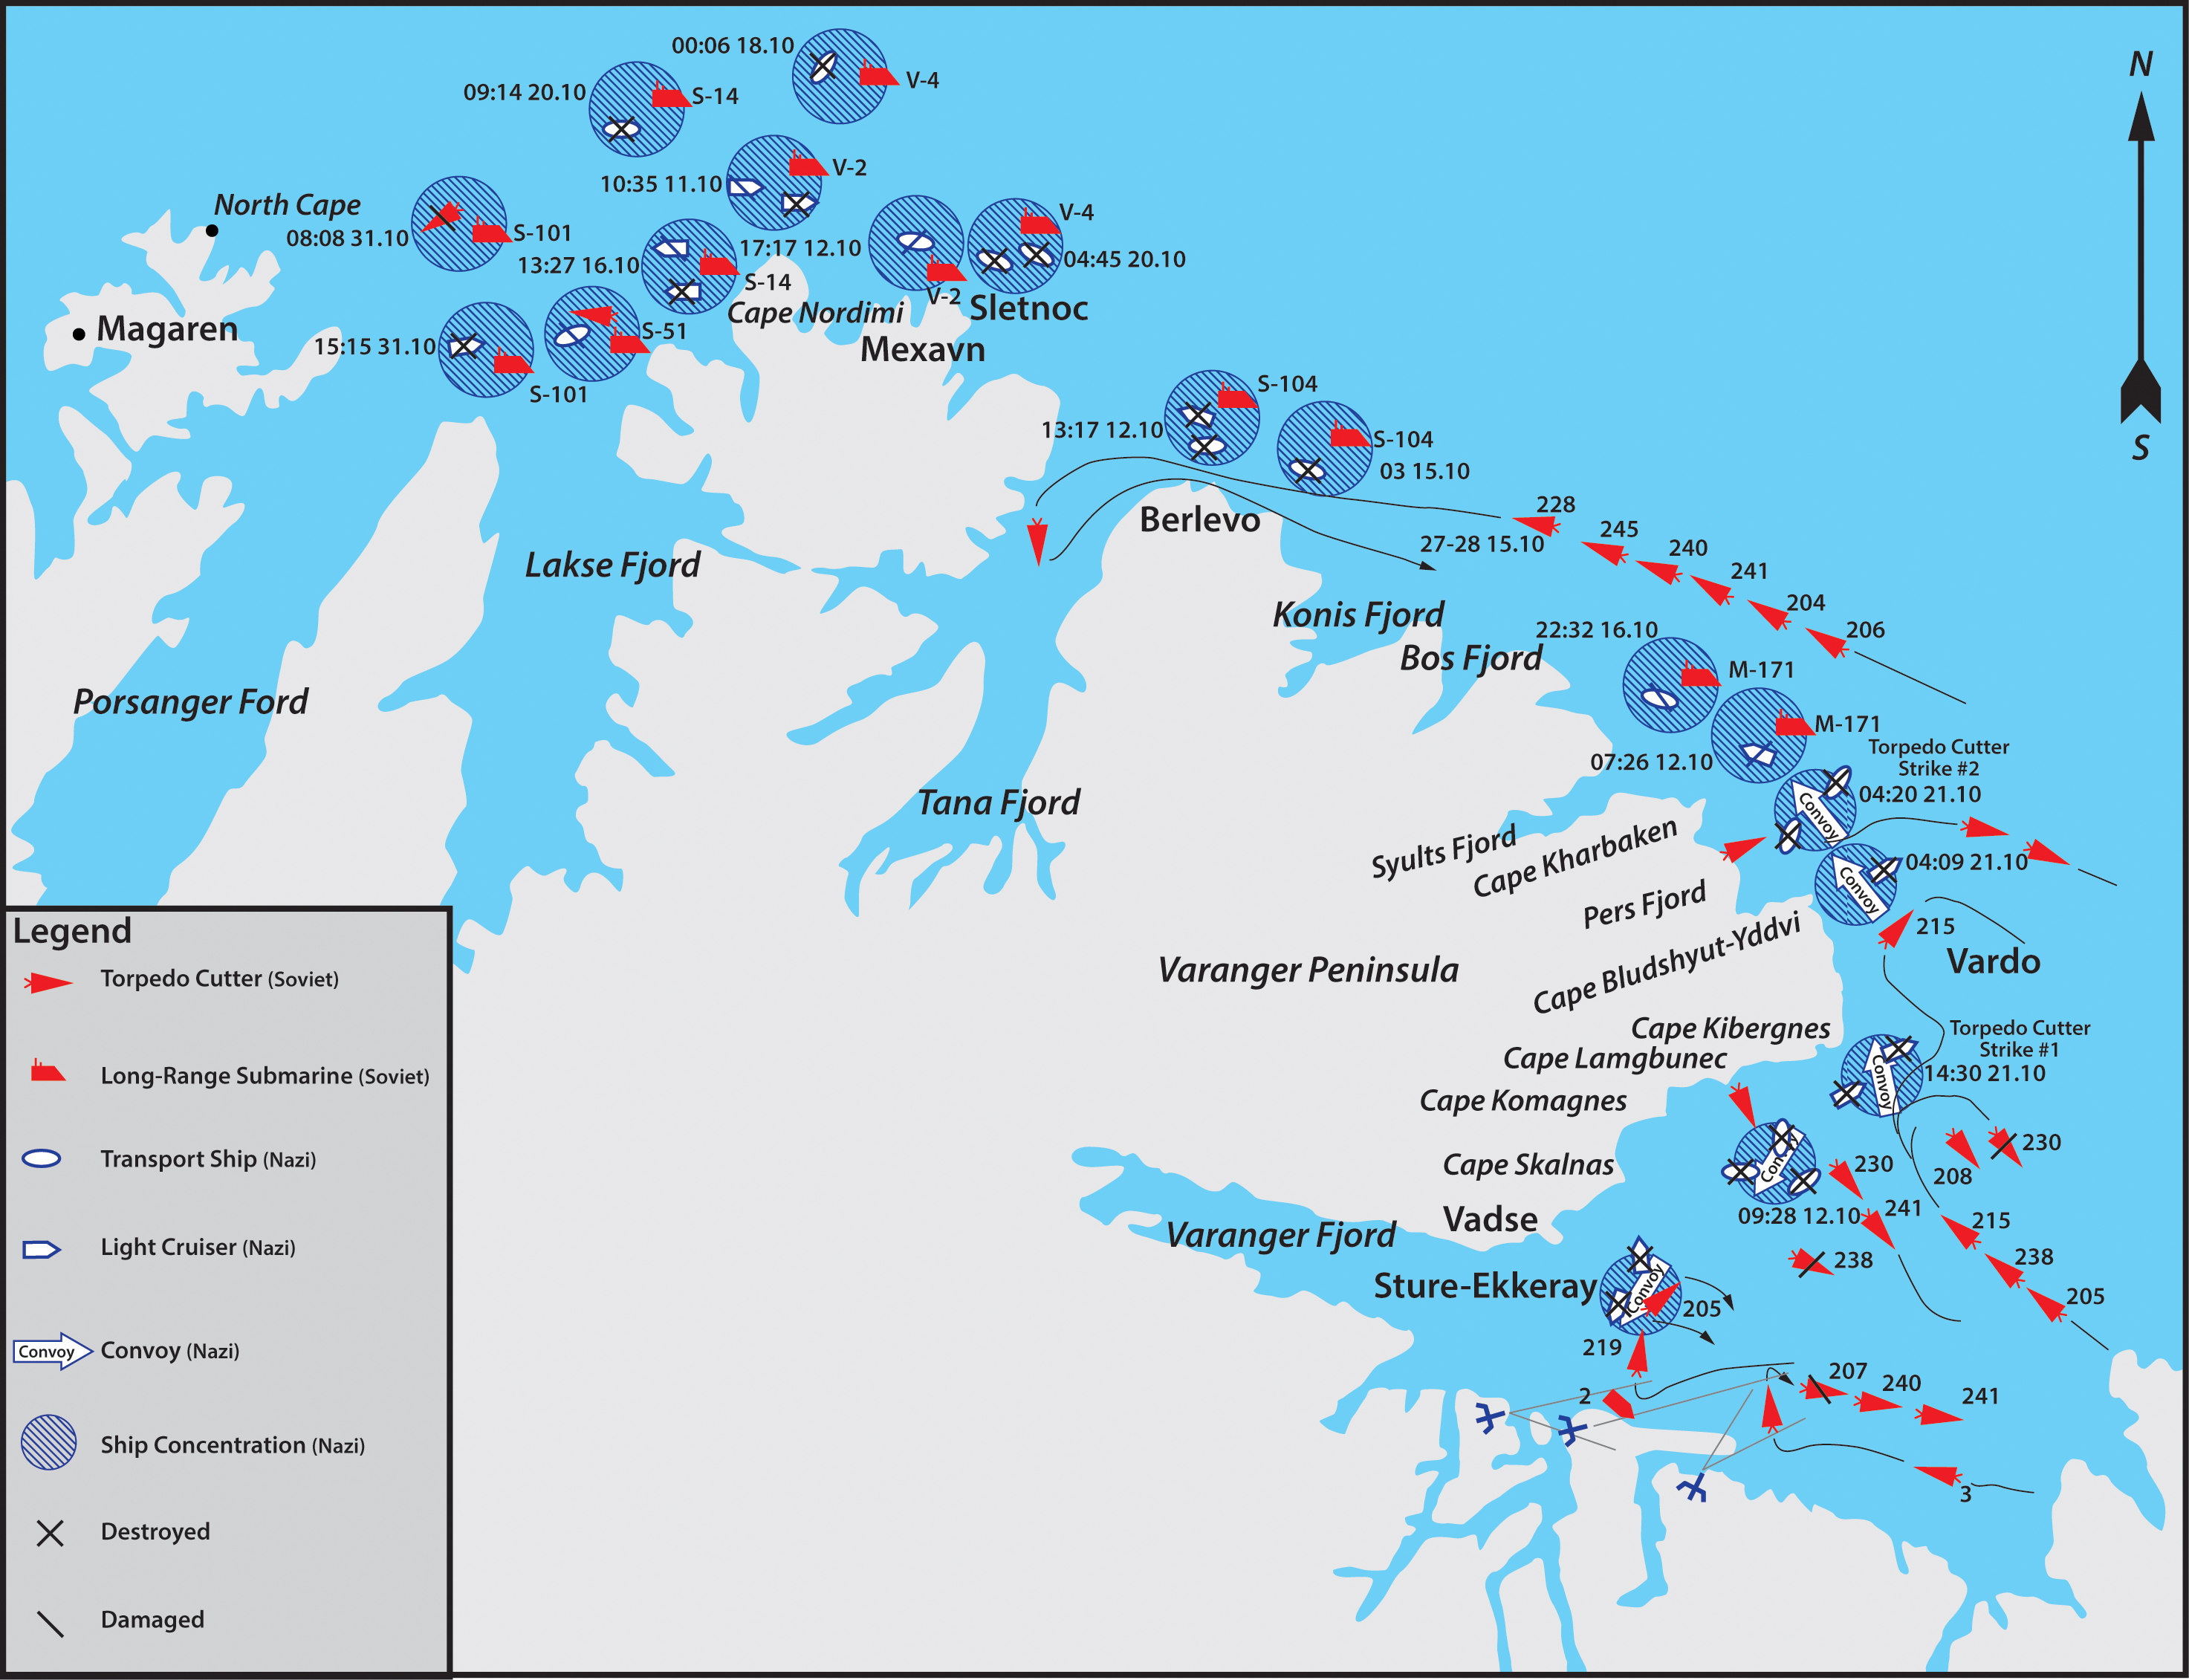 ...
...
Figure 5.13. Northern Fleet Air Forces air strikes on enemy sea lines of communication
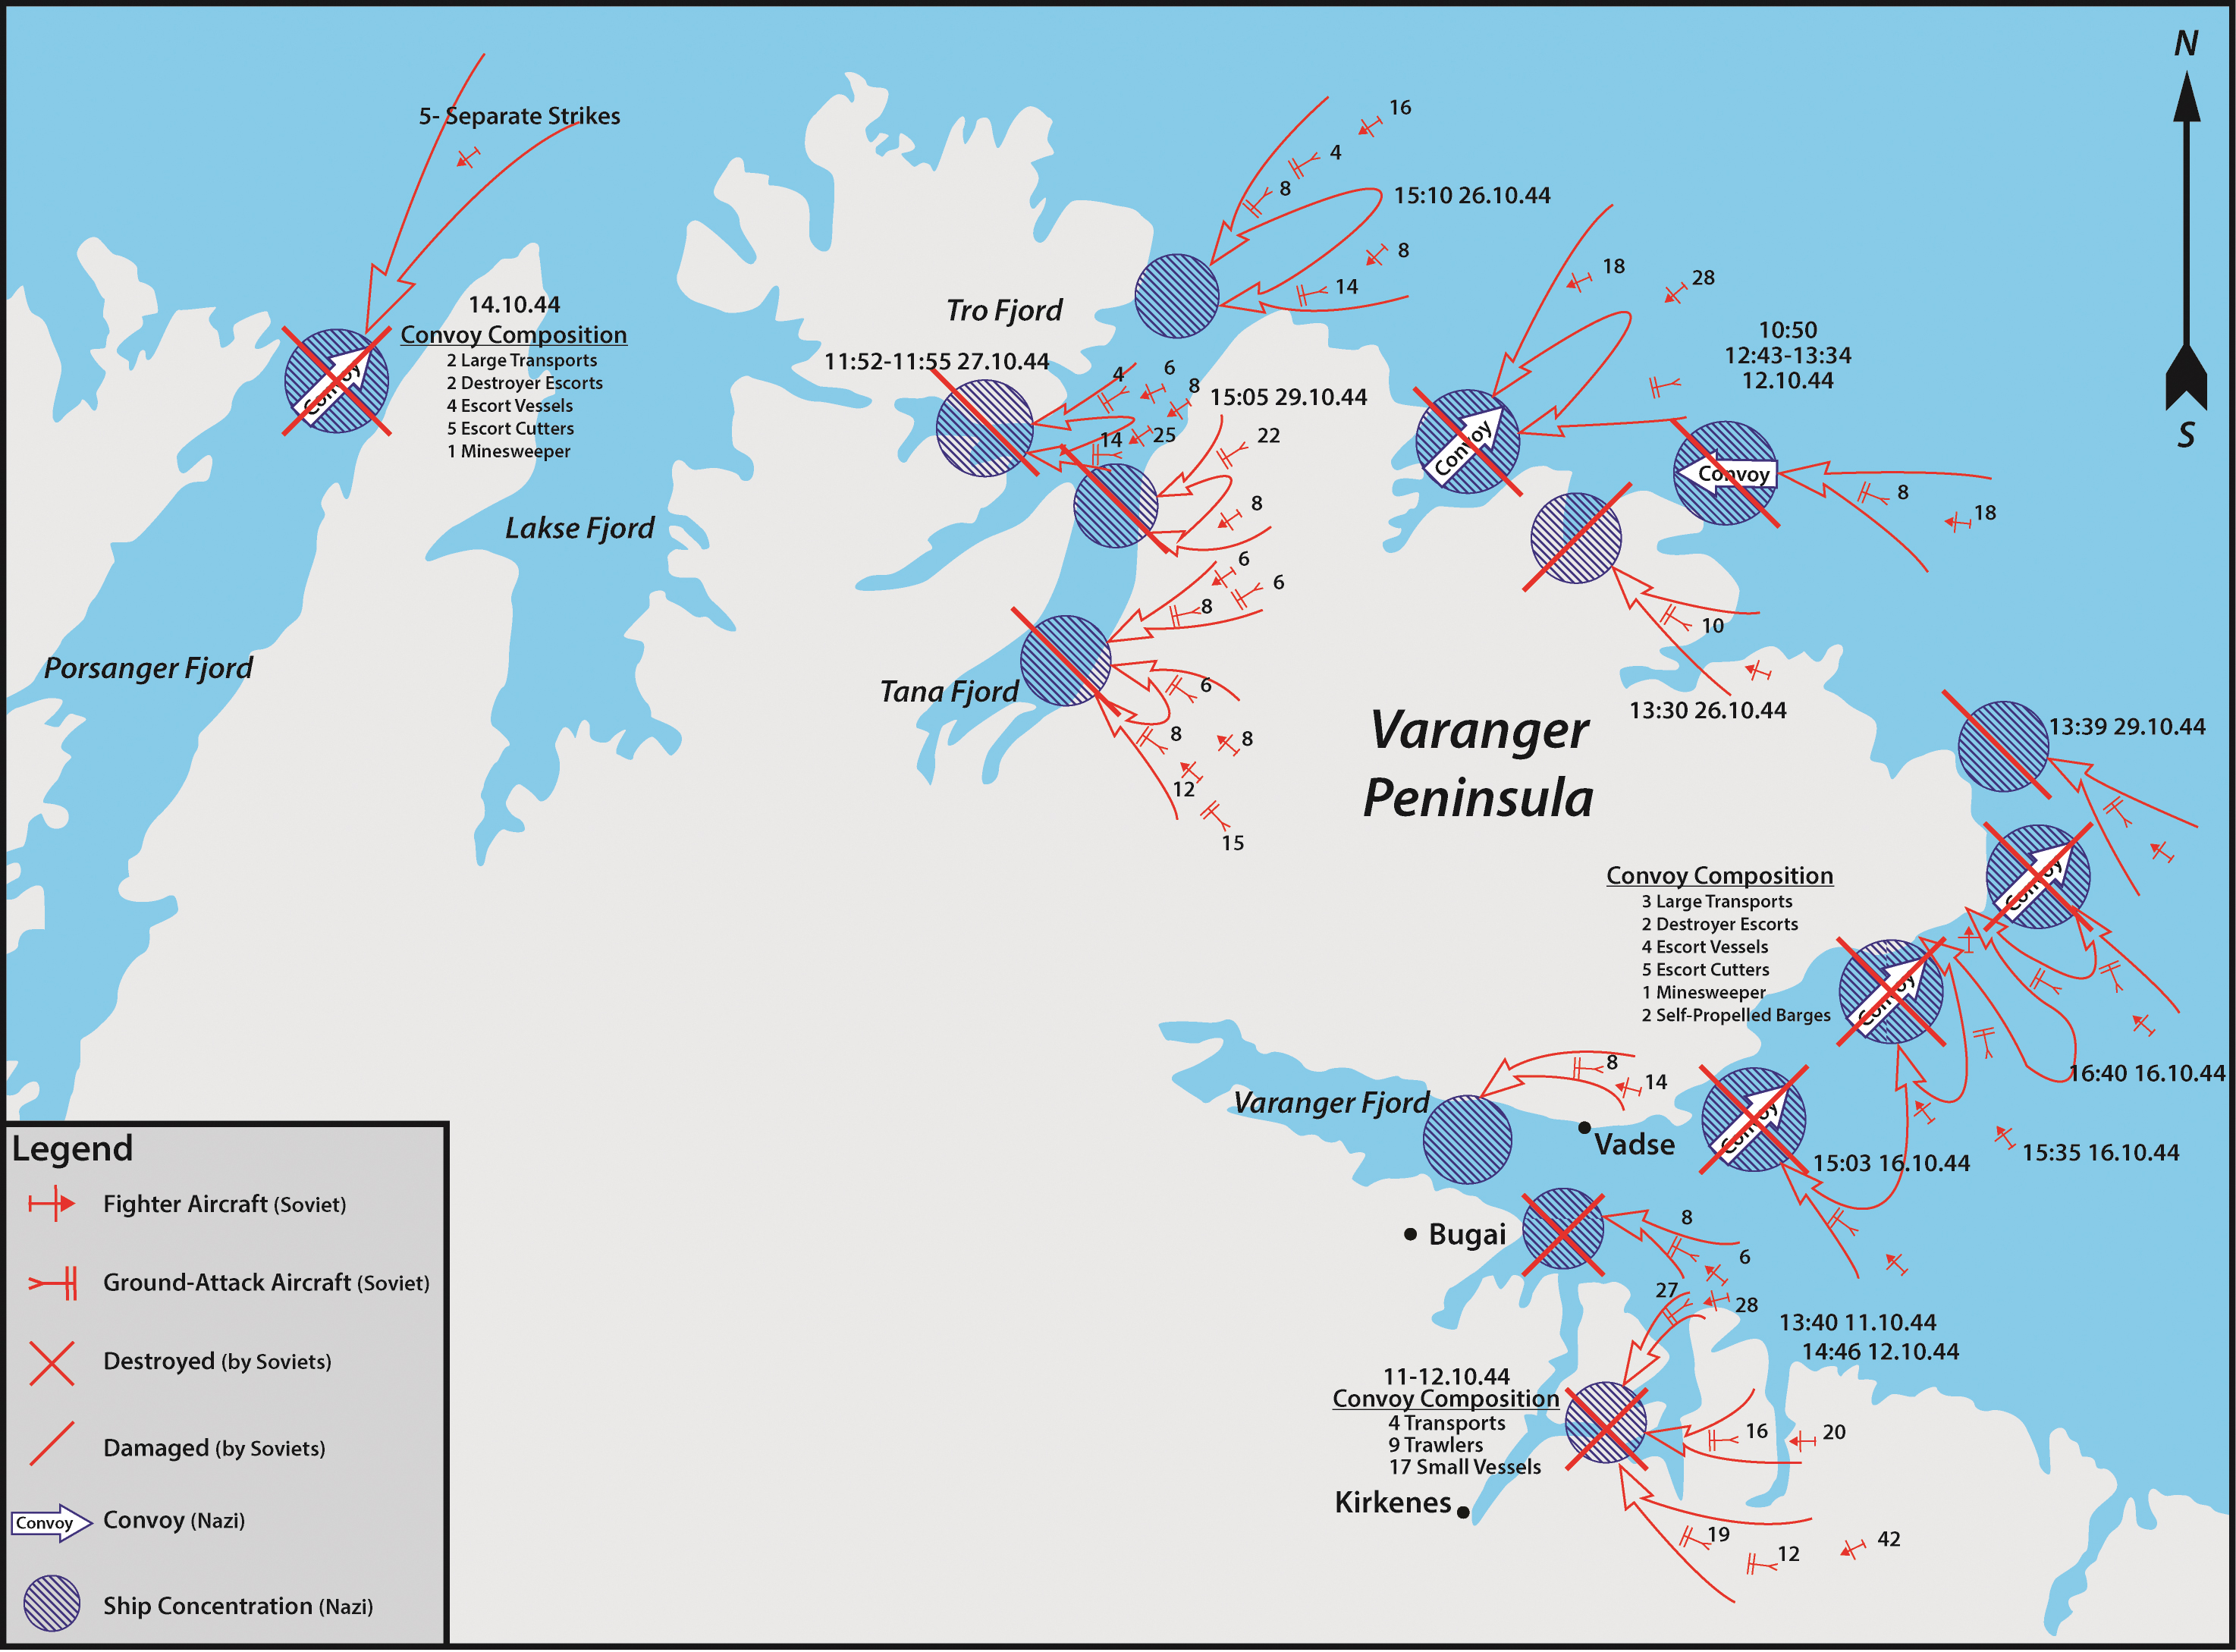 ...
...
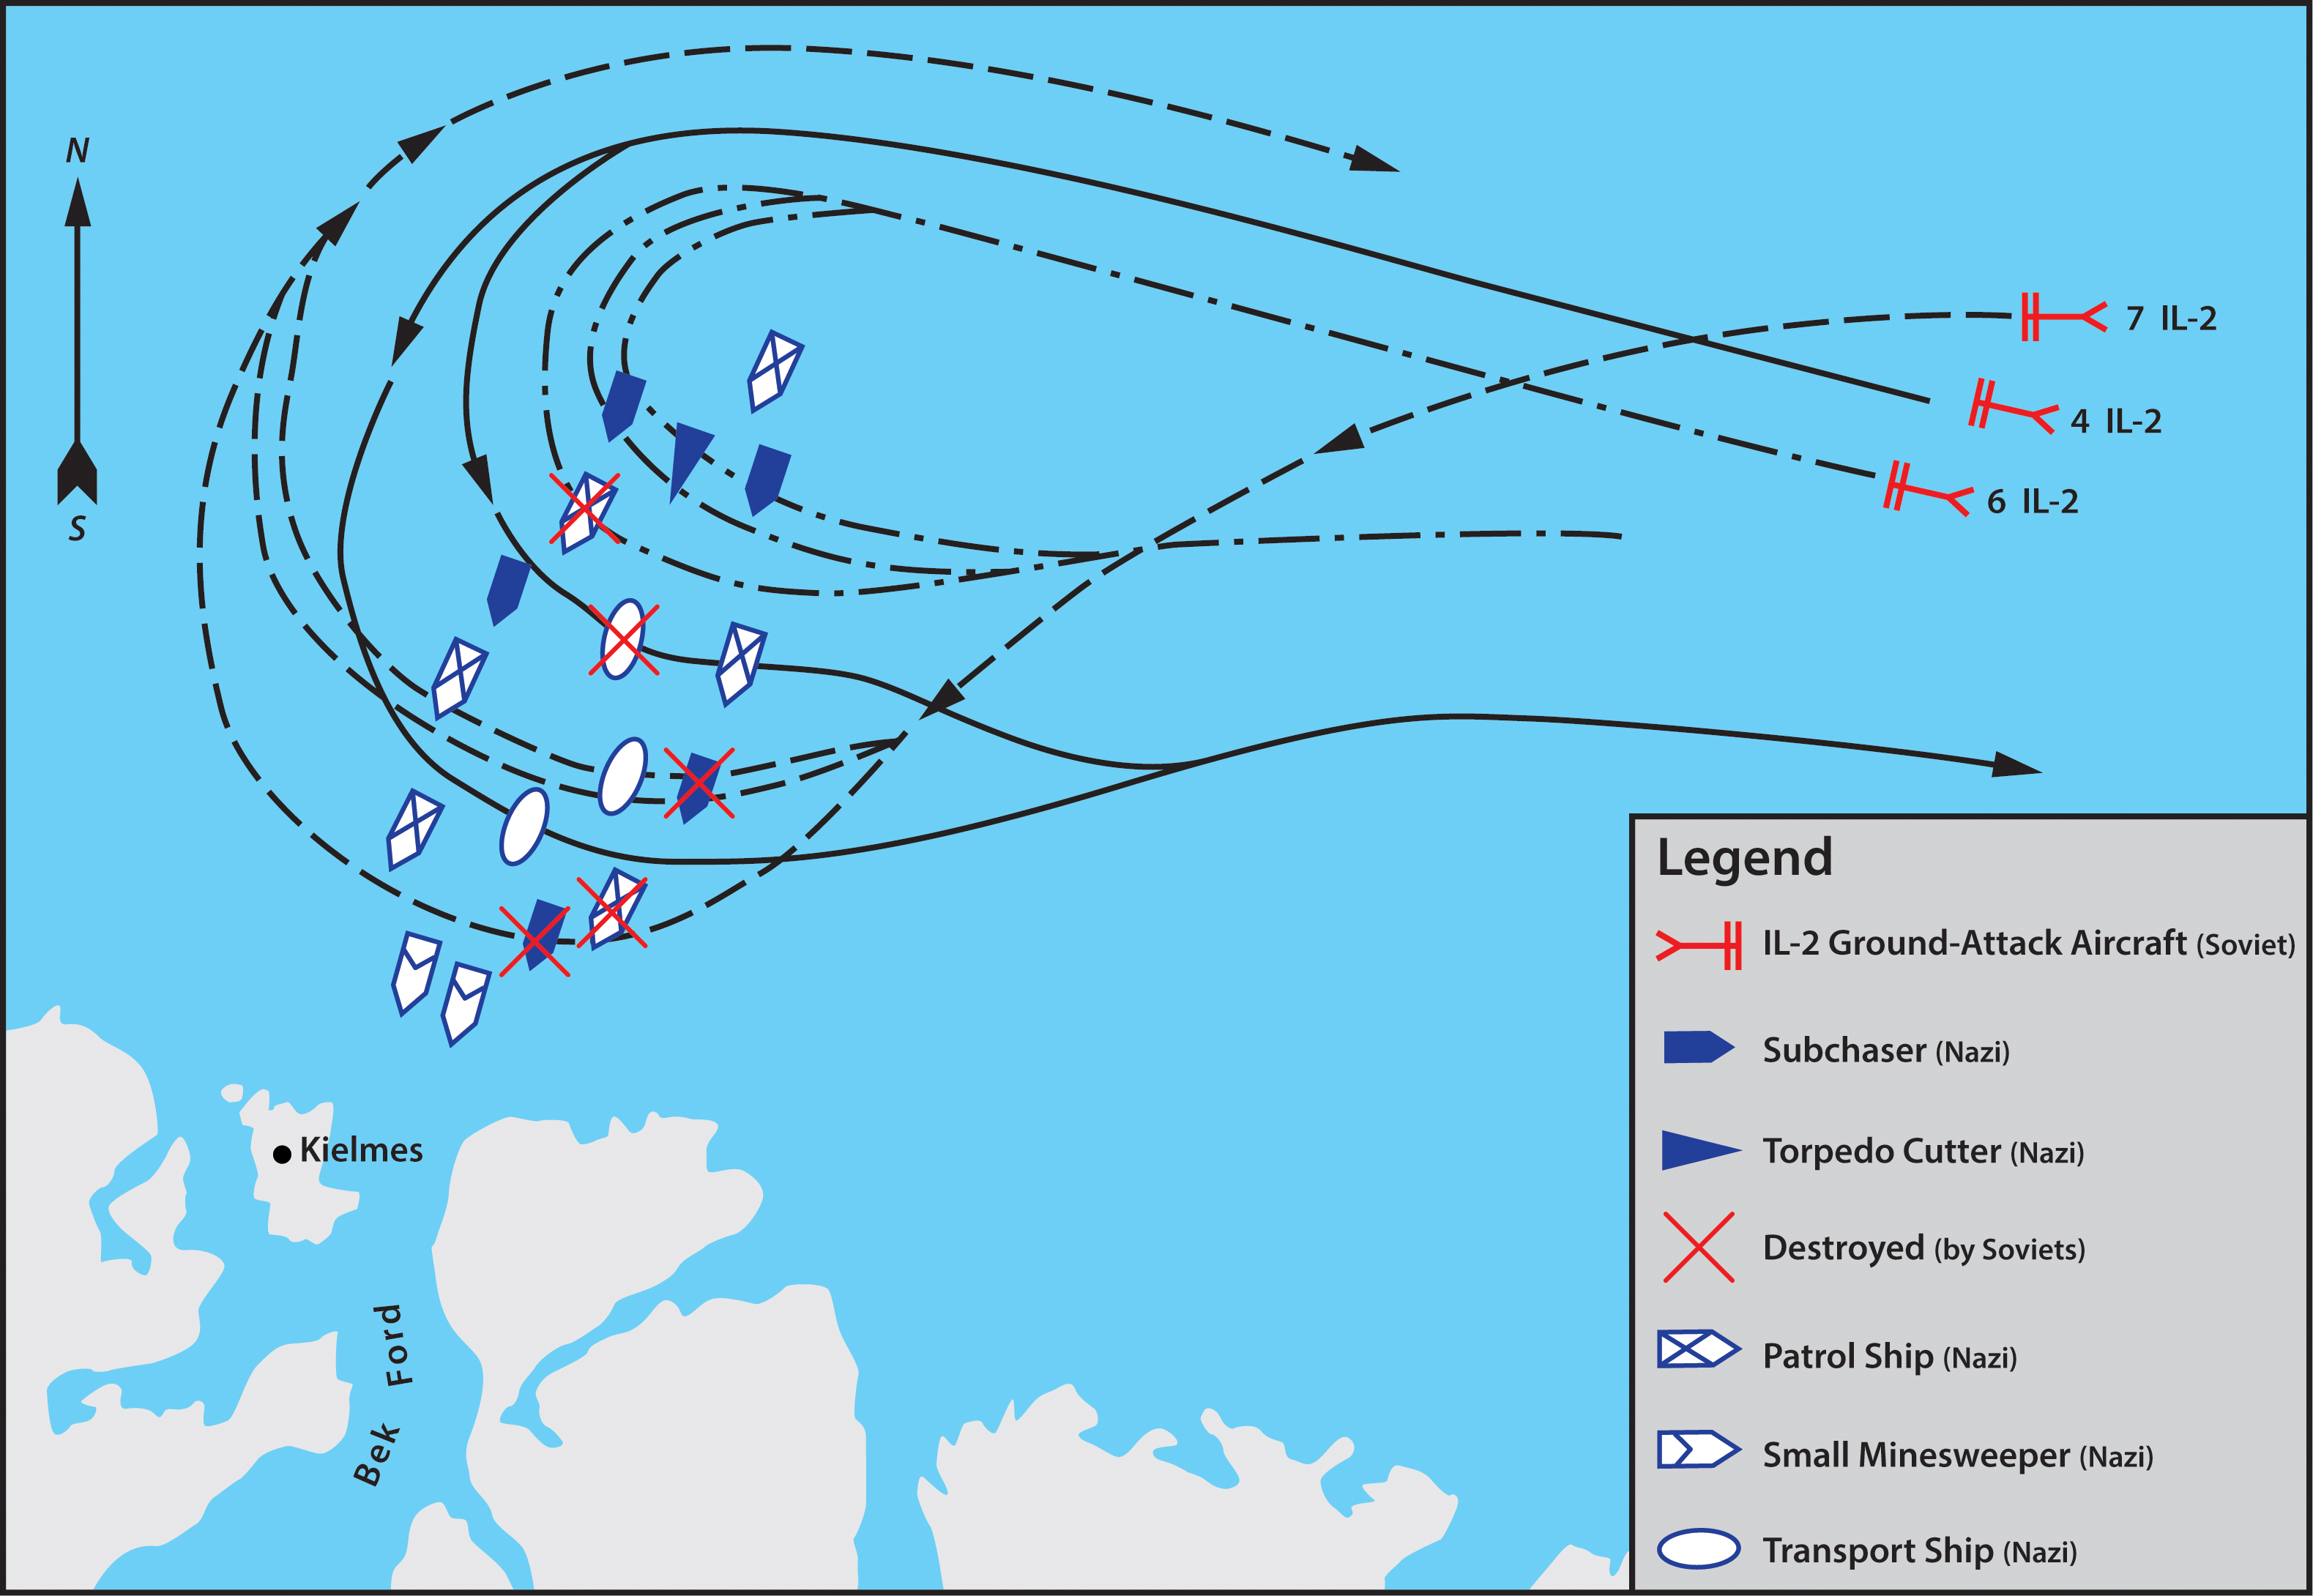
Figure 5.14. Air attacks on a convoy on 11 October 1944
 ...
...
Figure 6.1. Organization of radio communications
 ...
...
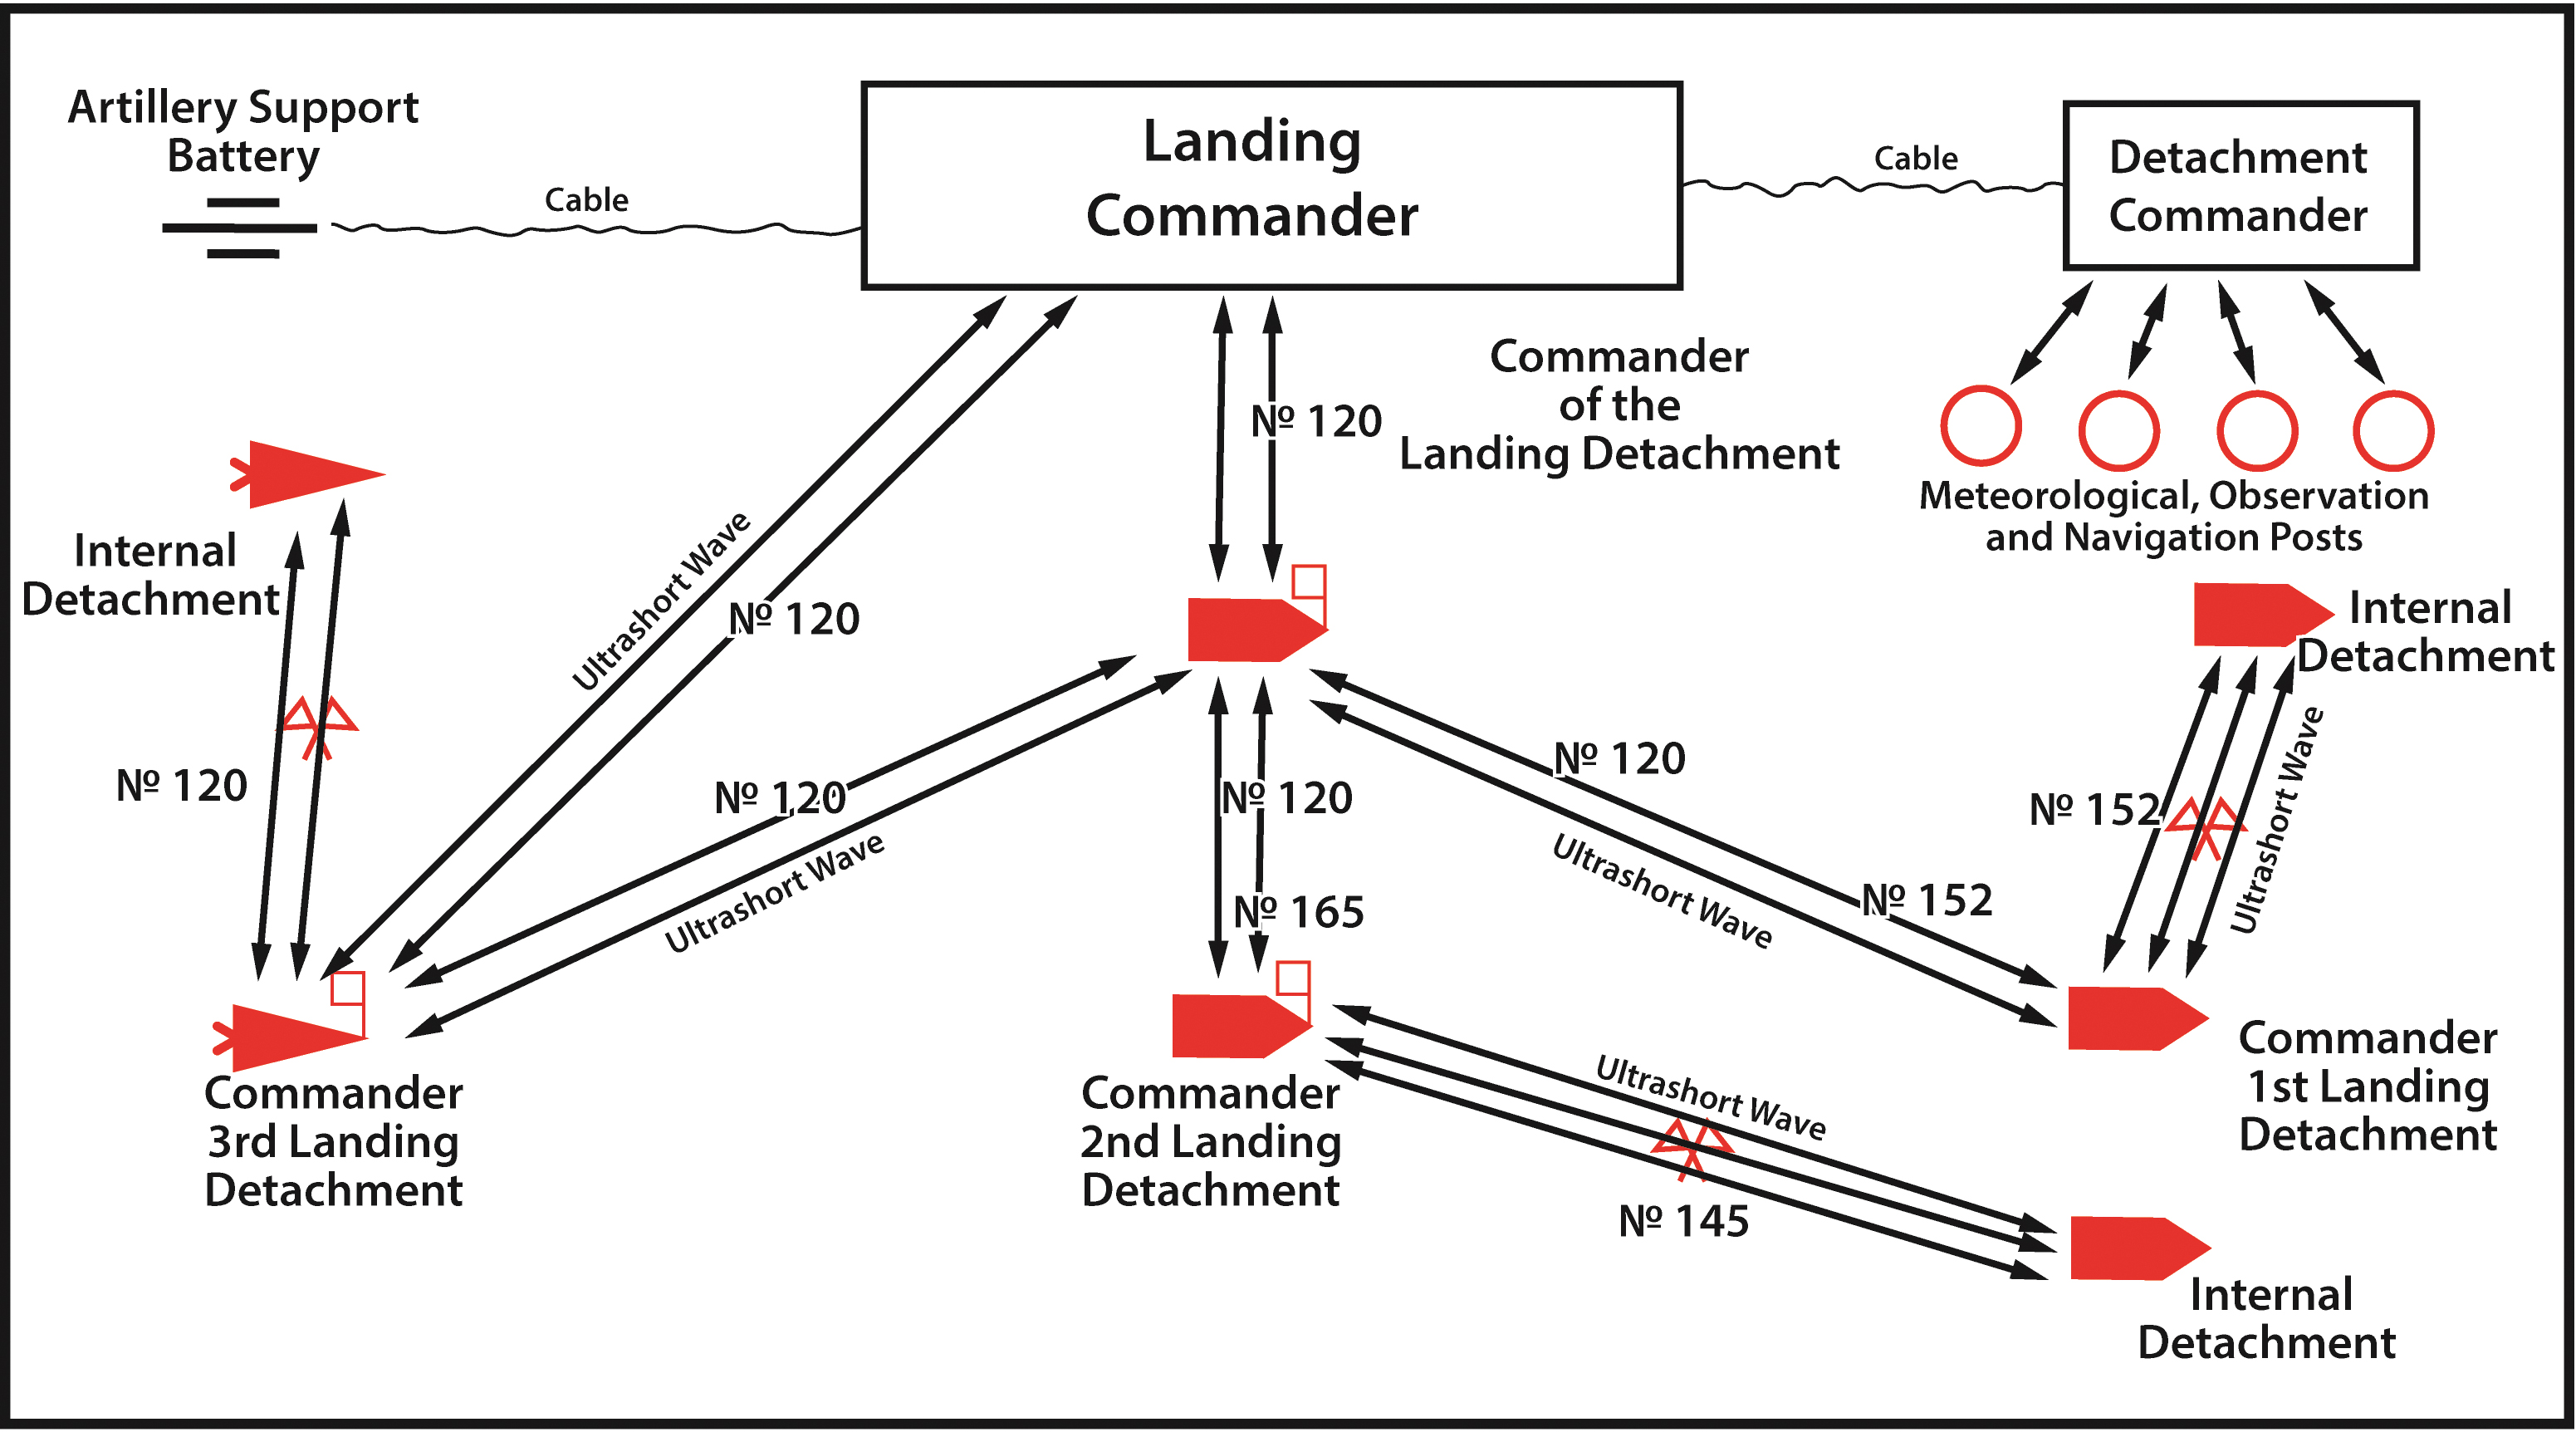
Figure 6.2. Organization of communications for the amphibious landing
 ...
...
...


